Myster Slick Box V2: Comprehensive Instructions & Guide
Welcome! This guide provides detailed instructions for the Myster Slick Box V2, a premium 510 vape battery․
Discover its features, operation, and maintenance for an optimal vaping experience․
Explore the device’s sleek design, magnetic connection, and advanced settings․
This user guide ensures you fully understand and enjoy your new portable vaporizer․
From charging to troubleshooting, we cover everything․
Maximize performance and longevity with these comprehensive instructions for the Slick Box V2․

The Myster Slick Box V2 represents a significant leap forward in discreet and powerful vaping technology․ Designed with the modern user in mind, this device prioritizes both convenience and performance, offering a refined experience for concentrate enthusiasts․ It’s more than just a battery; it’s a statement of style and sophistication, seamlessly blending into your lifestyle․
This iteration builds upon the success of previous models, addressing user feedback and incorporating cutting-edge features․ The Slick Box V2 boasts a sleek, compact design, making it incredibly portable and easy to conceal․ Its matte finish provides a comfortable grip and a premium feel, while the robust construction ensures durability for everyday use․
At its core, the Slick Box V2 is engineered for compatibility with standard 510 thread cartridges․ The innovative magnetic connection simplifies cartridge attachment and removal, eliminating the hassle of traditional threading․ This feature, combined with adjustable voltage settings, allows you to customize your vaping experience to perfectly match your preferences and the characteristics of your chosen concentrate․ This user guide will help you unlock its full potential․
What’s Included in the Box
Upon unboxing your new Myster Slick Box V2, you’ll find a carefully curated selection of components designed to get you started immediately․ The package includes the Slick Box V2 device itself, showcasing its sleek and compact design․ This premium battery is ready to elevate your concentrate experience․
Alongside the device, you’ll receive a high-quality USB charging cable․ This cable is specifically designed for efficient and reliable charging, ensuring your Slick Box V2 is always powered up and ready for use․ It connects seamlessly to the device’s charging port, providing a convenient power source․
Crucially, each Slick Box V2 comes with a detailed user manual․ This comprehensive guide provides step-by-step instructions on everything from powering the device on and off to adjusting voltage settings and troubleshooting common issues․ It’s your essential resource for maximizing the performance and longevity of your new vaporizer․ The box is compact and elegantly designed, reflecting the quality within․
Device Overview: Physical Components
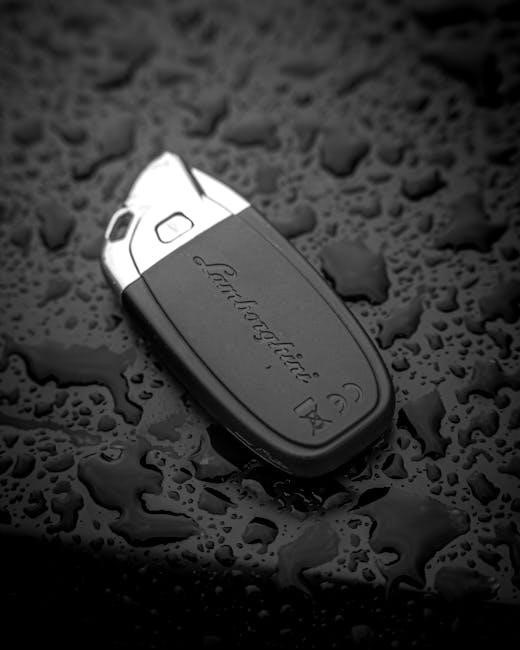
The Myster Slick Box V2 boasts a meticulously crafted design, prioritizing both aesthetics and functionality․ Its core is a robust, yet lightweight, chassis featuring a smooth matte finish for a comfortable and discreet grip․ The device’s compact size makes it exceptionally portable, easily fitting into pockets or bags․
A key physical component is the 510 threaded connection, designed to securely accommodate a wide range of vape cartridges․ Beneath this connection lies the innovative magnetic bottom, providing a secure and effortless cartridge attachment – ensuring a perfect fit every time․ This magnetic locking base is a signature feature․

The device incorporates a single button operation, simplifying the vaping process․ A discreet LED indicator light provides crucial feedback on battery status and operational mode․ The USB charging port is conveniently located for easy access․ Overall, the Slick Box V2’s physical components combine to deliver a premium and user-friendly experience․
Understanding the Magnetic Connection
The Myster Slick Box V2 distinguishes itself with its innovative magnetic connection system for 510 vape cartridges․ Unlike traditional screw-on connections, this feature offers unparalleled ease of use and a consistently secure fit․ The base of the device houses powerful magnets strategically positioned to align perfectly with compatible cartridges․
To attach a cartridge, simply align the cartridge’s metal base with the magnetic base of the Slick Box V2․ The magnets will automatically draw the cartridge into place, creating a firm and reliable connection․ This eliminates the risk of cross-threading or loosening during use․
This magnetic locking base ensures your cartridge remains securely attached, preventing leaks or accidental disconnections․ It also simplifies cartridge changes, allowing for quick and effortless swaps․ The strength of the magnets is carefully calibrated to provide a secure hold without damaging the cartridge․ This feature truly sets the Slick Box V2 apart․
Powering On and Off
Operating the Myster Slick Box V2 is remarkably simple, utilizing a universal five-click power function for safety and ease of use․ To power on the device, rapidly press the power button five times in succession․ You’ll receive visual confirmation via the LED indicator, signaling the device is active and ready for use․
This five-click method prevents accidental activation while the device is stored or transported, conserving battery life and ensuring user safety․ Once powered on, the device will remember your last used voltage setting, providing a consistent experience․
To power off the Slick Box V2, repeat the same process – five rapid clicks of the power button․ The LED indicator will flash, confirming the device has been deactivated․ This simple yet effective control scheme makes the Slick Box V2 incredibly user-friendly, even for those new to vaping․ Remember to always power off the device when not in use․
Voltage Adjustment Settings
The Myster Slick Box V2 offers adjustable voltage settings, allowing you to customize your vaping experience to suit your preferences and cartridge type․ Voltage is adjusted by rapidly clicking the power button three times․ This will cycle through the available voltage levels․
The device typically features three to four voltage options, indicated by corresponding LED color changes․ Lower voltages are ideal for flavor preservation, while higher voltages produce larger vapor clouds and a more intense experience․ Experiment to find the setting that best suits your oil and desired outcome․
Pay attention to the LED indicator to determine the current voltage level․ Refer to the user manual for a specific breakdown of the LED colors and their corresponding voltages․ Remember that different cartridges may perform optimally at different voltage settings․ Start low and gradually increase until you achieve your desired results․
Cartridge Compatibility
The Myster Slick Box V2 is designed with universal 510 threading, ensuring compatibility with a vast majority of 510 vape cartridges available on the market․ This includes most standard oil cartridges, distillate cartridges, and concentrate cartridges featuring a 510 connection․
However, it’s important to note that cartridge quality and manufacturing tolerances can sometimes affect the fit․ Ensure your cartridge’s 510 thread is clean and undamaged for a secure connection․ The magnetic adapter further enhances compatibility, providing a stable and reliable hold․
While generally compatible, exceptionally large or uniquely shaped cartridges might not fit perfectly․ Always gently screw the cartridge onto the device, avoiding excessive force․ Refer to the user manual for any specific compatibility notes or recommendations․ The Slick Box V2 prioritizes versatility, offering broad cartridge support․
Preheating Function: Activation & Benefits

The Myster Slick Box V2 features a preheating function designed to optimize vapor production, especially with thicker oils or colder cartridges․ Activation is typically achieved through a series of quick button presses – consult your user manual for the precise sequence, usually five rapid clicks․
Once activated, the device will gently warm the oil within the cartridge, reducing viscosity and improving airflow․ This results in smoother, more flavorful hits and prevents the need for prolonged initial draws․ The preheating function is particularly beneficial in colder climates or when using cartridges stored at lower temperatures․
Benefits include consistent vapor quality, extended cartridge life, and a more enjoyable vaping experience․ The preheat setting ensures optimal performance, even with challenging oil consistencies․ Remember to use the preheat function responsibly and avoid overheating the cartridge․
Charging the Device
Charging your Myster Slick Box V2 is straightforward, utilizing the included USB charging cable․ Locate the charging port, typically found on the bottom of the device․ Connect the USB cable to a compatible power source – a standard USB wall adapter or a computer USB port will suffice․
During charging, the LED indicator light will illuminate, displaying the charging status․ Refer to the “LED Indicator Lights” section of this user guide for specific color codes and meanings․ A full charge typically takes between 60-90 minutes, depending on the power source and battery level․
Avoid overcharging the device, as this can potentially reduce battery lifespan․ Once fully charged, disconnect the USB cable․ It’s recommended to use a low-amperage charger to prolong battery health․ Do not use fast chargers or attempt to disassemble the battery for charging purposes․
LED Indicator Lights: Decoding the Signals
The Myster Slick Box V2 utilizes LED indicator lights to communicate device status․ Understanding these signals is crucial for optimal operation․ A solid white light generally indicates a fully charged battery․ During charging, a pulsing white light signifies the charging process is underway․
If the LED flashes red, it indicates a low battery level, prompting you to recharge the device․ A rapid flashing red light may suggest a potential issue or error․ Refer to the “Troubleshooting” section for further assistance․
When activating the preheat function, the LED will display a specific color or pattern, as detailed in the “Preheating Function” section; The LED also indicates when the device is in use, typically illuminating while you are inhaling․ Pay attention to these visual cues to ensure proper functionality and battery management․

Troubleshooting Common Issues
Device Not Turning On: Ensure the battery is adequately charged․ If the LED doesn’t illuminate during charging, try a different USB cable and power adapter․ A quick five-click on/off sequence can sometimes resolve unresponsive behavior․
Poor Vapor Production: Verify cartridge compatibility and ensure a secure magnetic connection․ Clean the cartridge contacts and the device’s connection points with a cotton swab dipped in isopropyl alcohol․ Adjust the voltage setting to find the optimal level for your cartridge․
Charging Issues: Confirm the USB port is functioning correctly․ If charging is intermittent, inspect the charging port for debris․ If problems persist, contact customer support․ A flashing red light may indicate an error; consult the LED indicator section․
Cartridge Not Connecting: Ensure the cartridge is properly aligned with the magnetic base; Clean both surfaces for a stronger connection․
Cleaning and Maintenance

Regular cleaning is crucial for optimal performance and longevity of your Myster Slick Box V2․ Power off the device before any cleaning procedure․ Disconnect the cartridge before commencing․

Exterior Cleaning: Wipe down the device’s exterior with a soft, slightly damp cloth․ Avoid abrasive cleaners or solvents, as they can damage the finish․ For stubborn residue, a small amount of isopropyl alcohol on the cloth can be used cautiously․
Connection Point Cleaning: Regularly clean the magnetic connection points on both the device and the cartridge․ Use a cotton swab lightly dampened with isopropyl alcohol to remove any buildup․ Ensure both surfaces are completely dry before reconnecting․
Internal Cleaning: Avoid liquid ingress into the device’s internal components․ Do not disassemble the device beyond removing the cartridge․ Proper maintenance ensures consistent vapor production and prevents malfunctions․
Store the device in a clean, dry place when not in use․
Safety Precautions
Important Safety Guidelines for your Myster Slick Box V2․ Always operate the device within the specified voltage range․ Avoid dropping or subjecting the device to strong impacts, as this can cause damage․
Heat & Storage: Do not expose the device to extreme temperatures (direct sunlight, heat sources) or humidity․ Store in a cool, dry place, away from flammable materials․ Keep out of reach of children and pets․
Usage Restrictions: This device is intended for use with compatible 510 vape cartridges only․ Do not attempt to modify or disassemble the device beyond cartridge removal․ Misuse can void the warranty and pose safety risks․
Battery Safety: Do not puncture, incinerate, or short-circuit the battery․ If the battery appears damaged, discontinue use immediately․ Use only the provided USB charging cable․
Legal Compliance: Adhere to all local laws and regulations regarding vaping products․
Battery Life and Performance
The Myster Slick Box V2 boasts a high-capacity battery designed for extended use․ Battery life varies depending on voltage settings, cartridge type, and usage frequency․ Generally, expect several hours of continuous vaping on a full charge․
Optimizing Performance: Lower voltage settings conserve battery power, while higher settings deliver a more potent vapor but consume energy faster․ Preheating functions can initially reduce battery life but ensure optimal cartridge vaporization․
Charging Cycles: The battery’s lifespan is affected by the number of charge cycles․ Avoid fully discharging the battery before recharging to maximize its longevity․ Use the provided USB cable for optimal charging speed and safety․
Performance Factors: Cartridge resistance impacts battery drain․ Lower resistance cartridges draw more power․ Regularly cleaning the device’s contacts ensures efficient energy transfer and consistent performance․
Monitoring Usage: Pay attention to the LED indicator lights to monitor battery levels and adjust usage accordingly․
Comparing Slick Box V2 to Previous Versions
The Myster Slick Box V2 represents a significant upgrade over its predecessor, the original Slick Box․ Key improvements focus on enhanced performance, refined design, and increased user-friendliness․
Design Enhancements: The V2 features a smoother matte finish and a more compact form factor for improved portability and a premium feel․ The magnetic connection has been strengthened for a more secure cartridge hold․
Performance Upgrades: The V2 incorporates a more efficient chipset, resulting in longer battery life and more consistent voltage output․ The preheating function has been refined for faster and more effective cartridge activation․
User Experience: The V2 offers a simplified interface with clearer LED indicators․ The overall build quality is improved, enhancing durability and reliability․
Overall: The Slick Box V2 delivers a superior vaping experience compared to the original, offering a blend of style, performance, and convenience․
User Manual Access & Support
For a comprehensive understanding of your Myster Slick Box V2, a detailed user manual is readily available․ You can access a digital copy directly from the official Myster website, typically found in the ‘Support’ or ‘Downloads’ section․
The user manual provides in-depth explanations of all features, including voltage adjustment, preheating functionality, and LED indicator meanings․ It also includes troubleshooting tips and safety guidelines․
Customer Support: Myster offers dedicated customer support to assist with any questions or concerns․ You can reach their support team via email, through their website’s contact form, or potentially through live chat during business hours․
Online Resources: Explore online forums and communities dedicated to Myster products․ These platforms often feature helpful discussions, user tips, and solutions to common issues․
Additional Guides: Look for specific guides for related Myster accessories, such as the Stashtray, to maximize your overall experience․
Frequently Asked Questions (FAQ)

Q: How do I adjust the voltage on my Slick Box V2? A: Use the button sequence detailed in the user manual to cycle through the available voltage settings, customizing your vaping experience․
Q: What does the LED indicator light sequence mean? A: Refer to the user manual for a complete decoding of the LED signals, indicating battery level, charging status, and potential errors․
Q: My device isn’t turning on․ What should I do? A: Ensure the device is fully charged․ If the issue persists, consult the troubleshooting section of the user manual or contact customer support․
Q: Is the Slick Box V2 compatible with all 510 cartridges? A: Yes, it’s designed for universal 510 cartridge compatibility, offering versatility with your preferred concentrates․
Q: How do I activate the preheating function? A: The user manual outlines the specific button combination to activate preheating, ensuring optimal vapor production․
Warranty Information
Myster proudly stands behind the quality of the Slick Box V2․ This device is covered by a limited warranty against defects in materials and workmanship for a period of 90 days from the date of original purchase․
This warranty does not cover damage resulting from misuse, accidents, unauthorized modifications, or normal wear and tear․ Proof of purchase is required for all warranty claims․
To initiate a warranty claim, please contact customer support with details of the issue and your proof of purchase․ We will guide you through the return and assessment process․
The warranty covers repair or replacement of the defective device at Myster’s discretion․ We reserve the right to refuse warranty claims for issues not covered under the terms of this warranty․
For complete warranty details and terms, please refer to the official Myster website or the included user manual․
Accessories Available (Stashtray, etc․)
Myster offers a range of premium accessories designed to enhance your Slick Box V2 experience․ The Myster Stashtray is a popular choice, providing a sleek and convenient surface for preparing and containing concentrates․
Crafted from high-quality materials, the Stashtray complements the device’s aesthetic and offers practical functionality․ Beyond the Stashtray, Myster also provides specialized carrying cases for secure transport and protection of your Slick Box V2․
These cases are designed to be discreet and durable, ensuring your device remains safe on the go․ Additional accessories include custom cleaning tools, optimized for maintaining the Slick Box V2’s performance․
Explore the full range of Myster accessories on our official website to discover items that suit your individual needs and preferences․ Elevate your vaping experience with these thoughtfully designed additions․
Don’t forget to check for limited-edition releases and exclusive bundles!
Customer Reviews & Feedback
Myster Slick Box V2 consistently receives positive feedback from users praising its discreet design and reliable performance․ Many customers highlight the magnetic connection as a standout feature, ensuring a secure and effortless cartridge attachment․
Reviewers frequently commend the device’s ease of use, even for those new to concentrate vaping․ The voltage adjustment settings are also a popular point of appreciation, allowing for personalized vaping experiences․
Some users have noted the superior quality of the Myster Stashtray, appreciating its functionality and aesthetic appeal․ A common sentiment is that the Slick Box V2 surpasses other similar devices in terms of build quality and overall satisfaction․
While overwhelmingly positive, some feedback mentions the electric grinder included in certain bundles not performing optimally․ Myster actively addresses customer concerns and strives for continuous improvement based on user input․
Check our website for the latest reviews and share your own experience!
Where to Purchase the Myster Slick Box V2
The Myster Slick Box V2 is available through a variety of authorized retailers, both online and in select physical stores․ To ensure authenticity and receive full warranty coverage, we strongly recommend purchasing directly from Myster’s official website․
Alternatively, you can find the Slick Box V2 at reputable vape shops and online marketplaces specializing in high-end vaping accessories․ A list of authorized retailers is maintained and regularly updated on the Myster website․

Be cautious of unauthorized sellers offering significantly discounted prices, as these may be counterfeit products․ Purchasing from trusted sources guarantees you receive a genuine Myster product with access to customer support and warranty services․
Explore bundled options, including the Myster Stashtray and other accessories, for added value․ Check for promotional offers and discounts available periodically on the official website and through authorized retailers․
Visit our website today to find a retailer near you!
Long-Term Care and Storage
To maximize the lifespan of your Myster Slick Box V2, proper long-term care and storage are essential․ When not in use for extended periods, fully discharge the battery before storing it in a cool, dry place, away from direct sunlight and extreme temperatures․
Avoid leaving the device in a car during hot or cold weather, as this can damage the battery and internal components․ Regularly clean the device with a soft, dry cloth to remove any residue or buildup․ Do not use abrasive cleaners or solvents․
Store the device in its original packaging or a protective case to prevent scratches and damage․ Periodically check the battery’s condition and charge it to approximately 50% if storing for several months․
Proper storage helps maintain optimal battery performance and prevents potential issues․ Remember to always follow safety precautions and refer to the user manual for detailed instructions․
Consistent care ensures years of reliable use from your Slick Box V2!