Category Archive Manuals

Bybeatrice

kenmore elite top load washer owners manual

Welcome to the Kenmore Elite Top Load Washer Owner’s Manual. This guide provides essential information for proper installation, operation, and maintenance of your advanced washing machine.

Installation and Setup

Install the Kenmore Elite Top Load Washer on a level surface with proper water and electrical connections. Ensure the hot water system is functional before first use for optimal performance.

1.1. Proper Installation Requirements

Proper installation is crucial for the optimal performance and longevity of your Kenmore Elite Top Load Washer. Ensure the washer is placed on a firm, level surface to prevent vibration and imbalance during operation. The area should be well-ventilated, away from direct sunlight and moisture. Check that the washer is installed on a floor that can support its weight when fully loaded with water and laundry. Ensure the drain hose is securely connected to a standpipe or laundry tub, and the water supply lines are properly attached to avoid leaks. Avoid placing the washer on uneven or soft surfaces, such as carpet, to maintain stability. Refer to the manual for specific installation guidelines and diagrams for a safe setup.

1.2. Levelling and Balancing the Washer

Proper levelling and balancing of the Kenmore Elite Top Load Washer are crucial for optimal performance and to prevent vibration during operation. Ensure the washer is placed on a firm, even surface. Use the adjustable levelling feet to stabilize the unit, ensuring all legs are in contact with the floor. Check the balance by placing a spirit level on the washer lid. If the surface is uneven, adjust the levelling feet accordingly. Proper levelling prevents excessive noise, vibration, and potential damage to the machine. For best results, avoid placing the washer on soft or uneven surfaces, as this can affect its stability and performance. Regularly check the levelling to maintain balance, especially after moving the appliance.

Operating the Kenmore Elite Top Load Washer

Understand your washer’s advanced features, including fuzzy logic technology, which adjusts wash time based on load size and soil level for optimal cleaning performance.

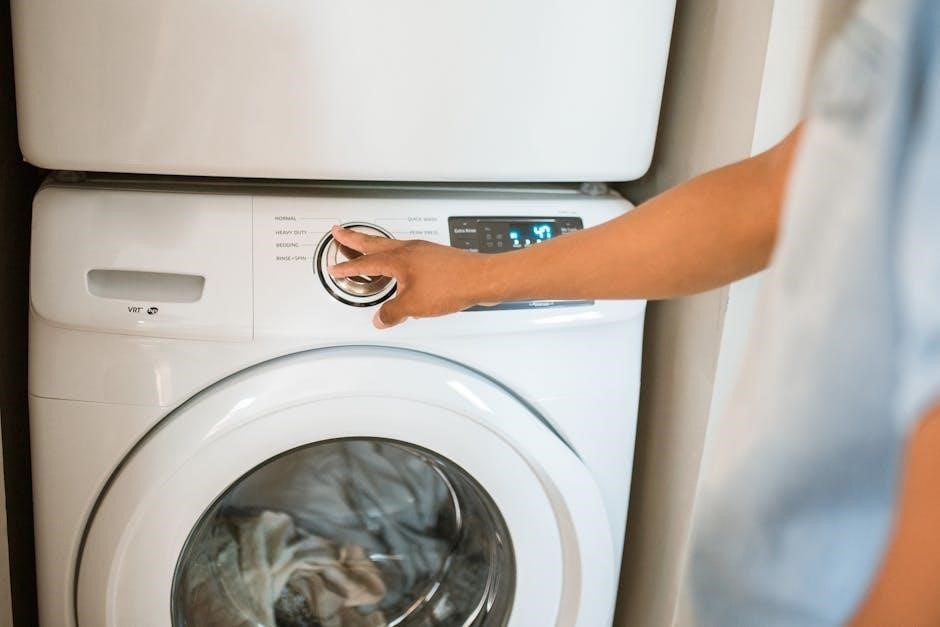
2.1. Understanding the Control Panel

The Kenmore Elite Top Load Washer features an intuitive control panel designed for easy operation. The panel includes a touchscreen interface with buttons for cycle selection, temperature control, and additional options like steam cleaning or sanitize. Users can navigate through various settings to customize their wash experience. The display screen provides real-time updates on the wash cycle progress, ensuring you stay informed. Familiarize yourself with the panel’s layout to optimize your laundry routine. For detailed guidance, refer to the user manual, which outlines each button’s function and how to utilize advanced features effectively.

2.2. Wash Cycles and Options

The Kenmore Elite Top Load Washer offers a variety of wash cycles designed for different fabric types and soil levels. Choose from options like Normal, Heavy Duty, Delicates, and Quick Wash. Each cycle adjusts water temperature, agitation, and spin speed to ensure optimal cleaning while protecting fabrics. Additional options include steam cleaning for tough stains, a sanitize cycle to eliminate bacteria, and a deep rinse setting for those with sensitive skin. Customizable settings allow you to tailor wash cycles to your specific needs, ensuring efficient and gentle cleaning. The intuitive controls make it easy to select the perfect cycle for every load, enhancing both performance and fabric care.

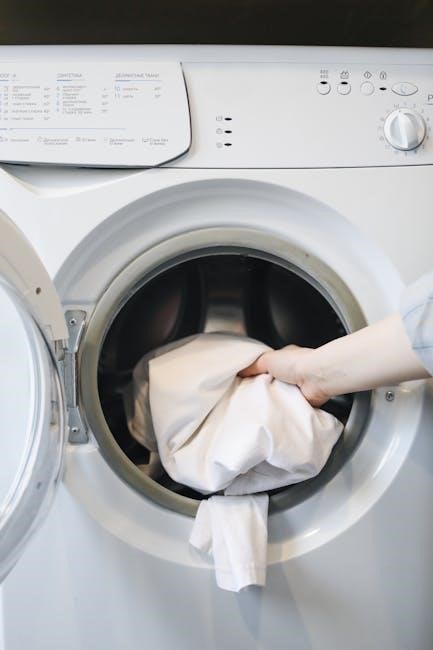
2.3. Loading the Washer Correctly

Proper loading ensures efficient washing and prevents damage to both clothes and the washer. Always check fabric labels for special instructions. Separate delicate or lightweight items from heavier ones to maintain balance. Avoid overloading, as this can cause vibration and reduce cleaning performance. Place bulky items like towels or bedding at the bottom, followed by smaller garments on top. Use a laundry bag for fragile or delicate fabrics to protect them during the cycle. Ensure loose items like socks or underwear are secured to prevent loss or tangling. Proper distribution of the load ensures optimal washing results and extends the lifespan of your Kenmore Elite Top Load Washer.

Maintenance and Care

Regular maintenance ensures optimal performance. Clean the interior, check water inlet filters, and drain pumps. Leave the lid open after use to prevent mold and mildew growth.

3.1. Cleaning the Washer Interior

Regular cleaning of the Kenmore Elite Top Load Washer’s interior is crucial for maintaining hygiene and performance. Start by leaving the washer lid open after use to allow moisture to evaporate. Every 1-2 months, run a cleaning cycle using a washer cleaner or 1 cup of white vinegar on the hottest setting. After the cycle, wipe down the interior, gasket, and dispensers with a mild detergent. Check and clean the drain pump filter regularly to remove debris. For tough odors, mix baking soda and water, let it sit, then rinse. Always refer to the manual for specific cleaning recommendations to ensure optimal functionality and freshness.

3.2. Checking and Cleaning the Water Inlet Filters

Regularly inspecting and cleaning the water inlet filters is crucial for maintaining optimal performance of your Kenmore Elite Top Load Washer. Locate the filters on the water inlet hoses and remove any debris or sediment that may accumulate. Use a soft brush or cloth to gently scrub away blockages. Ensure the filters are free of mineral buildup, which can reduce water flow and affect washing efficiency. Replace the filters securely after cleaning to prevent leaks. Cleaning the filters every 1-2 months, or as needed, will help maintain proper water pressure and prevent issues during wash cycles. This simple maintenance step ensures your washer operates efficiently and effectively.

Troubleshooting Common Issues

This section helps diagnose and resolve common issues like error codes, drainage problems, and vibration. Follow step-by-step solutions to ensure optimal performance and extend the washer’s lifespan.

4.1. Identifying Error Codes

Your Kenmore Elite Top Load Washer may display error codes to indicate specific issues. These codes, such as E1, E2, or E3, are designed to help diagnose problems quickly. Each code corresponds to a particular malfunction, such as issues with water supply, drainage, or sensor errors. Refer to the manual for a detailed list of codes and their meanings. Understanding these codes allows you to address the problem effectively, whether it requires adjusting settings, cleaning filters, or contacting a professional. Regularly checking and resolving error codes ensures optimal performance and extends the lifespan of your washer. Always consult the manual or contact Kenmore support for accurate troubleshooting guidance.

4.2. Solving Drainage and Vibration Problems

Drainage and vibration issues with the Kenmore Elite Top Load Washer can often be resolved through simple troubleshooting steps. First, ensure the drain hose is kink-free and properly secured. Check the drain pump filter for debris and clean it regularly. For vibration problems, confirm the washer is level using the provided legs and a spirit level. If uneven, adjust the legs to balance the machine. Overloading the washer can also cause vibrations, so adhere to the recommended load capacity. Additionally, ensure the washer is installed on a sturdy, even floor to minimize movement during operation. Regular maintenance, such as cleaning the interior and checking water inlet filters, can help prevent these issues. If problems persist, consult the troubleshooting guide or contact Kenmore support for further assistance.

Safety Precautions

Ensure safe operation by following these guidelines. Always unplug the washer before servicing. Avoid washing items with flammable materials or those previously cleaned with hazardous substances. Keep children and pets away during operation. Never lean or sit on the washer, as it may tip over. Install the washer on a level, stable surface to prevent vibration issues. Avoid overloading the machine, as this can cause imbalance and potential damage. Do not bypass safety features or attempt repairs without professional assistance. Regularly check and maintain the washer to prevent malfunctions. Follow all instructions in this manual to ensure optimal performance and safety. Always prioritize caution to avoid accidents and extend the lifespan of your appliance.

Energy Efficiency and Water Usage

The Kenmore Elite Top Load Washer is designed with energy efficiency in mind, featuring advanced technology to minimize water and energy consumption. By utilizing fuzzy logic, the washer optimizes cycle settings based on load size, water temperature, and soil level, ensuring efficient cleaning while reducing resource use. This eco-friendly design helps lower utility bills and environmental impact. The washer also includes an Energy Star certification, meeting strict energy efficiency standards. Proper maintenance, such as cleaning filters and checking water inlet systems, further enhances efficiency. Regularly reviewing and adjusting wash cycles can also contribute to optimal water and energy usage. This balance of performance and sustainability makes the Kenmore Elite a practical choice for eco-conscious homeowners.

Warranty Information and Support

Your Kenmore Elite Top Load Washer is backed by a comprehensive warranty program. The standard warranty covers parts and labor for defective materials or workmanship. Register your product online to ensure warranty validity. For warranty claims, contact Sears Brand Management or visit their official website. Additional extended warranty options are available for purchase for added protection. Refer to the PDF manual for detailed warranty terms and conditions. Customer support is accessible through phone, email, or live chat for any inquiries or assistance. Always retain your proof of purchase and warranty documentation for smooth service requests. This support ensures your appliance performs optimally for years to come.

Bybeatrice

lasko ceramic element heater manual

Lasko Ceramic Element Heaters offer reliable, efficient heating solutions with advanced ceramic technology, designed for safe and even heat distribution in home environments as a supplemental heating solution.

1.1 Overview of Lasko Ceramic Heaters

Lasko Ceramic Heaters are designed for efficient and safe home heating, utilizing advanced ceramic heating elements for consistent warmth. Popular models like the 5160, 755320, and CT22445 offer features such as digital controls, oscillation, and remote operation. These heaters are known for their portability, energy efficiency, and built-in safety features, making them ideal for supplemental heating in various room sizes. Their compact designs and user-friendly interfaces ensure ease of use while providing reliable performance for cozy comfort during colder months.

1.2 Importance of Reading the Manual

Reading the manual for your Lasko Ceramic Heater is crucial for safe and efficient operation. It provides essential safety guidelines, such as proper placement and usage to prevent overheating. Understanding the controls and features ensures you maximize the heater’s performance and longevity. The manual also includes troubleshooting tips to address common issues, saving you time and money. Additionally, it outlines warranty details, helping you understand coverage and maintenance requirements. By following the manual, you can enjoy a safe, comfortable, and worry-free heating experience while ensuring optimal energy use.

Safety Precautions and Warnings

Lasko Ceramic Heaters feature built-in safety protections like overheat shutdown and tip-over switches. Always follow guidelines to avoid hazards and ensure safe, reliable operation.

2.1 General Safety Guidelines

Always read and follow the manual instructions carefully before using the Lasko Ceramic Heater. Ensure the heater is placed on a stable, flat surface away from flammable materials. Never operate the heater near water or in humid environments. Avoid overheating by keeping the heater at least 3 feet away from combustible materials. Do not leave the heater unattended or running for extended periods. Keep children and pets away from the unit. Regular cleaning and proper storage are essential to maintain safety and efficiency. Dispose of packaging materials responsibly, and recycle when possible.

2.2 Built-In Safety Features

Lasko Ceramic Heaters are equipped with multiple safety features to ensure safe operation. The overheat protection automatically shuts off the heater if it exceeds a safe temperature. A tip-over switch deactivates the unit if it tilts or falls, preventing accidents. The ceramic heating element ensures efficient heat distribution without exposed hot surfaces, while the cool-touch housing keeps the exterior safe to handle. These features provide peace of mind and protect against potential hazards, making the heater suitable for use around children and pets while maintaining reliable performance and safety standards.

2.3 Proper Usage and Handling

Place the heater on a flat, stable surface away from flammable materials. Ensure the area is well-ventilated and avoid placing it near water or in humid environments. Operate the heater only when necessary and within the recommended temperature range. Keep children and pets at a safe distance. Use the remote control within its specified range for proper functionality. Avoid blocking the air intake or output vents. Do not cover the heater or place it on uneven surfaces. Always unplug it when not in use or during cleaning to maintain safety and performance.

Installation and Setup

Start by unpacking the heater and ensuring all components are included. Place it on a stable, flat surface, ensuring proper ventilation and clearance from obstructions. Plug it into a grounded electrical outlet, avoiding extension cords. Follow the manual for initial settings, such as setting the temperature mode or timer. Ensure the area is clear of flammable materials and that the heater is positioned safely for optimal performance and efficiency. Always refer to the manual for specific model instructions to ensure correct installation and setup procedures are followed.

3.1 Unpacking and Placement

Begin by carefully unpacking the heater and ensuring all components are included. Place the heater on a flat, stable surface, away from flammable materials. Maintain a 3-foot clearance from combustible materials like curtains or furniture. Avoid placing the heater on carpets or rugs, as this can impede airflow and increase the risk of overheating. Ensure the area is well-ventilated and free from obstructions. Do not place the heater near water or in humid environments to avoid electrical hazards. Always check for damage before use and ensure the heater is placed securely to prevent tipping. Follow the manual’s guidelines for proper placement to ensure safe and efficient operation.

3.2 Electrical Requirements

Ensure the heater is connected to a 120V AC electrical outlet. Use a dedicated circuit to prevent overload and avoid sharing the outlet with other high-power devices. The heater includes a 6-foot power cord for flexible placement. Always maintain a secure connection to prevent electrical hazards. Do not use extension cords unless absolutely necessary, and ensure the cord is undamaged. Avoid modifying the plug or using adapters, as this can create safety risks. Plug the heater directly into a grounded outlet to ensure proper operation and safety. If unsure about electrical compatibility, consult a licensed electrician. Always follow local electrical codes and regulations.

3.3 Initial Setup and Configuration

After unpacking, place the heater on a flat, stable surface. Plug the unit into a 120V AC outlet, ensuring it is the only device connected to avoid overload. Familiarize yourself with the controls, including the power button, heat mode selector, timer, and oscillation function. Set your preferred heat mode (High or Low) and adjust the timer if desired. Test the heater to ensure proper operation. Refer to the manual for specific instructions on configuring advanced features like automatic temperature control or remote operation. Always follow safety guidelines during setup and operation.

Operating the Lasko Ceramic Heater

Turn the heater on/off using the power button, adjust heat settings (High/Low), and use the remote to control temperature, timer, and oscillation for optimal comfort.

4.1 Understanding the Controls

The Lasko Ceramic Heater features intuitive controls, including a Power Button to turn the unit on/off, an Oscillation Button for wide heat distribution, and Heat Mode buttons to switch between High and Low settings. The Timer Button allows you to set operation duration up to 8 hours, with an orange light indicating activation. Automatic Temperature Control buttons let you adjust the desired room temperature. The remote control mirrors these functions, except for temperature unit changes. Pressing the (↑) and (↓) buttons simultaneously toggles between Celsius and Fahrenheit. Understanding these controls ensures safe and efficient operation.

4.2 Heat Mode Selection

The Lasko Ceramic Heater offers two heat modes: High and Low. The High mode provides maximum heating for faster warmth, while the Low mode offers energy-efficient, consistent heat. Use the Heat Mode Button to cycle between settings. Note that the automatic temperature control only functions in High mode. The Manual indicates this limitation to ensure optimal performance. LED indicators on the control panel display the active mode, helping you monitor and adjust settings effortlessly. This feature allows you to tailor heating to your comfort and energy preferences efficiently.

4.3 Timer and Remote Control Functions

The Lasko Ceramic Heater features a programmable timer that can be set for up to 8 hours, allowing you to customize heating duration. The remote control provides convenient operation, mirroring all manual functions. Press the Timer Button to cycle through settings, with an orange light indicating activation. The remote cannot change the temperature display between Celsius and Fahrenheit; this requires pressing two buttons simultaneously on the unit. If the remote is lost, contact Customer Service at (800) 233-0268 to order a replacement. This ensures seamless control over your heating experience.

Maintenance and Cleaning

Regular cleaning ensures optimal performance and safety. Use a soft cloth to wipe the heater, avoiding harsh chemicals. Store the unit in a cool, dry place during off-seasons.

5.1 Regular Cleaning Procedures

Regular cleaning is essential for maintaining your Lasko Ceramic Heater’s efficiency and safety. Turn off and unplug the heater before cleaning. Use a soft, dry cloth to gently wipe the exterior, grilles, and controls to remove dust and debris. Avoid using water or harsh chemicals, as they may damage the finish or electrical components. For the ceramic heating element, ensure it is cool, then use a soft brush or vacuum with a brush attachment to remove any dust buildup. Regular cleaning prevents dust from accumulating and potentially causing operational issues or reducing heating efficiency. Always refer to the manual for specific cleaning instructions to ensure safety and longevity of the product.

5.2 Storage and Disposal Guidelines

Store the heater in its original packaging or a protective cover in a cool, dry place. Avoid exposure to moisture or extreme temperatures. For disposal, follow local regulations for electronic waste. Do not dispose of the heater in regular trash; contact local waste management for environmentally responsible options. Proper storage and disposal ensure safety and environmental protection. Always follow these guidelines to maintain product integrity and comply with safety standards.

Troubleshooting Common Issues

Store the heater in its original carton in a cool, dry place. Recycle corrugated packaging and dispose of the product responsibly. Contact local waste services for environmentally safe disposal options. Visit 1800recycling.com for guidance. Do not return the heater to the store. For questions, contact Lasko Customer Service at (800) 233-0268. Proper storage and disposal ensure safety and environmental protection.

6.1 Heater Not Turning On

Ensure the power button is pressed to turn on the heater. Check if the outlet is working by plugging in another device. Verify the circuit breaker or fuse hasn’t tripped. If using automatic temperature control, ensure the set temperature is higher than the current room temperature. Check for activated safety features like overheat protection or tip-over switch. If issues persist, consult the manual or contact customer service for assistance; Regular maintenance and proper usage can prevent such issues.

6.2 Overheat Protection Activation

If the heater shuts off unexpectedly, it may have triggered the overheat protection feature. Ensure the unit has proper airflow by clearing nearby obstructions. Turn off the heater, unplug it, and let it cool for 30 minutes. Check for blocked vents or excessive dust buildup, which can cause overheating. After cooling, plug it back in and resume operation. If the issue recurs, contact customer service for further assistance. Always follow safety guidelines to prevent overheating and maintain efficiency.

6.4 Remote Control Malfunctions

If the remote control fails to operate, first check the batteries, ensuring they are correctly installed and not depleted. Verify there are no obstructions between the remote and heater. If issues persist, reset the remote by pressing and holding the Power button for 5 seconds while pointing it at the heater. If the problem continues, contact customer service at (800) 233-0268 for a replacement. Remote functionality should resume after syncing with the heater properly.

Warranty and Customer Support

Lasko Ceramic Heaters are backed by a 3-year warranty covering defects in workmanship and materials. For assistance, contact customer service at (800) 233-0268 or visit www.lasko.com.

7.1 Warranty Coverage and Duration

Lasko Ceramic Element Heaters are covered by a 3-year warranty from the date of original purchase. This warranty protects against defects in materials and workmanship. It applies only to the original purchaser and is valid in the USA, its territories, and Canada. The warranty period ends if the product is sold or transferred. Proof of purchase is required for all warranty claims. For more details, refer to the product manual or contact Lasko’s customer service team.

7.2 Contacting Customer Service

For assistance with your Lasko Ceramic Element Heater, contact Customer Service at (800) 233-0268 (Monday-Friday, 8AM-5PM EST). Email inquiries can be directed to producthelp@lasko.com. Ensure you have your model number and product details ready for efficient support. Visit www.lasko.com for additional resources or to register your product. Please do not send products to the customer service address without prior authorization. Representatives are available to address warranty claims, repairs, and general product inquiries.

7.3 Return and Repair Policies

Return or repair requests require a Return Authorization (RA) from Lasko Customer Service. Contact them at (800) 233-0268 to obtain an RA. Products must be shipped to Lasko at the customer’s expense, with proof of purchase included. Lasko will cover return shipping costs after repairs or replacements. Defective parts or units may be repaired or replaced at Lasko’s discretion. Damages from misuse, accidents, or commercial use are not covered. Do not return products without an RA, as they will not be processed.

Additional Resources

Access additional resources, including downloadable manuals and online support, at www.lasko.com. Contact Customer Service at (800) 233-0268 for further assistance or replacement parts.

8.1 Downloading the Full Manual

Visit Lasko’s official website to download the full manual for your ceramic heater. Navigate to the “Support” section, select your product model, and download the PDF manual. Manuals are also available on platforms like ManualsLib. Ensure you have the correct model number for accurate results; If you cannot find your manual, contact Lasko Customer Service at (800) 233-0268 for assistance. Always refer to the official sources for the most reliable information.

8.2 Online Support and FAQs

Bybeatrice

brother vx 1120 instruction manual

Welcome to the Brother VX-1120 instruction manual‚ your comprehensive guide to mastering this versatile sewing machine․ Designed for both novice and experienced sewists‚ this manual provides detailed instructions on operations‚ safety‚ and maintenance․

Inside‚ you’ll find step-by-step guides‚ troubleshooting tips‚ and essential information to ensure optimal performance․ Available in multiple languages‚ this manual is your go-to resource for unlocking the full potential of your Brother VX-1120․

1․1 Overview of the Manual

The Brother VX-1120 instruction manual is a detailed guide designed to help users understand and utilize their sewing machine effectively․ It covers essential topics such as safety precautions‚ threading‚ basic operations‚ and maintenance․ The manual is structured logically‚ starting with an introduction and progressing through advanced features‚ ensuring users can navigate its contents with ease․

Available in PDF format‚ the manual can be downloaded from various online sources‚ including Brother’s official website and third-party platforms like ManualsLib or Sears Parts Direct․ It is divided into clear sections‚ such as operation manual‚ instructions manual‚ and troubleshooting guides‚ making it a comprehensive resource for both beginners and experienced sewists․ The document is typically around 60-100 pages long‚ providing in-depth information to ensure optimal performance and longevity of the machine․

1․2 Importance of Reading the Manual

Reading the Brother VX-1120 instruction manual is crucial for ensuring safe and effective use of the sewing machine․ It provides essential information on proper operation‚ maintenance‚ and troubleshooting‚ helping users avoid potential hazards and extend the machine’s lifespan․ The manual also guides users in understanding the machine’s features‚ optimizing their sewing experience․ By following the instructions‚ users can prevent common issues and ensure high-quality results․ Whether you’re a beginner or an experienced sewist‚ the manual serves as a valuable resource for mastering the Brother VX-1120․ Ignoring the manual may lead to improper use‚ damage‚ or safety risks‚ making it a must-read for everyone․

Key Features of the Brother VX-1120 Sewing Machine

The Brother VX-1120 is a versatile mechanical sewing machine designed for a wide range of sewing tasks․ It features multiple stitch options‚ including straight‚ zigzag‚ and decorative stitches‚ making it ideal for both basic and creative projects․ The machine is lightweight and portable‚ with a durable construction that ensures long-lasting performance․ Its free-arm design allows for easy sewing of cuffs‚ sleeves‚ and other hard-to-reach areas․ The VX-1120 also includes a built-in needle threader and a stainless steel bed plate for smooth fabric flow․ Perfect for beginners and experienced sewists alike‚ this machine offers reliability and ease of use‚ making it a great choice for household sewing needs․

Safety Guidelines for Operating the VX-1120

Always read the manual before use․ Avoid pushing fabric forcefully and keep loose clothing tied back․ Use only recommended accessories and follow needle safety guidelines carefully․

3․1 Essential Safety Precautions

Before using the Brother VX-1120‚ ensure you follow these essential safety precautions to avoid accidents and maintain optimal machine performance․

  • Always read the entire manual carefully before operating the machine to understand its functions and safety features․
  • Avoid wearing loose clothing or jewelry that could get caught in moving parts․
  • Keep long hair tied back to prevent it from interfering with the machine․
  • Never touch the needle or other sharp parts with your fingers‚ as they can cause injury․
  • Ensure the machine is placed on a stable‚ flat surface to prevent tipping․
  • Unplug the machine when not in use or during maintenance to avoid accidental start-ups․
  • Keep children and pets away from the machine while it is in operation․

By adhering to these guidelines‚ you can ensure a safe and enjoyable sewing experience with your Brother VX-1120․

3․2 Best Practices While Sewing

To ensure smooth and efficient sewing with your Brother VX-1120‚ follow these best practices:

  • Use the appropriate needle type and size for your fabric to prevent damage or breakage․
  • Keep fabric steady and maintain consistent tension to achieve even stitches․
  • Avoid pulling or pushing fabric forcefully‚ as this can deflect the needle and cause it to break․
  • Always thread the machine correctly‚ following the manual’s guidelines to avoid tangles or thread breakage․
  • Use the correct presser foot for your fabric type to ensure proper feeding and stitching․
  • Perform regular maintenance‚ such as oiling and cleaning‚ to keep the machine running smoothly․

By following these practices‚ you’ll achieve professional-quality results and extend the lifespan of your Brother VX-1120․

Threading and Basic Operations

Threading your Brother VX-1120 correctly is essential for smooth operation․ Begin by turning off the machine and locating the spool pin․ Gently pull the thread through the guides‚ ensuring it’s seated properly in the tension disc․ Pass the thread through the take-up lever and insert it into the needle’s eye from front to back․ For basic operations‚ start by selecting the desired stitch using the dial․ Place your fabric under the presser foot‚ aligning the edge with the guide․ Lower the presser foot and begin sewing at a steady pace․ Always keep your hands clear of the needle and use the handwheel to manually advance the fabric if needed; Proper threading and these simple steps will help you achieve consistent results․

Basic Operations of the VX-1120

Mastering the basic operations of the Brother VX-1120 ensures a seamless sewing experience․ Begin by turning on the machine and selecting the desired stitch using the stitch selector dial․ Always start with a test stitch on scrap fabric to ensure settings are correct․ Place your fabric under the presser foot‚ aligning the edge with the guide․ Gently lower the presser foot and begin sewing at a steady pace․ Use the handwheel to manually advance the fabric if needed‚ especially for precise control․ To backstitch‚ press the reverse button and sew a few stitches before continuing forward․ Keep your hands clear of the needle and avoid pushing or pulling fabric excessively․ These simple steps will help you achieve professional-looking results with ease․

Maintenance and Troubleshooting Tips

Regularly clean and oil the machine to ensure smooth operation․ For common issues like thread jams or needle breakage‚ refer to the manual or contact support․

6․1 Routine Maintenance and Care

Regular maintenance is crucial for the longevity and performance of your Brother VX-1120․ Start by turning off and unplugging the machine before any cleaning or servicing․ Use a soft brush to remove lint and debris from the bobbin area and tension disks․ Oil the machine periodically as specified in the manual to keep internal mechanisms running smoothly․ Avoid using harsh chemicals‚ as they may damage the finish․ Store the machine in a dry place‚ away from direct sunlight․ Following these care tips ensures your sewing machine remains in optimal condition for years of reliable use․

6․2 Common Issues and Solutions

Experiencing issues with your Brother VX-1120? This section offers quick fixes for common problems․ If the machine won’t turn on‚ check the power cord connection and ensure it’s properly plugged in․ For uneven stitching‚ verify that the bobbin is correctly threaded and seated․ Fabric not moving smoothly? Ensure the presser foot is lowered and the stitch length is adjusted appropriately․ Needle breakage often results from improper threading or using the wrong needle type․ Refer to the manual for guidance on resolving these issues․ Regular maintenance and correct usage practices can prevent many of these problems‚ ensuring seamless sewing sessions every time․

Downloading the Brother VX-1120 Instruction Manual

Easily access the Brother VX-1120 instruction manual online․ Visit the official Brother website or trusted platforms like ManualsLib‚ Sears Parts Direct‚ or all-guides․com․ These sites offer free PDF downloads of the manual in multiple languages‚ including English‚ Spanish‚ Italian‚ and more․ Simply search for “Brother VX-1120 manual” and select the appropriate file․ Ensure the manual is downloaded from a reputable source to avoid unauthorized versions․ The document is typically available as a PDF‚ making it easy to view on any device․ For convenience‚ the manual is also available for download through Brother’s official support page․ Follow the on-screen instructions to complete the download and start exploring your sewing machine’s features․

Additional Resources for Users

Beyond the manual‚ Brother offers various resources to enhance your sewing experience․ Visit the official Brother website for FAQs‚ video tutorials‚ and troubleshooting guides specific to the VX-1120․ Additionally‚ platforms like ManualsLib and all-guides․com provide user guides and specifications․ For repairs‚ Sears Parts Direct offers manuals and part diagrams․ Engage with sewing communities or Brother’s customer support for personalized advice․ These resources ensure you maximize your machine’s potential and resolve any issues efficiently․ Explore these tools to deepen your knowledge and improve your sewing skills with the Brother VX-1120․

The Brother VX-1120 instruction manual serves as an indispensable guide for unlocking the full potential of your sewing machine․ By following the detailed instructions‚ safety guidelines‚ and maintenance tips outlined in this manual‚ you can ensure optimal performance and extend the lifespan of your machine․ Whether you’re a novice or an experienced sewist‚ this comprehensive resource provides the knowledge needed to tackle various sewing projects with confidence․ For additional support‚ explore the wealth of online resources‚ including FAQs‚ video tutorials‚ and user forums․ With the Brother VX-1120 and its manual‚ you’re equipped to create effortlessly and efficiently․ Happy sewing!

Bybeatrice

honeywell rth111b manual

This manual provides essential guidance for installing, operating, and troubleshooting the Honeywell RTH111B thermostat. It is crucial for homeowners and installers to ensure optimal functionality, safety, and energy efficiency.

1.1 Overview of the Honeywell RTH111B Thermostat

The Honeywell RTH111B is a digital non-programmable thermostat designed for simplicity and efficiency. It is compatible with gas, oil, or electric furnaces and central air conditioners, operating on 2 or 3-wire systems. This thermostat features a backlit display for easy readability and built-in compressor protection to prevent damage. It is ideal for homeowners seeking a straightforward temperature control solution without advanced programming options. The RTH111B is user-friendly, ensuring consistent heating and cooling by allowing manual adjustments. Its compact design and easy installation make it a popular choice for various HVAC systems. This thermostat is a reliable option for maintaining a comfortable home environment effortlessly.

1.2 Key Features and Compatibility

The Honeywell RTH111B thermostat offers a sleek, user-friendly design with a backlit display for enhanced readability. It features built-in compressor protection to safeguard your HVAC system. Compatible with gas, oil, or electric furnaces, as well as central air conditioners, this thermostat supports 2 or 3-wire systems, making it versatile for various setups. It operates on 24-volt or 750 mV systems but is not suitable for multi-stage conventional systems. The RTH111B is energy-efficient and ensures consistent temperature control. Its compact design allows for easy installation, and it comes with a 1-year limited warranty for added peace of mind, ensuring reliable performance for homeowners seeking a straightforward temperature management solution.

Installation Guide for Honeywell RTH111B

The Honeywell RTH111B installation guide provides step-by-step instructions for a seamless setup. It ensures compatibility with various HVAC systems and offers clear wiring diagrams for accurate connections.

2.1 Step-by-Step Installation Instructions

The Honeywell RTH111B installation guide offers a detailed, step-by-step process to ensure a smooth setup. Begin by turning off the power to your HVAC system. Remove the old thermostat carefully, taking note of the wiring connections. Mount the new wallplate, ensuring it is level and secure. Connect the wires to the appropriate terminals, referring to the wiring diagram provided. Finally, attach the thermostat to the wallplate and restore power. Test the system to confirm proper operation. Always follow safety precautions and refer to the manual for specific configurations and compatibility checks to avoid installation errors. Proper installation ensures optimal performance and energy efficiency.

  • Prepare tools and materials before starting.
  • Shut off power to the HVAC system.
  • Remove the old thermostat and label wires.
  • Mount the wallplate and connect wires.
  • Attach the thermostat and restore power.
  • Test the system for proper functionality;

2;2 Advanced Installation Considerations

For a seamless setup, consider system compatibility and wiring configurations. The Honeywell RTH111B works with gas, oil, or electric furnaces and central air conditioners using 2 or 3 wires. Ensure the system is compatible with 24V or 750mV systems, as it does not support multi-stage conventional systems. Check for proper wiring connections to avoid malfunctions. Built-in compressor protection is a key feature, preventing damage from short cycling. Always refer to the wiring diagram for accurate terminal connections. If upgrading from an old thermostat, dispose of it responsibly. Advanced considerations ensure optimal performance and safety, tailored to your HVAC system’s specific needs.

  • Verify system compatibility before installation.
  • Ensure correct wiring connections for safe operation.
  • Utilize built-in compressor protection for efficiency.
  • Follow proper disposal guidelines for old thermostats.

2.3 Wiring Diagrams and Requirements

The Honeywell RTH111B requires precise wiring to ensure proper functionality. Refer to the provided wiring diagrams for 2-wire and 3-wire systems. The thermostat is compatible with 24V or 750mV systems but does not support multi-stage conventional systems. Ensure correct terminal connections: R (power), W (heat), Y (cool), G (fan), and C (common) if applicable. The RTH111B does not require a battery, as it draws power from the HVAC system. Proper grounding is essential to avoid malfunctions. Incorrect wiring can damage the thermostat or HVAC system, so double-check connections before powering up. Always follow the wiring diagram specific to your system type for a safe and successful installation.

  • Use the correct wiring diagram for your system type.
  • Ensure all terminals are securely connected to prevent issues.
  • Avoid incorrect wiring to protect your HVAC system.

Operating the Honeywell RTH111B Thermostat

Learn how to operate the Honeywell RTH111B thermostat, including turning heating/cooling systems on/off and adjusting settings for optimal comfort and energy efficiency.

3.1 Understanding the Thermostat Controls

The Honeywell RTH111B thermostat features intuitive controls designed for easy operation. The interface includes buttons for adjusting temperature settings, switching between heating and cooling modes, and accessing basic functions. The thermostat also includes indicators for system status, such as when the furnace or air conditioner is active. Users can navigate through the menu to set preferences, view current settings, and monitor system performance. The controls are designed to be user-friendly, ensuring seamless management of home comfort. Proper understanding of these controls is essential for optimizing energy efficiency and maintaining desired indoor conditions. Refer to the manual for detailed explanations of each control function and its operation.

3.2 Setting Up and Adjusting Temperature

The Honeywell RTH111B thermostat allows users to easily set and adjust temperature settings. To set the desired temperature, press the up or down arrows on the thermostat. The display will show the current temperature and the setpoint. Users can toggle between heating and cooling modes using the “Heat” or “Cool” buttons. The thermostat also features a simple interface for adjusting temperature settings manually. It is important to note that the thermostat does not have programmable features, so adjustments must be made manually. The system will respond by turning the heating or cooling system on or off to reach the desired temperature. Always refer to the manual for specific instructions on temperature adjustment procedures.

Troubleshooting Common Issues

The Honeywell RTH111B manual provides troubleshooting guides to identify and resolve common issues, including thermostat malfunctions and reset procedures for optimal performance.

4.1 Identifying and Solving Thermostat Malfunctions

Identifying malfunctions early ensures efficient resolution. Common issues include unresponsive displays, incorrect temperature readings, or system failures. Check power sources and battery levels first. Ensure proper wiring connections and verify system compatibility. Consult the manual for specific error codes. If the thermostat doesn’t turn on, inspect circuit breakers or fuses. For temperature inaccuracies, recalibrate settings or reset the device. Contact Honeywell support for persistent problems. Regular maintenance and updates can prevent malfunctions. Always refer to troubleshooting guides in the manual for detailed solutions. Addressing issues promptly ensures optimal performance and energy efficiency. Honeywell’s customer care is available for further assistance.

4.2 Resetting the Thermostat

Resetting the Honeywell RTH111B thermostat can resolve many operational issues. To reset, press and hold the “Menu” button for 10 seconds until the display clears. For models with removable batteries, take them out for 30 seconds to discharge internal capacitors. After resetting, reinsert batteries or restore power. The thermostat will revert to factory settings, so you’ll need to reconfigure temperature preferences and system settings. Ensure all wiring connections are secure before restarting. If issues persist, consult the troubleshooting section or contact Honeywell support. Resetting is a straightforward solution for restoring functionality and ensuring optimal performance. Always address underlying causes before resetting.

Customer Support and Warranty Information

Honeywell offers 24/7 customer support at 1-800-468-1502. The RTH111B is backed by a 1-year limited warranty covering defects in workmanship and materials. For returns, contact Honeywell first.

5.1 Contacting Honeywell Customer Care

For assistance with your Honeywell RTH111B thermostat, contact customer care at 1-800-468-1502. Representatives are available to address installation, operation, and troubleshooting inquiries. Visit yourhome.honeywell.com for additional resources and support. Honeywell’s customer care team can also guide you through warranty claims and product returns, ensuring a smooth resolution to any issues. Proper documentation, including proof of purchase, may be required for warranty services.

5.2 Warranty Details and Return Policy

The Honeywell RTH111B thermostat is covered by a 1-year limited warranty, which protects against defects in materials and workmanship under normal use. Returns or replacements must be authorized by Honeywell Customer Care. Contact them at 1-800-468-1502 to determine if the product should be returned to Honeywell Return Goods, Dock 4 MN10-3860, 1885 Douglas Dr. N., Golden Valley, MN 55422, or if a replacement will be provided. Ensure you have proof of purchase for warranty claims. Proper return procedures must be followed to ensure a smooth process and maintain warranty validity.

Frequently Asked Questions (FAQs)

The FAQs section addresses common queries about the Honeywell RTH111B, including operation, compatibility, and troubleshooting, providing quick solutions for optimal thermostat performance and user convenience.

6.1 Common Queries About the RTH111B

Users often inquire about the RTH111B’s compatibility with their HVAC systems, installation steps, and troubleshooting common issues. Many ask how to reset the thermostat or adjust temperature settings. Others seek clarity on warranty details and customer support contact information. Additionally, questions about the thermostat’s non-programmable features and how to optimize energy efficiency are frequent. Some users also ask about proper recycling and disposal methods for old thermostats. These queries highlight the need for clear, concise guidance to ensure seamless operation and maintenance of the Honeywell RTH111B thermostat.

6.2 Tips for Optimal Thermostat Performance

For optimal performance, ensure the RTH111B is installed level and away from direct sunlight or drafts. Regularly clean the thermostat’s display and internal components to maintain accuracy. Adjust temperature settings gradually to avoid sudden system strain. Use the built-in compressor protection feature to prevent damage to your HVAC system. Schedule periodic checks of wiring connections to ensure reliability. Refer to the manual for advanced settings to tailor functionality to your home’s needs. Proper maintenance and adherence to these tips will enhance energy efficiency and extend the thermostat’s lifespan, ensuring consistent comfort and performance.

References and Further Reading

Visit Honeywell’s official website for the complete RTH111B manual and additional resources. Contact Honeywell customer support for further assistance or clarification on any thermostat-related queries.

7.1 Links to Official Honeywell Manuals

The official Honeywell RTH111B manual is available for download on Honeywell’s website. Visit yourhome.honeywell.com to access the PDF version of the manual, which includes detailed installation, operation, and troubleshooting guides. Additional resources, such as quick installation guides and warranty information, can also be found on this platform. For further assistance, refer to the “Support” section on Honeywell’s website, which provides contact details for customer care and FAQs. Ensure to download the manual specific to your model, such as the RTH111B1042 or RTH111B1024, for accurate instructions tailored to your thermostat.

7.2 Additional Resources for Thermostat Users

Beyond the official manual, users can explore Honeywell’s official website for interactive guides and FAQs. The Honeywell Home app offers remote control and scheduling features. Additionally, video tutorials on Honeywell’s YouTube channel provide step-by-step installation and troubleshooting tips. For community support, forums like Reddit’s homeautomation community often share user experiences and solutions. Third-party websites like ManualsLib and ManualsOnline also host downloadable PDF manuals for the RTH111B series. Lastly, Honeywell’s customer support hotline at 1-800-468-1502 is available for personalized assistance, ensuring comprehensive support for all user needs.

Bybeatrice

sky pad 8 manual

Welcome to the Sky Pad 8 manual! This guide helps you unlock your device’s full potential‚ offering detailed insights into its features‚ setup‚ and troubleshooting. Discover how to maximize your Sky Pad 8 experience with step-by-step instructions and expert tips.

  • Learn about the device’s high-resolution display and supported file formats.
  • Explore setup processes‚ including Wi-Fi and Bluetooth connections.
  • Find troubleshooting solutions for common issues.

Get ready to enhance your Sky Pad 8 journey with this comprehensive manual!

Overview of the Sky Pad 8 Device

The Sky Pad 8 is a versatile tablet designed for both entertainment and productivity. It features a high-resolution display‚ perfect for watching videos or browsing content. The device supports various media formats‚ including MP3‚ AVI‚ and PDF‚ making it ideal for multimedia consumption. With its compact design and robust audio-visual capabilities‚ the Sky Pad 8 offers a seamless experience for users seeking a portable solution for work and leisure.

  • High-resolution display for crisp visuals.
  • Supports multiple file formats for versatile use.
  • Compact and lightweight for easy portability.

Importance of the User Manual

The user manual is your key to unlocking the full potential of the Sky Pad 8. It provides essential guidance for setting up‚ operating‚ and maintaining your device. From initial setup to troubleshooting common issues‚ the manual ensures you make the most of your tablet’s features. Understanding safety precautions and proper care routines helps extend the device’s lifespan and enhances your overall user experience. Referencing the manual regularly guarantees optimal performance and minimizes potential technical difficulties.

  • Guides you through initial setup and configuration.
  • Offers troubleshooting solutions for common problems.
  • Details safety tips to protect your device.

Technical Specifications of the Sky Pad 8

The Sky Pad 8 features a 1280×800 resolution display‚ supports various media formats like PDF‚ RTF‚ and MP3‚ and includes Wi-Fi and Bluetooth connectivity for enhanced functionality.

Display Resolution and Quality

The Sky Pad 8 boasts an impressive 1280×800 pixel resolution‚ ensuring crisp and vibrant visuals. Its 8-inch screen delivers sharp text and vivid colors‚ perfect for multimedia consumption. The display supports HD video playback‚ making it ideal for watching movies and browsing photos. With excellent brightness and color accuracy‚ the Sky Pad 8 offers an immersive viewing experience‚ whether you’re streaming content or reading documents. Its touchscreen responsiveness enhances navigation‚ providing a seamless user experience.

Supported File Formats for Media Playback

The Sky Pad 8 supports a wide range of media formats‚ ensuring versatility for your entertainment needs. For audio‚ it plays MP3‚ RMVB‚ and MPEG files seamlessly. Video playback is equally impressive‚ with support for AVI‚ FLV‚ VOB‚ DAT‚ VP-8‚ and VC-1 formats. Additionally‚ it handles popular document formats like PDF‚ RTF‚ and TXT‚ making it a great tool for both work and leisure. This compatibility ensures you can enjoy various types of content without conversion hassles‚ enhancing your overall user experience.

Audio and VideoCapabilities

The Sky Pad 8 excels in delivering high-quality audio and video experiences. It supports popular audio formats like MP3‚ RMVB‚ and MPEG‚ ensuring crisp sound. For video‚ it plays AVI‚ FLV‚ VOB‚ DAT‚ VP-8‚ and VC-1 files‚ with 1080p playback for stunning visuals. The device also features a 3.5mm audio jack for external sound‚ enhancing your multimedia enjoyment. Whether streaming or playing local files‚ the Sky Pad 8 offers a seamless and immersive experience for all your audio and video needs.

Setting Up Your Sky Pad 8

Start by turning on your Sky Pad 8 and following the on-screen instructions. Select your language‚ connect to Wi-Fi‚ and complete the initial setup process. Ensure your device is fully charged before first use for optimal performance.

  • Charge the device using the provided cable.
  • Complete the initialization process.
  • Connect to your preferred network.

Your Sky Pad 8 is now ready for use!

First-Time Setup and Initialization

Begin by powering on your Sky Pad 8 and following the on-screen instructions. Select your preferred language and proceed through the setup wizard. Connect to a Wi-Fi network and wait for the device to download and install any available updates. Create or sign in with an existing account to access full features. Familiarize yourself with the home screen layout and customize it to your preferences. Ensure all initial setup steps are completed before exploring the device.

  • Power on the device and select your language.
  • Connect to a stable Wi-Fi network.
  • Complete account setup and update software.
  • Customize your home screen.

Your Sky Pad 8 is now initialized and ready for use!

Charging the Device

To charge your Sky Pad 8‚ use the provided USB charger and cable. Connect the cable to both the charger and the device. Ensure the charger is plugged into a working power source. The device will indicate charging via a notification light or icon. Charge until the battery reaches 100% for optimal performance. Avoid overcharging to prolong battery life. For best results‚ use original or certified accessories.

  • Use the original USB charger and cable.
  • Connect to a stable power source.
  • Monitor charging progress via indicators;
  • Avoid overcharging to maintain battery health.

Keep your Sky Pad 8 powered and ready for use!

Connecting to Wi-Fi and Bluetooth

To connect your Sky Pad 8 to Wi-Fi‚ go to Settings‚ select Wi-Fi‚ and choose your network. Enter the password and wait for the connection to establish. For Bluetooth‚ enable Bluetooth in Settings‚ pair your device with the Sky Pad 8‚ and confirm the connection. Ensure both devices are in pairing mode. Restarting the device may resolve connectivity issues. These connections enable seamless media playback and file transfers.

  • Access Wi-Fi settings to connect to your network.
  • Enter the network password for secure access.
  • Enable Bluetooth and pair compatible devices.
  • Restart the device if connectivity issues arise.

Effortlessly connect your Sky Pad 8 to Wi-Fi and Bluetooth for enhanced functionality!

Safety Precautions and Guidelines

Ensure safe use of your Sky Pad 8 by following guidelines. Handle the device with care to avoid damage. Avoid exposure to liquids or extreme temperatures. Keep it out of reach of children and follow battery care instructions to prevent hazards. Adhere to environmental disposal practices for sustainability.

General Safety Warnings

To ensure safe use of your Sky Pad 8‚ follow these guidelines:

  • Avoid exposing the device to liquids or extreme temperatures.
  • Handle the device with care to prevent physical damage.
  • Keep the Sky Pad 8 out of reach of children.
  • Use only approved chargers and cables to prevent electrical hazards.
  • Follow proper battery care instructions to avoid overheating or damage.
  • Adhere to environmental disposal practices for sustainability.

By following these precautions‚ you can enjoy your Sky Pad 8 safely and responsibly.

Battery Care and Maintenance

To prolong the life of your Sky Pad 8’s battery:

  • Avoid extreme temperatures and liquid exposure.
  • Use only approved chargers and cables.
  • Charge the device on a flat‚ stable surface.
  • Avoid overcharging; keep the battery level between 20% and 80% for optimal health.
  • Store the device in a cool‚ dry place if not in use for extended periods.
  • Update your software regularly for improved battery performance.

Proper care ensures your Sky Pad 8 remains efficient and reliable over time.

Environmental Considerations

Responsible use of your Sky Pad 8 helps protect the environment. Always follow local recycling guidelines for disposing of batteries and electronic devices. Use energy-saving features to reduce power consumption. Avoid exposing the device to extreme temperatures or humidity. Keep the device clean and avoid harsh chemicals. Proper disposal of packaging materials and accessories contributes to a greener planet. By adhering to these practices‚ you help minimize the environmental impact of your Sky Pad 8.

Navigating the Sky Pad 8 Interface

Welcome to the Sky Pad 8 interface! Discover intuitive navigation with customizable icons‚ seamless gesture controls‚ and user-friendly menus. Tailor your experience for efficiency and enjoyment.

Understanding the Home Screen

The Sky Pad 8 home screen serves as your central hub for navigation; It features customizable icons‚ widgets‚ and shortcuts to frequently used apps. The dock at the bottom provides quick access to essential functions like settings‚ browser‚ and media players. Customize your layout by dragging and dropping apps or widgets. The status bar at the top displays battery life‚ Wi-Fi connectivity‚ and notifications. Use gestures to switch between open apps or return to the home screen seamlessly. Personalize your experience by adjusting wallpaper‚ themes‚ and icon sizes to suit your preferences.

  • Customizable layout with app shortcuts.
  • Quick access to settings and media.
  • Gestures for seamless navigation.

Using Gestures and Navigation Controls

The Sky Pad 8 supports intuitive gestures for seamless navigation. Swipe up from the bottom to return to the home screen‚ and swipe down to access quick settings. Pinch to zoom in/out on web pages or images‚ and swipe left/right to switch between open apps. Double-tap to wake the screen or lock it. Use the back button to navigate through menus‚ and long-press for additional options. These gestures enhance multitasking and provide a smooth user experience. Customize gesture sensitivity in settings for optimal control.

  • Swipe gestures for app switching and navigation.
  • Pinch-to-zoom functionality for media and web content.
  • Double-tap and back button for easy access to features.

Accessing and Managing Apps

Access and manage apps on your Sky Pad 8 effortlessly. Open the app drawer to view all installed apps‚ or find shortcuts on the home screen. Download new apps from the built-in app store‚ and organize them into folders for easy access. Update apps regularly to ensure optimal performance. Uninstall unused apps to free up storage. Use the multitasking feature to switch between open apps seamlessly. Customize app notifications and permissions in the settings menu for a tailored experience.

  • Launch apps from the home screen or app drawer.
  • Update and manage apps through the app store.
  • Organize apps into folders for convenience.

Troubleshooting Common Issues

Identify and resolve common Sky Pad 8 issues‚ such as connectivity problems or performance lag‚ by following diagnostic steps and optimization tips within this section.

Resolving Connectivity Problems

Encounter connectivity issues with your Sky Pad 8? Start by restarting your device and router. Ensure Wi-Fi is enabled and correctly configured. Check network passwords and signal strength. For Bluetooth‚ verify pairing settings and device compatibility. Disable and re-enable Bluetooth to refresh connections. If issues persist‚ reset network settings or perform a factory reset. Ensure firmware is up-to-date‚ as outdated software may cause connectivity problems. Consult the manual for detailed troubleshooting steps to restore your Sky Pad 8’s connectivity.

Addressing Performance Lag

Experiencing performance lag on your Sky Pad 8? Close unused apps and background processes to free up memory. Ensure your device is updated with the latest software‚ as outdated firmware can slow performance. Clear cache and storage by deleting unnecessary files. Avoid using resource-heavy apps or multiple high-resolution media files simultaneously. Restart your device periodically to refresh its system. If lag persists‚ consider resetting to factory settings after backing up your data. These steps should help optimize your Sky Pad 8’s performance.

Fixing Audio and Video Playback Issues

To resolve audio or video playback issues on your Sky Pad 8‚ ensure the file format is supported. Check for corrupted files or convert them to compatible formats like MP3‚ AVI‚ or MPEG. Restart the device to refresh its media player. Ensure the volume is turned up and not muted. If issues persist‚ update the media player app or reinstall it. For video lag‚ reduce screen resolution or close background apps. Ensure your device is connected to quality speakers or headphones for optimal audio output.

Maintenance and Care Tips

Regularly clean the screen with a soft cloth to maintain clarity. Keep the device away from moisture and extreme temperatures to prevent damage. Update software regularly for optimal performance. Use the original charger to avoid battery degradation.

Cleaning the Device

To maintain your Sky Pad 8’s performance and appearance‚ regular cleaning is essential. Use a soft‚ dry microfiber cloth to gently wipe the screen and exterior surfaces. For stubborn smudges‚ lightly dampen the cloth with water‚ but avoid harsh chemicals or abrasive cleaners. Never spray liquids directly onto the device. Clean the ports with a soft-bristled brush to remove dust. Avoid exposing the device to extreme temperatures or moisture‚ which can damage internal components. Regular cleaning ensures optimal functionality and longevity.

  • Avoid using paper towels or rough materials that may scratch the screen.
  • For deep cleaning‚ turn off the device and unplug it before proceeding.
  • Clean the device periodically to prevent dust buildup and maintain performance.

Updating Software and Firmware

Keeping your Sky Pad 8 up to date ensures optimal performance and security. Regularly check for software and firmware updates in the device settings under the “System Update” section. Connect to Wi-Fi to download and install updates automatically. Before updating‚ back up your data to prevent loss. Allow the device to restart and complete the installation process. Updates may improve compatibility‚ fix bugs‚ and enhance features. Always use the official update method to avoid unauthorized modifications.

  • Ensure the device is fully charged before starting an update.
  • Avoid interrupting the update process to prevent system errors.
  • Updates are essential for maintaining device stability and functionality.

Backing Up Data

Backing up your Sky Pad 8 data is crucial to prevent loss. Navigate to Settings > Backup & reset. Enable automatic backups to Google Drive‚ ensuring your contacts‚ photos‚ and apps are saved. For manual backups‚ select “Backup now.” Ensure a Wi-Fi connection for uploading. To restore‚ revisit the same section and choose “Restore.” Additionally‚ consider backing up to an external device like a USB drive or SD card for extra security. Regular backups protect your data and settings‚ ensuring peace of mind against potential loss.

  • Connect to Wi-Fi for cloud backups.
  • Test restore processes to confirm functionality.
  • Explore external backup options for added safety.

Mastering your Sky Pad 8 is now within reach! This manual has equipped you with essential knowledge to optimize your experience. Explore‚ discover‚ and enjoy your device to the fullest!

Final Thoughts on the Sky Pad 8 Manual

This manual has provided a comprehensive guide to understanding and optimizing your Sky Pad 8 experience. From setup to troubleshooting‚ it ensures you make the most of your device. Key sections like display quality‚ connectivity‚ and safety precautions are highlighted to enhance usability. Regular updates and proper care will keep your Sky Pad 8 performing at its best. Refer to this manual whenever needed for a seamless and enjoyable experience with your device.

  • Explore features confidently with this guide.
  • Stay informed about best practices and maintenance.
  • Enjoy a hassle-free experience with your Sky Pad 8.

Encouragement to Explore Device Features

Now that you’ve familiarized yourself with the Sky Pad 8‚ it’s time to dive into its exciting features! Explore the high-resolution display‚ versatile media playback options‚ and seamless connectivity. Discover how gestures and navigation controls enhance your user experience. Don’t hesitate to experiment with apps and settings to unlock your device’s full potential. Keep exploring‚ and you’ll find new ways to make the Sky Pad 8 your go-to companion for entertainment‚ productivity‚ and creativity.

  • Take advantage of the device’s multimedia capabilities.
  • Customize settings to suit your preferences.
  • Stay curious and enjoy the journey of discovery!
Bybeatrice

manual compression test

A manual compression test measures engine cylinder pressure, identifying issues like low compression due to piston rings, cylinders, valves, or head gaskets. It’s crucial for diagnosing engine performance problems effectively.

What is a Manual Compression Test?

A manual compression test is a diagnostic procedure used to measure the pressure within an engine’s cylinders; It helps identify issues such as low compression, which can indicate problems with piston rings, cylinders, valves, or head gaskets. This test is essential for evaluating engine performance and troubleshooting common issues like rough idling, misfires, or reduced power.

The process involves inserting a compression gauge into the engine’s spark plug hole and cranking the engine to capture pressure readings. By comparing these readings across all cylinders, technicians can pinpoint uneven compression levels, which often signal underlying mechanical faults.

Understanding the results of a manual compression test requires knowledge of normal and abnormal pressure ranges. For instance, a significant drop in compression in one cylinder compared to others may suggest a cracked head, worn piston rings, or a faulty valve. This test is a critical tool for mechanics and automotive enthusiasts alike, providing insights into the internal condition of an engine.

Why is a Manual Compression Test Important?

A manual compression test is vital for assessing engine health by identifying internal issues early, preventing costly repairs. It helps diagnose problems like low compression, which can lead to poor performance, reduced fuel efficiency, and increased emissions.

By measuring cylinder pressure, the test reveals uneven compression, indicating faulty piston rings, cylinders, valves, or head gaskets. Early detection of these issues can prevent engine damage, saving time and money. Additionally, the test aids in troubleshooting symptoms like rough idling, misfires, or lack of power, ensuring optimal engine operation. Regular testing supports proactive maintenance, extending engine lifespan and reliability. This simple yet effective procedure is crucial for maintaining peak engine performance and preventing severe damage.

Preparing for a Manual Compression Test

Proper preparation for a manual compression test ensures accurate results. Gather tools like a compression gauge, disable the ignition system, and warm the engine. Follow safety guidelines to avoid injuries.

Tools and Equipment Needed

To perform a manual compression test, specific tools and equipment are required. A compression gauge is essential for measuring cylinder pressure accurately. Additionally, you’ll need a spark plug socket to remove spark plugs, allowing access to the cylinders. A wrench or ratchet set is necessary for removing the spark plug wire or coil pack. Ensure the engine is warm, as this provides more accurate readings. Safety gear such as gloves and goggles is crucial to protect against potential hazards. A throttle holder or assistant may be needed to keep the engine running during the test. Proper tools ensure the test is conducted safely and effectively, providing reliable results for diagnosing engine issues.

Pre-Test Checks and Safety Precautions

Before conducting a manual compression test, perform pre-test checks to ensure safety and accuracy. Check the engine oil level and condition, as low or dirty oil can affect test results. Ensure the battery is fully charged to prevent mid-test power loss. Coolant and fuel levels should also be verified. Safety precautions are critical; wear protective gear like gloves and goggles to guard against potential engine kickback or debris. Disconnect the ignition coil to prevent accidental engine start-up; Clear the area around the engine to avoid tripping hazards. Familiarize yourself with the test procedure to minimize errors. Keep a fire extinguisher nearby as a precaution. By following these steps, you can perform the test safely and obtain reliable results. Proper preparation is key to a successful and accident-free manual compression test. Always prioritize safety to avoid injuries and ensure accurate engine diagnosis.

Performing the Manual Compression Test

The manual compression test involves removing spark plugs, installing a compression gauge, and cranking the engine to measure cylinder pressure. Repeat for each cylinder, ensuring consistent cranking speed and comparing readings for accuracy.

Step-by-Step Procedure

  1. Ensure the engine is warm for accurate results.
  2. Disconnect the ignition coil to prevent firing during the test.
  3. Remove the spark plug from the first cylinder using a spark plug wrench.
  4. Attach the compression gauge to the spark plug socket and crank the engine for 5-7 seconds.
  5. Record the compression reading and repeat for all cylinders.
  6. Compare readings to identify variations, which may indicate issues like worn piston rings or blown head gaskets.
  7. Perform a leak-down test if low compression is detected for precise diagnosis.

Following these steps ensures a thorough and accurate manual compression test, helping to pinpoint engine problems effectively.

Interpreting the Results

Compression readings indicate engine health. Normal readings typically range between 100-150 PSI. Low compression suggests issues like worn piston rings or damaged valves. Consistent readings across cylinders ensure proper engine performance and reliability.

Understanding Compression Readings

Compression readings are crucial for assessing engine health. A typical healthy engine shows readings between 100-150 PSI, indicating proper sealing of cylinders. Variations of more than 10% between cylinders suggest potential issues, such as worn piston rings or damaged valves. Low compression across all cylinders may point to a faulty head gasket or cracked cylinder head. High compression can indicate carbon buildup or over-compression. Consistent readings ensure even engine performance and efficiency. Understanding these values helps diagnose problems accurately, guiding necessary repairs. Always compare results to manufacturer specifications for precise analysis.

Identifying Potential Issues

A manual compression test helps identify engine problems by analyzing pressure readings. Low compression in one cylinder may indicate a faulty piston ring, cracked cylinder wall, or blown head gasket. If multiple cylinders show low compression, it could signal a blocked intake manifold or faulty valves. High compression readings might reveal carbon buildup or over-compression. Significant differences between cylinders (more than 10%) suggest uneven wear or damage. For example, a cylinder with 50 PSI while others are at 120 PSI points to a serious issue, such as a cracked head or leaking valve. Comparing readings across all cylinders helps pinpoint the source of the problem. Always refer to the manufacturer’s specifications for baseline values. This test is essential for diagnosing engine performance issues, ensuring timely repairs, and maintaining optimal engine health. By interpreting the results accurately, mechanics can address problems before they escalate into costly damages.

Bybeatrice

2011 chevy malibu manual

The 2011 Chevy Malibu manual is a comprehensive guide designed to help owners understand and maintain their vehicle effectively, ensuring optimal performance and longevity of the car․

Overview of the 2011 Chevy Malibu

The 2011 Chevy Malibu is a mid-size sedan known for its balance of comfort, performance, and affordability․ It offers a smooth driving experience with its refined engine options, including a 2․4L Ecotec inline-4 and a 3․6L V6 engine․ The Malibu features a 6-speed automatic transmission, providing seamless shifting and improved fuel efficiency․ With an EPA rating of up to 33 mpg on the highway, it is a practical choice for daily commuting and long trips alike․ The interior is designed for comfort, offering ample legroom, premium seating materials, and advanced technology features like Bluetooth connectivity and a touchscreen infotainment system․ Safety is a priority, with the Malibu earning top ratings in crash tests and featuring standard airbags, stability control, and anti-lock brakes․ Its sleek exterior design and quiet cabin make it a standout in its class, appealing to families and professionals seeking reliability and style․

Importance of the Owner’s Manual

The owner’s manual for the 2011 Chevy Malibu is an essential resource for drivers, providing detailed information about the vehicle’s operation, maintenance, and safety features․ It serves as a comprehensive guide to understanding the car’s capabilities and ensuring proper use․ By reading the manual, owners can learn how to optimize fuel efficiency, troubleshoot common issues, and perform routine maintenance tasks․ This reduces the risk of premature wear and tear, potentially saving money on repairs․ Additionally, the manual includes critical safety information, such as proper seating positions, airbag functionality, and emergency procedures․ It also outlines warranty details and recommended maintenance schedules, helping owners keep their vehicle in peak condition․ Regularly referencing the manual ensures a safer, more enjoyable driving experience and extends the lifespan of the car․ It is a must-have for both new and experienced Malibu owners․

Key Features and Specifications

The 2011 Chevy Malibu offers a 2․4L Ecotec engine, 6-speed automatic transmission, and an estimated EPA rating of 22 MPG city and 33 MPG highway․ It features a spacious interior, comfortable seating, and advanced technology options, making it a reliable and stylish choice for drivers․

Engine and Performance

The 2011 Chevy Malibu is equipped with a 2․4L Ecotec Inline-4 cylinder engine, delivering 182 horsepower at 6,700 RPM and 172 lb-ft of torque at 4,900 RPM․ This engine is paired with a 6-speed automatic transmission, offering smooth shifting and optimal fuel efficiency․ The Malibu also features a front-wheel-drive system, providing stable handling and traction․ The engine is designed with fuel-saving technologies, such as Variable Valve Timing, which enhances performance while reducing fuel consumption․ Drivers can expect an estimated EPA rating of 22 MPG in the city and 33 MPG on the highway, making it a practical choice for both daily commuting and long-distance travel․ The Malibu’s suspension system, including a MacPherson strut front suspension and multi-link rear suspension, ensures a comfortable and responsive ride, balancing sportiness with everyday usability․

Transmission and Fuel Efficiency

The 2011 Chevy Malibu features a 6-speed automatic transmission with TapShift control, allowing drivers to manually shift gears for enhanced performance․ This transmission is designed to optimize fuel efficiency while providing smooth acceleration․ The Malibu achieves an EPA-estimated 22 MPG in city driving and 33 MPG on the highway, making it a fuel-efficient choice for commuters․ The combination of the 2․4L Ecotec engine and the advanced transmission system ensures balanced power delivery and reduced fuel consumption․ Additionally, the engine’s Variable Valve Timing technology contributes to improved fuel economy without sacrificing performance․ The Malibu’s front-wheel-drive layout further enhances traction and stability, ensuring a reliable and efficient driving experience․ These features make the 2011 Chevy Malibu a practical and economical vehicle for everyday use․

Interior and Technology Features

The 2011 Chevy Malibu boasts a refined interior designed for comfort and functionality․ The cabin features premium materials, with soft-touch surfaces and chrome accents that enhance its modern appeal․ The seats are supportive and spacious, offering ample legroom and adjustability for both front and rear passengers․ The Malibu also includes advanced technology features such as the Chevrolet MyLink infotainment system, which supports Bluetooth connectivity, USB ports, and a high-resolution touchscreen display for seamless control of music, navigation, and hands-free calling․ Optional upgrades include a rearview camera, remote start, and a Pioneer premium audio system․ These features make the 2011 Malibu a well-equipped vehicle that balances comfort, technology, and practicality for everyday driving․

Maintenance and Repair

Regular maintenance and timely repairs are crucial for ensuring the 2011 Chevy Malibu’s performance and longevity․ Follow the manual’s guidelines for inspections and repairs to keep your vehicle running smoothly․

Scheduled Maintenance Requirements

The 2011 Chevy Malibu manual outlines specific maintenance schedules to ensure optimal performance․ Regular oil changes, tire rotations, and inspections are recommended at intervals of 5,000 to 7,500 miles․ Brake pads, belts, and fluids should be checked periodically․ The air filter should be replaced every 15,000 miles; Spark plugs need replacement at 100,000 miles․ Proper maintenance helps prevent costly repairs and extends the vehicle’s lifespan․ Adhering to the manual’s schedule ensures reliability and safety on the road․ Always refer to the manual for detailed guidelines and recommendations tailored to the Malibu’s engine and drivetrain․ Consistent maintenance also helps maintain fuel efficiency and overall vehicle health․ Keep track of services to ensure everything is up-to-date․ Regular checks can prevent minor issues from becoming major problems․ Stay proactive with your Malibu’s care for years of trouble-free driving․

Common Repair Issues

The 2011 Chevy Malibu has been reported to have certain recurring repair issues․ One common problem is related to the transmission, where some owners have experienced hard shifting or slipping between gears․ This issue often stems from worn-out clutch packs or solenoid malfunctions․ Another frequent concern is the engine’s fuel pressure regulator, which can fail, leading to stalling or rough idling․ Additionally, some models have had issues with the electronic throttle control, requiring the throttle body to be cleaned or replaced․ Lastly, the power steering system has been known to malfunction, causing a loss of assist and increased steering effort․ Regular maintenance and timely repairs can help mitigate these problems, ensuring the vehicle remains reliable and safe to drive․

Troubleshooting Guide

The 2011 Chevy Malibu manual provides detailed steps for diagnosing common issues, such as warning light interpretations, sensor malfunctions, and performance problems, to help drivers resolve concerns efficiently․

  • Check warning lights and refer to the manual for interpretations․
  • Use diagnostic tools to identify fault codes․
  • Consult a professional if issues persist․

Diagnosing Common Problems

Diagnosing common problems in the 2011 Chevy Malibu can be streamlined using the manual’s troubleshooting section․ This guide helps identify issues such as warning light activations, engine performance concerns, or transmission malfunctions․ By following step-by-step instructions, drivers can pinpoint the root cause of problems like poor fuel efficiency, rough idling, or unexpected noises․ The manual also provides codes for error messages displayed on the dashboard, enabling owners to understand the severity of the issue․ For complex problems, the manual advises consulting a certified technician to ensure proper repairs․ Regular checks and adherence to maintenance schedules can prevent many common issues from arising․ This section empowers drivers to address concerns proactively, reducing the need for costly repairs and ensuring a smooth driving experience․

  • Check dashboard warning lights for specific codes․
  • Use diagnostic tools like OBD-II scanners for detailed insights․
  • Refer to the manual for interpretations of fault codes․
  • Address minor issues promptly to prevent escalation․
  • Consult a professional for complex or recurring problems․

Resetting Warning Lights

Resetting warning lights in the 2011 Chevy Malibu is a straightforward process outlined in the manual․ Many dashboard lights, such as the “Check Engine” light, can be reset using an OBD-II scanner or by following manual procedures․ For example, turning the ignition key to the “ON” position without starting the engine, then pressing and holding the trip reset button until the light turns off․ Some lights, like the oil change indicator, reset automatically after completing the recommended service; However, if a light persists, it may indicate a recurring issue requiring attention․ Always refer to the manual for specific instructions to avoid potential damage or misleading diagnostics․ Properly resetting warning lights ensures accurate monitoring of the vehicle’s condition and helps maintain its performance and safety․

  • Use an OBD-II scanner for precise reset procedures․
  • Follow manual steps for turning off non-critical lights․
  • Address underlying issues if lights reappear․
  • Consult the manual for detailed reset instructions․
Bybeatrice

sapc provider manual

The SAPC Provider Manual is a comprehensive guide for Substance Use Disorder (SUD) treatment providers, outlining policies, compliance, and best practices for delivering high-quality services.

1.1 Purpose and Scope of the Manual

The SAPC Provider Manual is designed to guide Substance Use Disorder (SUD) treatment providers in Los Angeles County. Its purpose is to ensure compliance with federal, state, and local regulations while outlining documentation, billing, and training requirements. The manual serves as a standardized reference for all administrative and direct service staff, ensuring consistent and high-quality care delivery.

1.2 Intended Audience

This manual is intended for all SAPC network providers, including administrative and direct service staff. It serves as a reference for program managers, contractors, and network providers delivering Substance Use Disorder (SUD) treatment services. The manual ensures compliance with federal, state, and local regulations, aiding providers in understanding their roles and responsibilities within the SUD system of care in Los Angeles County.

1.3 Key Updates in the Latest Version

The latest version of the SAPC Provider Manual includes updated compliance guidelines, revised billing procedures, and new documentation requirements. It also incorporates changes in federal and state regulations, ensuring providers stay informed about policy updates and operational improvements. These updates aim to enhance service delivery and maintain alignment with current standards for SUD treatment programs in Los Angeles County.

SAPC Provider Manual Structure and Navigation

The manual is logically organized with clear sections, including a detailed table of contents, making it easy for providers to navigate and access essential information efficiently.

2.1 Table of Contents

The Table of Contents provides a detailed outline of the manual, ensuring quick access to key sections such as eligibility, core services, documentation, compliance, and training resources, aiding providers in efficiently locating specific information and guidance.

2.2 How to Use the Manual Effectively

To use the manual effectively, review updates regularly, utilize the table of contents for quick navigation, and ensure compliance with federal, state, and local regulations. Familiarize yourself with key sections like eligibility, documentation, and billing procedures. Refer to training resources for additional support, and always verify the latest version for the most accurate information.

Eligibility and Enrollment for SAPC Providers

Eligibility criteria and enrollment processes ensure providers meet regulatory standards to deliver approved services. Compliance with federal, state, and local requirements is mandatory for participation.

3.1 Requirements for Becoming a SAPC Provider

To become a SAPC provider, organizations must meet specific criteria, including obtaining a Drug Medi-Cal (DMC) contract and maintaining proper licensing. Staff must hold necessary qualifications, and providers should complete required training programs. Adherence to federal, state, and local regulations is mandatory, along with compliance with documentation standards. Participation in SAPC orientation and ongoing updates ensures alignment with program expectations.

3.2 Enrollment Process

The enrollment process involves submitting a complete application with required documentation, such as proof of licensing and certification. SAPC reviews the application for compliance with federal and state regulations. Once approved, providers must complete orientation training and sign a participation agreement. Ongoing adherence to program guidelines and periodic audits ensure continued eligibility and certification as a SAPC provider.

Core Services and Programs Offered by SAPC

SAPC offers comprehensive substance use disorder treatment services, including outpatient programs, medication-assisted therapy, and prevention initiatives to reduce substance abuse and promote community well-being.

4.1 Substance Use Disorder Treatment Services

SAPC provides evidence-based treatment services for substance use disorders, including outpatient programs, medication-assisted therapy, and individual counseling. These services aim to support recovery, reduce relapse, and improve overall well-being for individuals struggling with addiction. Providers are required to adhere to federal, state, and local regulations to ensure high-quality care delivery. Referrals and continuum of care are emphasized to address diverse patient needs effectively.

4.2 Prevention and Control Programs

SAPC offers prevention programs focused on reducing substance abuse through community outreach, education, and early intervention. These initiatives target at-risk populations, promoting healthier choices and lifestyles. Providers collaborate with local organizations to distribute resources and support, ensuring widespread reach and impact. Evidence-based strategies are emphasized to address root causes and prevent substance use disorders before they escalate.

Documentation and Billing Guidelines

Accurate documentation and adherence to billing procedures are crucial for reimbursement and compliance. Providers must maintain detailed records and follow SAPC guidelines to ensure timely payments.

5.1 Necessary Forms and Documentation

Providers must complete and maintain specific forms, such as the Client Admission Form, Treatment Plan Template, and Progress Notes. These documents ensure compliance with federal, state, and local regulations; Accurate and detailed records are essential for patient care continuity, billing, and audits. Electronic health records (EHRs) are recommended for streamlined documentation and confidentiality. Proper storage and retention of files are critical for adherence to SAPC guidelines.

5.2 Billing Procedures

Providers must submit claims using standardized billing codes, such as ICD-10 and CPT, to ensure accurate reimbursement. Claims must include detailed patient information, service dates, and codes. Adherence to federal and state regulations is mandatory. Timely submission of claims within specified deadlines is critical for uninterrupted payment processes. Providers should verify billing compliance regularly to avoid discrepancies or delays in reimbursement.

Training and Resources for Providers

Providers can access orientation programs, training videos, and resource guides to enhance service delivery. These tools ensure compliance with regulations and improve provider efficiency effectively.

6.1 Orientation and Training Programs

The SAPC Provider Manual offers a comprehensive orientation program designed for new providers. This program includes an online course with a provider orientation video featuring voice-over narration and closed captions for accessibility. The training focuses on core values, service delivery standards, and regulatory compliance, ensuring providers are well-prepared to meet the needs of their clients effectively.

6.2 Access to Additional Resources

Providers can access various resources, including training tools, bulletins, and forms, to support service delivery. The Sage 837P Companion Guide and other manuals are available for detailed guidance. These resources, found on the official SAPC website, ensure providers stay updated on documentation, billing, and compliance requirements, enhancing their ability to deliver effective care.

Compliance and Regulatory Requirements

The SAPC Provider Manual ensures adherence to federal, state, and local regulations governing substance use disorder services, providing clear guidelines for compliance and legal obligations.

7.1 Federal, State, and Local Regulations

The SAPC Provider Manual outlines regulatory requirements for federal, state, and local compliance, ensuring adherence to laws governing substance use disorder services. Providers must comply with Drug Medi-Cal contracts and Los Angeles County-specific mandates, adhering to ethical standards and legal obligations to maintain program integrity and patient care quality effectively.

7.2 Audit and Monitoring Processes

Regular audits and monitoring ensure compliance with federal, state, and local regulations. The SAPC Provider Manual mandates thorough documentation reviews and site visits to verify adherence to standards. These processes aim to maintain service quality, identify discrepancies, and ensure consistency in delivering substance use disorder treatment, aligning with regulatory requirements and best practices outlined in the manual.

Troubleshooting Common Issues

This section provides guidance for resolving common challenges, such as billing discrepancies and documentation errors, ensuring providers can address issues efficiently and maintain compliance with SAPC standards.

8.1 Frequently Asked Questions

This section addresses common inquiries about eligibility, billing, and compliance, offering clear solutions to everyday challenges. It includes guidance on resolving documentation errors, understanding payment processes, and navigating program requirements. Providers can find quick answers to frequently encountered issues, ensuring smooth operations and adherence to SAPC standards. Additional resources are also highlighted for further support.

8.2 Resolving Discrepancies

This section outlines steps to address conflicts or inconsistencies in documentation, billing, or service delivery. Providers can review updated manual versions, contact SAPC support, or refer to compliance guidelines for resolution. Documenting issues thoroughly and following established protocols ensures timely and accurate problem-solving, maintaining program integrity and provider accountability. Open communication is key to resolving discrepancies efficiently.

Updates and Revisions

The SAPC Provider Manual is periodically updated to reflect policy changes, regulatory requirements, and program improvements; Version 9.0, updated in January 2024, includes revisions to core sections.

9.1 How to Stay Informed About Changes

Providers can stay informed about updates through the official SAPC website, which offers access to the latest versions of the manual, bulletins, and forms. Subscribing to SAPC notifications ensures timely awareness of revisions. Regularly reviewing the manual and attending provider meetings are also effective ways to stay updated on changes and compliance requirements.

9.2 Version History

The SAPC Provider Manual is updated periodically, with version changes reflecting policy updates, regulatory adjustments, and program enhancements. Version 9.0, for instance, includes new compliance guidelines and expanded documentation requirements. Providers can track changes through summaries in each updated version, ensuring adherence to current standards. Archived versions are available for reference, highlighting evolutionary improvements in service delivery and regulatory alignment over time.

The SAPC Provider Manual serves as an essential guide for delivering high-quality Substance Use Disorder treatment services, ensuring compliance with regulations and fostering continuous improvement in care delivery.

10.1 Importance of Adherence to the Manual

Adherence to the SAPC Provider Manual is critical for ensuring compliance with federal, state, and local regulations. It guarantees consistent, high-quality care delivery and maintains program integrity. Non-compliance may result in audits, penalties, or service disruptions. Providers must stay updated on manual revisions to align practices with current standards and legal requirements, ensuring effective and ethical service delivery.

10.2 Final Tips for Effective Utilization

Regularly review the SAPC Provider Manual for updates and clarifications. Actively participate in training sessions to enhance understanding. Collaborate with colleagues and seek support when needed. Stay informed about regulatory changes and incorporate feedback to improve service delivery. By adhering to these practices, providers can optimize manual utilization, ensuring compliance and delivering high-quality care effectively.

Bybeatrice

chrysler town country 2010 manual

The 2010 Chrysler Town & Country manual provides essential guidance for owners, detailing key systems, features, and best practices for optimal vehicle maintenance and performance.

Importance

The Chrysler Town & Country 2010 manual is crucial for understanding vehicle features, ensuring safety, and performing proper maintenance. It provides detailed guidelines for troubleshooting common issues, optimizing performance, and extending the vehicle’s lifespan, making it an indispensable resource for owners seeking to maximize their driving experience and protect their investment.

Features

The 2010 Chrysler Town & Country manual highlights innovative features like the Stow ‘n Go seating system, offering versatile storage solutions. It also details the Swivel ‘n Go option, premium interior amenities, and advanced safety technologies. The manual further explores leather-trimmed seats, woodgrain accents, and chrome details, showcasing the vehicle’s comfort and style.

Maintenance

Regular maintenance is crucial for the 2010 Chrysler Town & Country to ensure optimal performance and longevity. The manual outlines scheduled services and DIY tips to keep your vehicle in prime condition.

Scheduled

The 2010 Chrysler Town & Country manual outlines a detailed scheduled maintenance plan, including oil changes, tire rotations, and filter replacements at specific intervals. Staying on schedule ensures optimal performance, fuel efficiency, and helps prevent costly repairs. Regular checks also maintain the vehicle’s warranty compliance and overall reliability over time.

DIY

The manual provides comprehensive DIY repair guidance, empowering owners to perform routine maintenance tasks such as replacing air filters, checking fluids, and inspecting belts. Clear instructions and diagrams enable confident execution of minor repairs, reducing reliance on professional mechanics and saving costs while maintaining vehicle health and performance effectively over time.

Features

The 2010 Chrysler Town & Country features the innovative Stow ‘n Go seating and Swivel n Go system, offering versatile storage and seating flexibility. Mopar accessories enhance customization, while interior touches like leather-trimmed seating and woodgrain accents provide comfort and style, making it ideal for families seeking practicality and elegance.

Stow

The Stow ‘n Go system in the 2010 Chrysler Town & Country offers best-in-class storage solutions. This feature allows seats to fold seamlessly into the floor, creating ample cargo space. It enhances versatility, making it ideal for families needing to balance passenger comfort with cargo requirements. The system is user-friendly and maximizes interior functionality effectively.

Mopar

Chrysler Accessories by Mopar offer authentic, high-quality parts designed specifically for the 2010 Town & Country. These accessories, including storage solutions and styling enhancements, are engineered to customize and protect your vehicle. Mopar products ensure perfect fitment and durability, enhancing both functionality and aesthetic appeal while maintaining the vehicle’s original warranty standards. They are a trusted choice for owners.

Troubleshooting

The manual helps identify and resolve common issues with the 2010 Chrysler Town & Country, ensuring efficient problem-solving and optimal vehicle performance through detailed diagnostic guidance.

Common

The 2010 Chrysler Town & Country manual highlights frequent issues like engine performance problems and electrical system malfunctions. It provides detailed diagnostic steps and solutions to address these concerns, ensuring owners can identify and resolve issues efficiently to maintain their vehicle’s reliability and safety on the road.

Technical

The 2010 Chrysler Town & Country manual provides detailed engine specifications, including the 3.3L, 3.8L, and 4.0L V6 options, along with transmission details and performance metrics for optimal operation.

Specs

The 2010 Chrysler Town & Country features a 3.3L V6 engine producing up to 175 horsepower and 205 lb-ft of torque. It includes a 6-speed automatic transmission, offering smooth shifting and efficient fuel economy. The vehicle boasts a 20.6-gallon fuel tank and a towing capacity of up to 3,600 lbs. With front-wheel drive as standard, it also offers optional all-wheel drive for enhanced traction. Dimensions include a 121.2-inch wheelbase and a 202.5-inch overall length, ensuring ample space for passengers and cargo. Performance metrics emphasize comfort and reliability, making it a versatile choice for families and road trips.

Safety

The 2010 Chrysler Town & Country emphasizes safety with features like seven airbags, electronic stability control, and anti-lock brakes. Regular maintenance ensures these systems function optimally, protecting occupants in all conditions. Always follow manual guidelines for inspections and repairs to maintain safety standards and vehicle reliability. Proper usage of seat belts and child restraints is strongly recommended to enhance passenger protection. Adhering to the manual’s safety tips helps prevent accidents and ensures a secure driving experience. By following the outlined precautions, owners can maximize safety and enjoy a worry-free journey. The vehicle’s robust structure and advanced safety features provide peace of mind for drivers and passengers alike; Stay informed about recalls and updates to keep your vehicle safe and up-to-date. Prioritize safety inspections to identify potential issues early and address them promptly. A well-maintained vehicle is a safer vehicle, ensuring the well-being of everyone on board. Remember, safety is a shared responsibility between the vehicle and its driver. Always be vigilant and proactive in maintaining a safe driving environment. The Chrysler Town & Country is designed with safety in mind, offering a reliable and secure ride for families and travelers. Trust the manual to guide you in keeping your vehicle safe and roadworthy. Safety is not just a feature; it’s a commitment to protecting what matters most.

Tips

  • Regularly check and maintain tire pressure for optimal performance and safety.
  • Use genuine Mopar parts for repairs to ensure compatibility and durability.
  • Familiarize yourself with the Stow ‘n Go system for efficient cargo management.
  • Always refer to the manual for correct seating and storage configurations.
  • Follow recommended maintenance schedules to prevent mechanical issues.
  • Keep emergency tools and a first-aid kit in the vehicle.
  • Ensure all passengers wear seat belts for enhanced safety.
  • Periodically inspect brakes and suspension for optimal performance.

By following these tips, you can maximize the performance, safety, and longevity of your Chrysler Town & Country.

The Chrysler Town & Country 2010 manual is a comprehensive guide designed to enhance your ownership experience. It provides detailed insights into maintenance, features, and troubleshooting, ensuring your vehicle performs at its best. By following the manual’s instructions, you can maximize safety, efficiency, and longevity, making it an indispensable resource for every owner.

The Chrysler Town & Country 2010 manual is a comprehensive guide for owners, offering detailed insights into features, maintenance, and troubleshooting to ensure optimal vehicle performance and safety.

Importance of the Manual

The Chrysler Town & Country 2010 manual is a comprehensive guide for owners, offering detailed insights into features, maintenance, and troubleshooting. It ensures safe and enjoyable operation of the vehicle by providing clear instructions and essential recommendations. This resource is indispensable for understanding and optimizing the performance, safety, and longevity of the 2010 model.

Key Features of the 2010 Model

The 2010 Chrysler Town & Country boasts innovative features like the Swivel ‘n Go seating system and Stow ‘n Go storage, offering unparalleled versatility. It also includes leather-trimmed seating, woodgrain accents, and chrome details, enhancing comfort and style. The model also features Chrysler Accessories by Mopar, providing customization options for a personalized driving experience, making it a standout choice in its class.

Maintenance and Repair

The Chrysler Town & Country 2010 manual emphasizes regular maintenance for optimal performance. It provides detailed schedules and DIY guidance, ensuring longevity and reliability for owners.

Scheduled Maintenance Requirements

The manual outlines a comprehensive maintenance schedule for the 2010 Chrysler Town & Country. It includes oil changes, filter inspections, tire rotations, and battery checks, ensuring optimal vehicle performance and longevity.

DIY Repair and Service Guidance

The manual offers detailed DIY guidance for minor repairs and maintenance, empowering owners to handle tasks like oil changes, filter replacements, and basic repairs confidently. Clear instructions and diagrams ensure ease of understanding, helping to save time and money while maintaining the vehicle’s performance and longevity.

Features and Accessories

The 2010 Chrysler Town & Country boasts Stow ‘n Go seating and Mopar accessories, enhancing versatility, storage, and personalized styling for a premium ownership experience.

Stow ‘n Go Seating and Storage System

The 2010 Chrysler Town & Country features the Stow ‘n Go seating system, offering unparalleled versatility with foldable second-row seats that seamlessly integrate into the floor. This innovative design maximizes cargo space while maintaining passenger comfort. Additional storage compartments and cleverly designed bins further enhance the vehicle’s practicality, making it ideal for families and active lifestyles.

Chrysler Accessories by Mopar

Chrysler Accessories by Mopar offer a wide range of authentic, high-quality components designed specifically for the 2010 Town & Country. These include styling enhancements, functional upgrades, and innovative storage solutions that personalize and enhance your vehicle. Mopar’s engineered accessories ensure seamless integration and durability, maintaining the integrity of your Chrysler investment while adding unique touches to meet your lifestyle needs.

Troubleshooting Common Issues

The manual addresses frequent concerns like transmission issues, sensor malfunctions, and electrical problems, providing step-by-step solutions and diagnostic guidance for the 2010 Chrysler Town & Country.

Identifying and Resolving Common Problems

The 2010 Chrysler Town & Country manual helps owners identify and resolve issues like faulty sensors, transmission slipping, and electrical system malfunctions. It offers detailed diagnostic steps and repair solutions, ensuring drivers can address problems efficiently and safely, minimizing downtime and maintaining vehicle performance.

Technical Specifications

The 2010 Chrysler Town & Country features a 3.3L V6 engine, optional 3.8L V6, or 4.0L V6, paired with a 6-speed automatic transmission. It offers front-wheel drive and an optional all-wheel drive system, with a maximum towing capacity of up to 3,800 lbs.

Engine, Transmission, and Performance Details

The 2010 Chrysler Town & Country offers a 3.3L V6 engine, producing 175 horsepower and 205 lb-ft of torque. It also features an optional 3.8L V6 with 197 horsepower and an available 4.0L V6 delivering 251 horsepower. All engines are paired with a 6-speed automatic transmission, providing smooth shifting and efficient performance across all driving conditions.

Safety Tips and Precautions

Always wear seat belts and ensure all passengers are properly secured. Use child restraints as recommended. Follow the manual’s guidelines to prevent accidents and ensure safe driving.

Essential Safety Guidelines for Owners

Owners must follow the manual’s safety recommendations, including proper seatbelt usage, child restraint installation, and regular checks of airbags and brakes. Ensure all passengers are secured and avoid distractions while driving to maintain safety and prevent accidents. Regular maintenance ensures your vehicle operates safely and efficiently, protecting you and your passengers on the road.

The Chrysler Town & Country 2010 manual serves as a comprehensive guide for owners, offering detailed insights into features, maintenance, and troubleshooting. By following the manual’s instructions, owners can ensure reliability, safety, and optimal performance of their vehicle. This resource is an indispensable tool for making informed decisions and enhancing the ownership experience.

Bybeatrice

delta-q charger manual

Safety Precautions and Instructions

Always follow safety guidelines when handling Delta-Q chargers to avoid injury or damage. Ensure proper ventilation, avoid water exposure, and use correct charging algorithms for your battery type. Read the manual thoroughly before operation.

  • Avoid overcharging, as it can damage batteries and pose safety risks.
  • Wear protective gear when working with electrical systems.
  • Keep the charger away from flammable materials and extreme temperatures.
  • Never modify the charger without authorization.
  • Follow all warnings and instructions provided in the manual.

Failure to comply may result in serious injury or equipment damage. Always prioritize safety when working with electrical systems.

1.1 General Safety Guidelines

Safety is paramount when working with Delta-Q chargers. Always disconnect the power source before performing maintenance or repairs. Ensure proper installation and grounding to prevent electrical hazards. Avoid exposure to water or moisture, as this can lead to electrical shock or equipment damage. Follow all manufacturer instructions and guidelines for charging and storage. Regularly inspect the charger and cables for damage or wear. Keep the charging area clean and well-ventilated to prevent overheating. Never overload the charger beyond its rated capacity, as this can cause malfunction or fire hazards. Properly train personnel on charger operation and emergency procedures. Adhere to all local electrical codes and regulations. Failure to follow these guidelines may result in serious injury, equipment damage, or void the warranty. Always prioritize caution when handling electrical systems.

1.2 Specific Warnings for Delta-Q Chargers

Delta-Q chargers contain high voltage, posing lethal risks if mishandled. Never touch electrical components without proper insulation or protective gear. Avoid altering charger settings without authorization, as this can damage the unit or battery. Ensure the charger is correctly matched to the battery type and capacity to prevent overheating or explosions. Keep children and unauthorized individuals away from the charging area. Always use genuine Delta-Q accessories to maintain safety and performance. Misuse or unauthorized modifications can lead to severe injury or equipment failure. Regularly check for firmware updates to ensure optimal functionality and safety compliance. Failure to adhere to these warnings may result in permanent damage or void the warranty. Always refer to the user manual for specific warnings and precautions.

Product Overview and Features

Delta-Q chargers are high-efficiency, reliable solutions designed for industrial and electric vehicle applications, offering advanced charging algorithms, compact designs, and high-performance capabilities to meet diverse energy needs effectively.

2.1 Key Features of Delta-Q Chargers

Delta-Q chargers are renowned for their high efficiency, compact design, and advanced charging algorithms. They support multiple battery types, including lithium and lead-acid, and offer customizable profiles for optimal charging. Built-in diagnostic tools and robust construction ensure reliability in industrial environments. The sealed enclosure protects against dust, mud, and water, making them suitable for harsh conditions and ensuring long-term durability and performance.

2.2 Compatible Models (QuiQ, IC Series, RQ Series)

Delta-Q chargers are compatible with various models, including the QuiQ, IC Series, and RQ Series. The QuiQ is a 1kW charger ideal for industrial applications. The IC Series includes IC650, IC900, and IC1200, known for their reliability and versatility. The RQ Series, such as the RQ350, offers high efficiency and durability for electric vehicles and industrial machines, ensuring compatibility with diverse power requirements and environments.

Installation and Setup

Ensure proper installation by following the manual’s guidelines. Verify electrical connections, mount securely, and perform pre-installation checks to ensure compatibility and safety. Refer to the manual for specific setup instructions.

  • Mount the charger in a well-ventilated area.
  • Connect batteries and power sources correctly.
  • Test the charger before full operation.

3.1 Step-by-Step Installation Guide

Begin by preparing the installation site, ensuring a clean, dry, and well-ventilated area. Mount the charger securely, following the manual’s guidelines. Connect the battery terminals carefully, respecting polarity. Attach the power supply and any additional accessories as specified. Perform a final check to ensure all connections are secure and properly insulated. Power on the charger and test functionality to confirm successful installation.

3.2 Pre-Installation Checks and Requirements

Before installing the Delta-Q charger, ensure compatibility with your battery type and voltage. Verify all components are undamaged and suitable for the environment. Check power supply requirements and ensure proper grounding. Review local electrical codes and safety standards. Prepare necessary tools and documentation. Ensure the area is clear of hazards and accessible for maintenance. Follow all manufacturer guidelines for a safe setup.

Charging Algorithms and Profiles

Delta-Q chargers use advanced algorithms and customizable profiles to optimize battery charging, ensuring efficiency and safety. Select the appropriate profile for your battery type to prevent damage and extend lifespan.

4.1 Understanding Charge Algorithms

Delta-Q chargers utilize sophisticated charge algorithms tailored for various battery types, ensuring optimal performance and longevity. These algorithms automatically adjust current and voltage to match battery needs, preventing overcharging and undercharging. Customizable profiles allow users to configure settings based on specific applications, enhancing efficiency and safety. Understanding these algorithms is crucial for maximizing battery health and overall system reliability.

4.2 Customizing Charging Profiles

Delta-Q chargers allow users to customize charging profiles for specific battery types and applications. This feature enhances charging efficiency and battery longevity. Profiles can be tailored by adjusting voltage, current, and charging stages. Users can store up to 10 profiles, ensuring versatility for different use cases. Refer to the user guide or software tools for detailed configuration instructions to optimize your charging experience.

  • Adjust settings like voltage and current limits.
  • Customize charging stages for optimal performance.
  • Save profiles for quick access and repeated use.

Maintenance and Troubleshooting

Regularly inspect and clean the charger to ensure optimal performance; Check connections and wiring for damage or wear. Refer to the manual for troubleshooting common issues like error codes or charging failures.

  • Clean the charger’s exterior and internal components periodically.
  • Verify all electrical connections are secure and undamaged.
  • Consult diagnostic tools for fault code resolution.

5.1 Routine Maintenance Tasks

Regular maintenance ensures optimal performance and longevity of Delta-Q chargers. Clean the exterior and internal components periodically to prevent dust buildup. Inspect cables and connections for wear or damage. Check for firmware updates and install the latest version. Monitor charging cycles and error codes to address potential issues early. Ensure proper ventilation and operating temperatures are maintained. Schedule annual professional inspections if used in demanding environments. Always follow the manufacturer’s guidelines for maintenance procedures to prevent voiding the warranty. Keep records of all maintenance activities for future reference. This proactive approach minimizes downtime and ensures reliable operation. Proper care extends the lifespan of the charger and enhances safety. Regular checks also help identify and resolve minor issues before they escalate, ensuring continuous productivity and efficiency. By adhering to a consistent maintenance routine, users can maximize the charger’s performance and reliability over time. This section provides a clear, structured approach to maintaining Delta-Q chargers effectively. Always prioritize safety during maintenance tasks. Follow all safety precautions outlined in the manual to avoid accidents or equipment damage. Routine maintenance is essential for sustaining the charger’s efficiency and ensuring safe operation. Proper upkeep also supports environmental compliance and reduces the risk of unexpected failures. Regular maintenance tasks are straightforward and can be performed with basic tools and knowledge. Refer to the manual for detailed instructions and specific recommendations. Maintaining your Delta-Q charger regularly ensures it continues to meet the highest performance standards. This routine care is vital for both the charger’s functionality and user safety. Always keep the charger in good working condition to enjoy uninterrupted service. Proper maintenance also helps in identifying compatibility issues with connected devices or batteries. Regular checks ensure that the charger operates within its specified parameters, preventing overheating or overcharging. By following these maintenance tasks, users can ensure their Delta-Q charger remains reliable and efficient for years. This section emphasizes the importance of routine care in maintaining the charger’s integrity and performance. Always refer to the manual for specific maintenance instructions tailored to your model. Regular maintenance is a critical aspect of owning and operating a Delta-Q charger. It ensures safety, efficiency, and longevity, making it a cornerstone of responsible ownership. Proper upkeep also supports compliance with regulatory standards and environmental guidelines. By prioritizing routine maintenance, users can enjoy optimal performance and peace of mind. This section provides a comprehensive guide to maintaining your Delta-Q charger, ensuring it continues to deliver exceptional results. Always follow the recommended maintenance schedule to protect your investment and ensure safe operation. Proper care and attention to detail are essential for maintaining the charger’s reliability and efficiency. Regular maintenance tasks are designed to be simple yet effective, ensuring the charger operates at its best. By following these guidelines, users can extend the lifespan of their Delta-Q charger and maintain its performance. This routine maintenance is a small investment that yields significant long-term benefits. Always take the time to perform these tasks diligently, as they are crucial for the charger’s functionality and safety. Proper maintenance ensures that the charger continues to meet the demands of your application, providing consistent and reliable service. Regular checks and updates are vital for maintaining the charger’s efficiency and ensuring it remains compatible with evolving battery technologies. By staying proactive with maintenance, users can avoid costly repairs and downtime, keeping their operations running smoothly. Proper maintenance also enhances the charger’s ability to handle varying loads and operating conditions, ensuring it performs consistently in different environments. Regular upkeep is a key factor in maximizing the charger’s potential and ensuring it remains a reliable asset for years to come. Always prioritize routine maintenance to safeguard your investment and maintain peak performance. This section underscores the importance of consistent care in preserving the charger’s functionality and safety. By following these maintenance tasks, users can ensure their Delta-Q charger continues to deliver exceptional results and remain a vital part of their operations. Regular maintenance is not just a recommendation; it is essential for the longevity and reliability of the charger. Always allocate time for these tasks to ensure the charger operates safely and efficiently. Proper care and attention to maintenance details are vital for maintaining the charger’s performance and ensuring it meets the demands of your application. Regular maintenance tasks are designed to be straightforward, allowing users to perform them without specialized tools or expertise. By following these guidelines, users can ensure their Delta-Q charger remains in excellent condition, providing reliable service for years. This routine upkeep is a simple yet effective way to protect your investment and ensure the charger continues to perform at its best. Always remember that maintenance is key to longevity and safety. Proper care ensures that the charger operates within its intended parameters, preventing potential hazards and ensuring optimal performance. Regular maintenance tasks are an essential part of owning and operating a Delta-Q charger, and they play a crucial role in maintaining its reliability and efficiency. By staying committed to routine care, users can enjoy uninterrupted service and peace of mind. This section provides a clear roadmap for maintaining your Delta-Q charger, ensuring it continues to deliver exceptional results and remain a trusted asset in your operations. Always prioritize routine maintenance to safeguard your investment and ensure the charger’s longevity. Proper maintenance is not just about extending the lifespan of the charger; it also enhances safety and performance. Regular checks and updates ensure that the charger remains compatible with evolving technologies and continues to meet the demands of your application. By following these maintenance tasks, users can ensure their Delta-Q charger remains a reliable and efficient tool, providing consistent service for years to come. This routine maintenance is a small but critical investment in the charger’s performance and longevity. Always take the time to perform these tasks diligently, as they are essential for the charger’s functionality and safety. Proper maintenance ensures that the charger continues to operate at its best, delivering the performance and reliability you expect from Delta-Q. Regular upkeep is a simple yet effective way to protect your investment and ensure the charger remains a vital part of your operations. By prioritizing routine maintenance, users can enjoy optimal performance, enhanced safety, and extended longevity of their Delta-Q charger. This section emphasizes the importance of consistent care in preserving the charger’s functionality and ensuring it remains a reliable asset for years to come. Always follow the recommended maintenance schedule to protect your investment and ensure safe operation. Proper care and attention to detail are essential for maintaining the charger’s reliability and efficiency. Regular maintenance tasks are designed to be simple yet effective, ensuring the charger operates at its best; By following these guidelines, users can extend the lifespan of their Delta-Q charger and maintain its performance. This routine maintenance is a small investment that yields significant long-term benefits. Always take the time to perform these tasks diligently, as they are crucial for the charger’s functionality and safety. Proper maintenance ensures that the charger continues to meet the demands of your application, providing consistent and reliable service. Regular checks and updates are vital for maintaining the charger’s efficiency and ensuring it remains compatible with evolving battery technologies. By staying proactive with maintenance, users can avoid costly repairs and downtime, keeping their operations running smoothly. Proper maintenance also enhances the charger’s ability to handle varying loads and operating conditions, ensuring it performs consistently in different environments. Regular upkeep is a key factor in maximizing the charger’s potential and ensuring it remains a reliable asset for years to come. Always prioritize routine maintenance to safeguard your investment and maintain peak performance. This section underscores the importance of consistent care in preserving the charger’s functionality and safety. By following these maintenance tasks, users can ensure their Delta-Q charger continues to deliver exceptional results and remain a vital part of their operations. Regular maintenance is not just a recommendation; it is essential for the longevity and reliability of the charger. Always allocate time for these tasks to ensure the charger operates safely and efficiently. Proper care and attention to maintenance details are vital for maintaining the charger’s performance and ensuring it meets the demands of your application. Regular maintenance tasks are designed to be straightforward, allowing users to perform them without specialized tools or expertise. By following these guidelines, users can ensure their Delta-Q charger remains in excellent condition, providing reliable service for years. This routine upkeep is a simple yet effective way to protect your investment and ensure the charger continues to perform at its best. Always remember that maintenance is key to longevity and safety. Proper care ensures that the charger operates within its intended parameters, preventing potential hazards and ensuring optimal performance. Regular maintenance tasks are an essential part of owning and operating a Delta-Q charger, and they play a crucial role in maintaining its reliability and efficiency. By staying committed to routine care, users can enjoy uninterrupted service and peace of mind; This section provides a clear roadmap

and Additional Resources

5.2 Common Issues and Solutions

Common issues with Delta-Q chargers include error codes, charging failures, and overheating. Check connections for looseness or damage and ensure proper ventilation. Reset the charger if it stops working. Update firmware to resolve software-related issues. Consult the troubleshooting guide for specific error codes. Contact Delta-Q support for persistent problems. Regular maintenance and correct usage prevent most issues. Always refer to the manual for detailed solutions.

  • Error codes: Check the manual for code meanings and solutions.
  • Charging failures: Verify battery compatibility and connection integrity.
  • Overheating: Ensure good airflow and check for blockages.
  • Firmware issues: Update to the latest version for optimal performance.

Maintaining proper usage and performing routine checks can prevent many common issues. Always follow the manufacturer’s guidelines for troubleshooting and repairs. If unresolved, contact Delta-Q support for professional assistance. Regular maintenance and adherence to safety guidelines minimize the risk of complications. Proper care ensures reliable operation and extends the charger’s lifespan. Addressing issues promptly prevents further damage.