Category Archive Manuals

Bybeatrice

shakespeare wondereel 1920 model fk manual

The Shakespeare Wondereel 1920 Model FK Manual provides essential guidance on setup, usage, and maintenance, ensuring optimal performance for anglers of all skill levels, enhancing their fishing experience.

1;1 Overview of the Shakespeare Wondereel 1920 Model FK

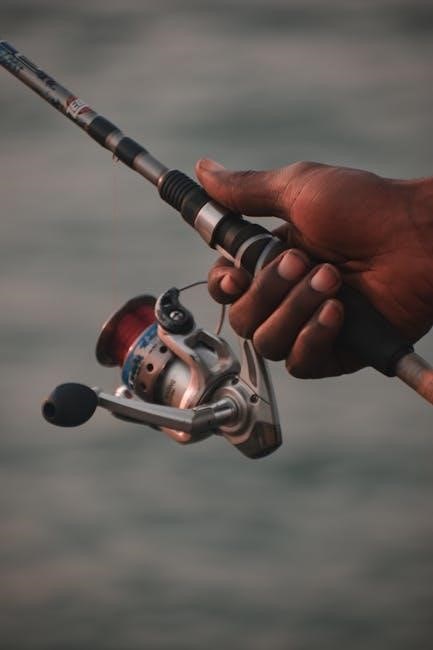
The Shakespeare Wondereel 1920 Model FK is a vintage baitcasting reel known for its smooth operation and durability. Designed for freshwater fishing, it features a robust construction with precision-machined gears and a reliable drag system. Its compact design and user-friendly interface make it suitable for anglers of all skill levels, offering consistent performance for targeting various fish species. The manual complements its functionality, ensuring optimal use and maintenance.

1.2 Importance of the Manual for Optimal Performance

The manual is crucial for maximizing the reel’s potential, offering detailed setup instructions, maintenance tips, and troubleshooting guidance. It provides insights into gear ratio, drag system, and line capacity, ensuring anglers understand the reel’s capabilities. By following the manual, users can enhance casting accuracy, reduce wear, and maintain smooth operation, ultimately improving their overall fishing experience and extending the reel’s lifespan.

Historical Background of the Shakespeare Wondereel 1920 Model FK

The Shakespeare Wondereel 1920 Model FK was introduced in the early 20th century, marking a significant milestone in fishing reel innovation with its durable design and smooth operation.

2.1 Evolution of the Wondereel Series

The Wondereel series, including the 1920 Model FK, evolved significantly over the years, with each iteration introducing improved gear systems and drag mechanisms. The series began in the early 20th century, with models like the GE and FK emerging in the mid-1900s. These reels were known for their durability and smooth operation, making them popular among anglers. The evolution reflects Shakespeare’s commitment to innovation and quality in fishing gear.

2.2 Production Timeline and Date Codes

The Shakespeare Wondereel 1920 Model FK was produced with specific date codes indicating manufacturing years. For example, the HB code corresponds to 1939, while GA and FK denote production in 1946-1950 and 1951, respectively. These codes, often found on the reel’s foot, help collectors and users verify authenticity and determine the production era, ensuring accurate historical context for vintage models.

Technical Specifications of the Shakespeare Wondereel 1920 Model FK

The Shakespeare Wondereel 1920 Model FK features precision-machined gears, a smooth drag system, and a line capacity of up to 200 yards of monofilament, ensuring durability and reliability for freshwater fishing.

3.1 Gear Ratio and Line Capacity

The Shakespeare Wondereel 1920 Model FK offers a gear ratio designed for smooth retrieval and consistent performance. It boasts a line capacity of up to 200 yards of monofilament, making it ideal for targeting various fish species. The combination of its gear ratio and line capacity ensures efficient casting and reeling, providing anglers with a reliable tool for freshwater fishing applications.

3.2 Drag System and Construction Materials

The Shakespeare Wondereel 1920 Model FK features a smooth drag system designed for consistent line tension control. Constructed with durable materials, including precision-machined gears and a robust frame, the reel ensures long-lasting performance. Its high-quality construction enhances reliability and provides anglers with a trustworthy tool for various freshwater fishing scenarios, combining strength and precision for an exceptional fishing experience.

Setting Up and Using the Shakespeare Wondereel 1920 Model FK

The manual provides a comprehensive guide for assembling and setting up the reel, ensuring anglers can easily configure it for optimal performance and enjoy a seamless fishing experience.

4.1 Assembly and Initial Setup

The Shakespeare Wondereel 1920 Model FK manual guides users through a straightforward assembly process, ensuring proper attachment to the rod and initial setup. Instructions include threading the fishing line, setting the drag system, and adjusting the reel’s components for smooth operation. Detailed diagrams and step-by-step directions help anglers configure the reel efficiently, preparing it for optimal performance on the water.

4.2 Adjusting the Drag and Casting Techniques

The Shakespeare Wondereel 1920 Model FK manual offers detailed guidance on adjusting the drag system to suit various fishing conditions. Instructions emphasize proper thumb placement and gentle pressure for controlled casts. Techniques include fine-tuning the drag to match target species and using the level wind feature for even line distribution, ensuring smooth and accurate casting performance every time.

Maintenance and Troubleshooting Tips

Regular cleaning and lubrication of the Shakespeare Wondereel 1920 Model FK ensure smooth operation and longevity. Follow manual guidelines for effective maintenance and troubleshooting.

5.1 Cleaning and Lubricating the Reel

Regularly clean the Shakespeare Wondereel 1920 Model FK with a soft cloth and mild soap to remove dirt and grime. Lubricate gears and bearings with light oil to ensure smooth operation. Avoid heavy oils that may attract dust. Proper maintenance extends the reel’s lifespan and maintains its performance. Follow manual instructions for disassembly and servicing if needed.

5.2 Common Issues and Solutions

Common issues with the Shakespeare Wondereel 1920 Model FK include line tangling and drag slippage. To resolve these, ensure proper spool alignment and clean the drag system regularly. Lubricate moving parts and check for worn components. For persistent problems, refer to the manual for disassembly and servicing instructions. Regular maintenance helps prevent these issues and ensures smooth operation.

Performance and Durability of the Shakespeare Wondereel 1920 Model FK

The Shakespeare Wondereel 1920 Model FK is renowned for its smooth operation and reliability, making it a durable choice for both freshwater and saltwater fishing enthusiasts.

6.1 Smooth Operation and reliabilty

6.1 Smooth Operation and Reliability

The Shakespeare Wondereel 1920 Model FK is designed for seamless performance, featuring precision-machined gears and stainless steel ball bearings that ensure smooth casting and retrieval. Its robust construction provides reliability during long fishing sessions, minimizing fatigue and ensuring consistent results. This makes it an excellent choice for anglers seeking a dependable reel for both freshwater and saltwater applications.

6.2 Long-Term Durability and User Feedback

The Shakespeare Wondereel 1920 Model FK is renowned for its long-term durability, with users praising its robust construction and minimal maintenance needs. Feedback highlights its consistent performance over years, making it a favorite among collectors and anglers alike. Its reliability and craftsmanship have solidified its reputation as a timeless fishing reel, enduring the test of time and heavy use.

The Shakespeare Wondereel 1920 Model FK for Collectors

The Shakespeare Wondereel 1920 Model FK is a sought-after vintage reel, appealing to collectors for its charm, rarity, and historical significance in fishing gear.

7.1 Rarity and Value of Vintage Models

The Shakespeare Wondereel 1920 Model FK is highly sought after by collectors due to its rarity, especially with original packaging and manuals. Mint-condition models with date codes like HB (1939) or FK (1951) command high prices, reflecting their historical significance and limited availability. Collectors prize these reels for their vintage charm and the nostalgia they evoke.

7.2 Tips for Identifying Authentic Models

Authenticating a Shakespeare Wondereel 1920 Model FK involves checking the date codes (e.g., HB for 1939 or FK for 1951), verifying original packaging, and inspecting the reel’s construction. Look for the “Made in USA” stamp, genuine materials like white plastic spool arbors, and rare features such as green sideplates. Consulting collector forums or experts can also help confirm authenticity and value.

Tips for Getting the Most Out of the Shakespeare Wondereel 1920 Model FK

Optimize performance by selecting the right line, mastering casting techniques, and adjusting drag settings. Regular maintenance ensures smooth operation, while proper handling preserves its durability for years of reliable use.

8.1 Choosing the Right Fishing Line

Selecting the appropriate fishing line for your Shakespeare Wondereel 1920 Model FK is crucial for optimal performance. The reel’s manual recommends using monofilament or fluorocarbon lines with a recommended strength and length that suit your target species. Ensuring the line matches the reel’s capacity and drag system ensures smooth casting and reliable performance during fishing trips.

8.2 Targeting Different Fish Species

The Shakespeare Wondereel 1920 Model FK is versatile, catering to various fishing needs. It excels for panfish, bass, and larger game fish, thanks to its robust construction and smooth drag system. By adjusting techniques and tackle, anglers can effectively target specific species, making it a reliable choice for diverse fishing environments and challenges.

Pricing and Availability of the Shakespeare Wondereel 1920 Model FK

The Shakespeare Wondereel 1920 Model FK is affordably priced, with new models ranging from $50 to $100 and vintage options available at varying costs online.

9.1 New vs. Vintage Models

New Shakespeare Wondereel 1920 Model FK reels are readily available at retail stores and online, offering modern manufacturing quality. Vintage models, often sought by collectors, can be found on eBay or specialty shops, sometimes with original packaging and manuals, though prices vary based on condition and rarity, appealing to enthusiasts of classic fishing gear.

9.2 Where to Buy and What to Expect

The Shakespeare Wondereel 1920 Model FK can be purchased from retail stores, online marketplaces like eBay, and specialty fishing shops. New models are readily available with included manuals, while vintage versions may require searching and often come with original packaging. Prices vary based on condition and rarity, with new models offering warranties and vintage options appealing to collectors. Expect thorough product descriptions and customer support when buying from reputable sellers.

Final Thoughts and Recommendations

The Shakespeare Wondereel 1920 Model FK Manual is a valuable resource for anglers and collectors, offering insights into the reel’s performance and maintenance, ensuring lasting reliability and enjoyment for fishing enthusiasts of all levels.

10.1 Summary of Key Features

The Shakespeare Wondereel 1920 Model FK Manual highlights a reel with a robust gear ratio, ample line capacity, and a reliable drag system. Its durable construction ensures long-term performance, while the manual provides clear setup and maintenance instructions. The reel’s smooth operation and versatility make it ideal for targeting various fish species, offering both functionality and value for anglers and collectors alike.

10.2 Who Should Consider the Shakespeare Wondereel 1920 Model FK

The Shakespeare Wondereel 1920 Model FK is ideal for both experienced anglers and collectors. Its durability and smooth operation make it suitable for freshwater fishing enthusiasts. Additionally, collectors of vintage fishing gear will appreciate its historical significance and craftsmanship. The manual’s detailed instructions also cater to those who enjoy understanding and maintaining their equipment, ensuring optimal performance and longevity.

Bybeatrice

ninja cp301 manual

The Ninja CP301 Hot & Cold Brew System is a versatile coffee maker that combines hot and cold brewing capabilities in one innovative appliance.

Designed for coffee enthusiasts‚ it allows users to craft a variety of hot and cold coffee drinks with ease‚ featuring advanced settings and a user-friendly interface.

Perfect for those seeking flexibility‚ this system offers a range of options‚ including specialty brews‚ iced coffee‚ and tea‚ making it a must-have for any home.

1.1 Overview of the Ninja CP301 Series

The Ninja CP301 Series is part of the CP300 line‚ offering a versatile hot and cold brew system designed for coffee and tea enthusiasts. It supports multiple SKUs‚ including CP301‚ CP301BRN‚ and CP301A‚ ensuring flexibility for various user preferences. This series is known for its programmable timer‚ milk frother‚ and ability to brew both hot and cold beverages‚ making it a versatile addition to any kitchen.

1.2 Key Features and Benefits

The Ninja CP301 features a programmable timer‚ allowing users to schedule brewing up to 24 hours in advance. It includes a built-in milk frother for creating lattes and cappuccinos‚ a removable 50-ounce water tank‚ and a versatile design that accommodates both hot and cold brewing. The system also supports tea brewing‚ making it a versatile kitchen appliance for coffee and tea enthusiasts alike.

Safety Precautions and Important Safeguards

Always use the Ninja CP301 on a clean‚ dry‚ level surface. Avoid placing it near hot burners or in a heated oven. Never use abrasive cleaners.

2.1 General Safety Guidelines

  • Place the Ninja CP301 on a stable‚ heat-resistant surface‚ away from direct sunlight and water sources.
  • Avoid exposing the machine to extreme temperatures or humidity.
  • Do not operate near open flames or sparks;
  • Keep children away from the appliance while in use.
  • Unplug the machine when not in use or during cleaning.
  • Ensure all parts are properly assembled before brewing.

2.2 Do’s and Don’ts for Proper Usage

  • Always place the machine on a clean‚ dry‚ level surface.
  • Use only recommended accessories and parts.
  • Follow the manual for brewing and cleaning instructions.
  • Avoid overheating the machine; let it cool before cleaning.
  • Do not use abrasive cleaners or scourers on surfaces.
  • Never submerge electrical components in water.
  • Keep the machine away from direct heat sources.
  • Adhere to guidelines for water hardness and temperature.

Parts and Accessories of the Ninja CP301

The Ninja CP301 includes a coffee maker‚ thermal carafe‚ frother‚ and reusable filters. Accessories like the scoop and brew basket enhance functionality for optimal brewing experiences.

3.1 Components of the Coffee Maker

The Ninja CP301 features a sleek‚ compact design with a programmable interface‚ a 50-ounce water reservoir‚ and an intelligent warming plate. The machine includes a thermal carafe‚ a reusable filter‚ and a built-in frother for crafting lattes and cappuccinos. Additional components like the brew basket and coffee scoop ensure precise measurements and easy cleanup‚ making the brewing process efficient and convenient.

3.2 Included Accessories and Their Functions

The Ninja CP301 comes with essential accessories‚ including a thermal carafe for keeping coffee hot‚ a reusable filter to save costs‚ and a coffee scoop for precise measurements. Additionally‚ the frother allows users to create creamy textures for specialty drinks‚ while the included owner’s guide provides detailed instructions for operation‚ maintenance‚ and troubleshooting‚ ensuring users get the most out of their machine.

Using the Control Panel

The control panel features intuitive buttons for selecting brew type‚ size‚ and strength‚ with a digital display for easy navigation and customization of your brewing experience.

4.1 Understanding the Control Panel Layout

The Ninja CP301 control panel is designed for ease of use‚ featuring a clear LED display and buttons for selecting brew type‚ size‚ and strength. The layout is intuitive‚ with labeled buttons for hot and cold brewing options‚ allowing users to quickly navigate and customize their brewing experience. The digital interface provides real-time feedback‚ ensuring precise control over each brew cycle.

The panel also includes buttons for specialty functions‚ such as the frother‚ and an illuminated display for easy viewing. This user-friendly design makes it simple to explore all the machine’s capabilities‚ from classic brews to advanced customization options‚ ensuring a seamless and enjoyable brewing process for every user.

4.2 Navigating Through Settings and Options

Navigating the Ninja CP301’s settings is straightforward‚ with buttons for brew type‚ size‚ and strength. The digital display guides you through options‚ allowing easy selection of hot or cold brew modes. Use the arrow keys to adjust settings like brew size and temperature. The interface is intuitive‚ enabling seamless transitions between options and ensuring a personalized brewing experience tailored to your preferences.

Before First Use

Before first use‚ carefully unbox and wash all parts. Assemble the machine according to the manual and prime it for the first brewing cycle.

5.1 Unboxing and Initial Setup

Start by carefully unboxing the Ninja CP301 components‚ including the brew basket‚ carafe‚ and frother. Wash all parts with warm‚ soapy water‚ then rinse thoroughly. Ensure the machine is placed on a clean‚ level surface. Plug in the unit and familiarize yourself with the control panel before proceeding to the first brew cycle.

5.2 Preparing the Machine for Brewing

Before brewing‚ ensure the machine is on a stable surface and all parts are properly assembled. Rinse the carafe‚ brew basket‚ and frother with clean water. Align the carafe under the spout and secure the brew basket. Double-check that the water reservoir is filled appropriately. Ensure the machine is plugged in and preheated if necessary. Now‚ it’s ready for your first brew cycle.

Cleaning and Maintenance

Regularly clean the carafe‚ brew basket‚ and water reservoir with mild soap and water. Descaling every 3-6 months prevents mineral buildup‚ ensuring optimal performance and longevity.

6.1 Regular Cleaning Procedures

For regular cleaning‚ wash the carafe‚ brew basket‚ and water reservoir with mild soap and warm water after each use. Rinse thoroughly to remove any residue. Wipe down the machine’s exterior with a damp cloth to prevent dust buildup. Regular cleaning ensures optimal performance and prevents bacterial growth‚ keeping your coffee tasting fresh and pure.

6.2 Descaling and Maintenance Tips

Descaling the Ninja CP301 is essential to remove mineral buildup. Use a descaling solution every 3-6 months‚ following the manual’s instructions. Run a cleaning cycle with vinegar and water for additional maintenance. After descaling‚ rinse thoroughly to ensure no residue remains. Regular descaling prevents clogs and extends the machine’s lifespan‚ ensuring consistent brewing performance and flavor quality over time.

Brewing Options and Customization

Explore diverse brewing options with the Ninja CP301‚ from classic hot coffee to rich and over ice settings. Customize strength‚ size‚ and temperature for a perfect cup every time.

7.1 Hot Brew Options and Settings

The Ninja CP301 offers multiple hot brew options‚ including Classic‚ Rich‚ and Specialty settings. Users can customize brew strength and size‚ with options ranging from single cups to full carafes. The machine also features programmable timing‚ allowing you to set brewing up to 24 hours in advance. This ensures your coffee is ready exactly when you need it‚ with minimal effort required.

7.2 Cold Brew and Iced Coffee Options

The Ninja CP301 allows you to brew cold coffee without the need for a separate container. The Cold Brew setting steepens coarsely ground coffee in cold water for a smooth‚ low-acidity flavor. For iced coffee‚ the Over Ice feature automatically adjusts the brew strength to prevent watering down when served over ice‚ ensuring a rich and full-bodied taste in every sip.

The Intelligent Warming Plate

The Intelligent Warming Plate automatically activates for select brew sizes‚ keeping coffee at the ideal temperature without overheating‚ ensuring a perfect cup every time.

8.1 How the Warming Plate Works

The Intelligent Warming Plate on the Ninja CP301 automatically activates during Half or Full Carafe brews‚ ensuring coffee stays at the perfect temperature without overheating.

It uses sensors to monitor and adjust heat output‚ maintaining an ideal temperature for optimal flavor and aroma. The plate heats evenly‚ preventing hot spots‚ and shuts off after a set period for energy efficiency.

8.2 Adjusting Warming Plate Settings

The warming plate settings can be adjusted through the control panel‚ allowing customization of temperature and activation times. While the plate automatically turns on for Half or Full Carafe brews‚ users can manually enable or disable it for smaller batches. Adjustments ensure optimal heat maintenance without overheating‚ providing flexibility for various brewing preferences and carafe sizes.

Milk Frother and Specialty Coffee Options

The Ninja CP301 features a built-in milk frother‚ enabling users to craft creamy lattes and cappuccinos effortlessly; This feature enhances the versatility of the machine.

9.1 Using the Built-In Frother

The Ninja CP301’s built-in frother allows users to create silky-smooth milk foam for lattes and cappuccinos. Simply pour milk into the frother‚ select the desired setting‚ and let the machine work its magic. The frother heats and whips the milk to the perfect consistency‚ ensuring professional-quality results every time. Regular cleaning of the frother is essential to maintain performance and hygiene.

9.2 Creating Lattes and Cappuccinos

To craft lattes and cappuccinos‚ brew a shot of coffee using the Ninja CP301’s hot brew setting. Then‚ froth milk to your desired consistency using the built-in frother. For lattes‚ combine the brewed coffee with a generous amount of frothed milk. For cappuccinos‚ layer frothed milk over the coffee. Experiment with ratios and flavors to create your perfect specialty coffee drink.

Troubleshooting Common Issues

Common issues with the Ninja CP301 include power malfunctions or brew errors. Check the manual for solutions or contact Ninja Customer Service at 1-877-646-5288 for assistance.

10.1 Common Problems and Solutions

Common issues with the Ninja CP301 include the machine not turning on‚ brewing errors‚ or the frother not functioning. Ensure the power cord is securely plugged in and the outlet is working. For brewing errors‚ check that the water reservoir is filled and properly aligned. If the frother isn’t working‚ clean it thoroughly and ensure it’s correctly assembled. Refer to the manual for detailed solutions or contact Ninja Customer Support for further assistance.

10.2 Resetting the Machine

To reset the Ninja CP301‚ unplug it from the power source and wait for 30 seconds. This allows the system to reset its internal settings. Plug it back in and test the machine. If issues persist‚ refer to the user manual or contact Ninja Customer Service for further assistance. Resetting can resolve many operational glitches effectively.

Customer Support and Resources

Ninja provides dedicated customer support at 1-877-646-5288. Additional resources‚ including manuals and troubleshooting guides‚ are available on the official Ninja website for optimal user assistance.

11.1 Contacting Ninja Customer Service

For assistance‚ contact Ninja Customer Service at 1-877-646-5288. This support line is available to address questions or issues regarding the CP301‚ CP301A‚ and CP301BRN models. Representatives are ready to provide help with troubleshooting‚ maintenance‚ or any inquiries about your Ninja Hot & Cold Brew System. Refer to the manual for additional contact options or resources.

11.2 Additional Resources and Manuals

For further guidance‚ access the official Ninja Kitchen website to download the CP301 manual or explore troubleshooting guides. Additional resources include the Quick Start Guide and Owners Guide‚ which cover setup‚ brewing options‚ and maintenance tips. These materials are available in PDF format‚ ensuring easy access to comprehensive support for your brewing needs and system care.

Quick Start Guide

12.1 Step-by-Step Brewing Guide

Add coffee grounds to the filter. 2. Select brew size and strength. 3. Choose hot or cold brew option. 4. Start brewing. Enjoy your perfect cup!

Measure and add coffee grounds to the filter basket.

Pour fresh water into the reservoir.

Select your desired brew size and strength.

Choose between hot or cold brew options.

Press Start to begin brewing.

Once complete‚ pour and enjoy your perfectly brewed coffee!

12.2 Tips for Optimal Performance

Regularly clean and descale the machine to prevent mineral buildup.

Use filtered water for better taste and to reduce scaling.

Store coffee grounds in an airtight container to preserve freshness.

Experiment with brew settings to find your perfect cup.

Avoid overfilling the water reservoir to ensure proper functioning.

Refer to the manual for maintenance schedules and troubleshooting.

Bybeatrice

hotpoint stove manual

Hotpoint stove manuals provide essential guidance for safe installation‚ operation‚ and maintenance. They are available on platforms like ManualsLib.com‚ Manuals.co.uk‚ and Manua.ls‚ ensuring optimal appliance performance and user safety.

1.1 Importance of Reading the Manual

Reading the Hotpoint stove manual is crucial for ensuring safety‚ proper usage‚ and optimal performance. It provides detailed instructions for installation‚ operation‚ and maintenance‚ helping users avoid potential hazards. The manual outlines safety precautions‚ such as proper ventilation and electrical connections‚ to prevent accidents. Additionally‚ it guides users on troubleshooting common issues‚ understanding error codes‚ and performing routine maintenance. By following the manual‚ users can enhance energy efficiency‚ extend the appliance’s lifespan‚ and ensure reliable cooking performance. It is essential to read and follow the guidelines carefully to maximize safety and functionality.

1.2 Overview of Hotpoint Stove Models

Hotpoint offers a diverse range of stove models designed to meet various household needs. Popular models include the H6TMH2AF (X) IT‚ known for its advanced features‚ and the RGBS330DRWW and RBS330DRWW‚ which are highly rated for their performance and reliability. These models cater to different preferences‚ whether gas or electric‚ and feature innovative technologies that enhance cooking efficiency. Each model is accompanied by a comprehensive manual‚ ensuring users can harness their full potential while maintaining safety and optimal functionality.

Popular Hotpoint Stove Models

Hotpoint offers a variety of stove models‚ with the H6TMH2AF (X) IT‚ RGBS330DRWW‚ and RBS330DRWW being among the most popular for their reliability and advanced features.

2.1 Hotpoint H6TMH2AF (X) IT

The Hotpoint H6TMH2AF (X) IT is a highly regarded freestanding electric cooker‚ known for its energy efficiency and advanced cooking features. It offers a spacious oven capacity and multiple cooking functions‚ making it ideal for versatile meal preparation.

This model is designed with safety and performance in mind‚ featuring even heat distribution and easy-to-use controls. The manual provides detailed instructions for installation‚ operation‚ and maintenance‚ ensuring optimal use of its capabilities.

2.2 Hotpoint RGBS330DRWW

The Hotpoint RGBS330DRWW is a 30-inch gas range designed for versatility and efficiency. It features a spacious oven and multiple burner options‚ ideal for both professional and home cooking. This model is known for its durable construction and user-friendly interface. The manual provides detailed instructions for operating the range safely and effectively‚ ensuring optimal performance. Its energy-efficient design makes it a popular choice among homeowners seeking reliable and cost-effective cooking solutions.

2.3 Hotpoint RBS330DRWW

The Hotpoint RBS330DRWW is a 30-inch gas range known for its robust design and reliable performance. It features a large oven capacity and multiple burners‚ making it ideal for cooking various dishes. The manual provides detailed instructions for installation‚ operation‚ and maintenance‚ ensuring safe and efficient use. This model is popular for its durability and user-friendly controls‚ offering a great balance between functionality and affordability. The manual is available on platforms like ManualsLib.com and Manua.ls‚ ensuring easy access for users.

Where to Find Hotpoint Stove Manuals

Hotpoint stove manuals are available on platforms like ManualsLib.com‚ Manuals.co.uk‚ and Manua.ls. These websites offer free downloads‚ ensuring easy access to your specific model’s instructions.

3.1 ManualsLib.com

ManualsLib.com is a premier destination for Hotpoint stove manuals‚ offering over 8278 downloadable PDFs. This platform provides comprehensive guides for models like the Hotpoint H6TMH2AF (X) IT‚ RGBS330DRWW‚ and RBS330DRWW. Users can easily search by model number or category‚ accessing detailed instructions for installation‚ operation‚ and maintenance. With a vast library covering various appliances‚ ManualsLib.com ensures quick and free access to the specific manual you need‚ making it an invaluable resource for Hotpoint stove owners.

3.2 Manuals.co.uk

Manuals.co.uk offers a wide range of Hotpoint stove manuals‚ with 598 available for download. The platform features popular models like the Hotpoint H6TMH2AF (X) IT‚ RGBS330DRWW‚ and RBS330DRWW. Users can search by model or category‚ accessing detailed installation‚ operation‚ and maintenance guides. The most recent manual‚ the Hotpoint HUI 612 P‚ was added in May 2025. This resource ensures that Hotpoint stove owners can easily find and download the necessary documentation for optimal appliance performance and safety.

3.3 Manua.ls

Manua.ls provides access to 598 Hotpoint stove manuals‚ including popular models like the Hotpoint H6TMH2AF (X) IT‚ RGBS330DRWW‚ and RBS330DRWW. The platform allows users to search by model or category‚ offering detailed guides for installation‚ operation‚ and maintenance. The most recently added manual‚ the Hotpoint HUI 612 P‚ ensures users have up-to-date resources. This comprehensive repository simplifies finding and downloading manuals‚ supporting optimal performance and safety for Hotpoint stove owners.

Key Sections of the Hotpoint Stove Manual

The manual includes safety precautions‚ installation instructions‚ operating guidelines‚ and maintenance tips to ensure safe and efficient use of your Hotpoint stove.

4.1 Safety Precautions

Safety precautions in the Hotpoint stove manual emphasize preventing accidents and ensuring safe usage. They include guidelines for proper installation‚ operation‚ and maintenance. Users are advised to keep the oven vent duct unobstructed‚ avoid grease buildup‚ and ensure the oven shelf is placed correctly when cool. Additionally‚ the manual highlights important safety notices‚ such as those related to power outages and proper loading of laundry in compatible models. Adhering to these precautions is crucial for optimal performance and user safety.

4.2 Installation Instructions

Installation instructions in the Hotpoint stove manual provide a step-by-step guide for proper setup. Ensure the stove is placed on a stable‚ heat-resistant surface and leveled for even cooking. For gas models‚ connect the gas line securely‚ following safety guidelines. Electrical models require a dedicated circuit. Keep vent ducts unobstructed to maintain proper airflow. Follow the manual’s specific instructions for your model to avoid installation errors and ensure safe‚ efficient operation. Proper installation is crucial for optimal performance and to prevent potential issues.

4.3 Operating Guidelines

Operating guidelines in the Hotpoint stove manual ensure safe and efficient use; Always preheat the oven as instructed and use the correct cookware for your stove type. For gas models‚ ignite burners gently and adjust flames to avoid excessive heat. Electric models require proper placement of heating elements. Avoid overheating and keep flammable materials away. Clean spills immediately to prevent residue buildup. Regularly check and maintain oven vents for proper airflow. Refer to the manual for specific temperature settings and cooking times to achieve optimal results. Follow these guidelines to enhance performance and longevity.

4.4 Maintenance Tips

Regular maintenance ensures your Hotpoint stove performs optimally. Clean the stove and oven regularly to prevent grease buildup. Check burner caps and igniter for blockages. Avoid using abrasive cleaners that can damage surfaces. For electric models‚ inspect heating elements for wear. Ensure proper ventilation to prevent moisture issues. Clean drip pans and replace them if damaged. Descale steam cleaning systems as recommended. Refer to the manual for specific maintenance schedules and approved cleaning products. Proper care extends the lifespan and efficiency of your stove.

Troubleshooting Common Issues

This section helps diagnose and resolve common problems with your Hotpoint stove‚ ensuring efficient operation and extending appliance lifespan through quick and effective solutions.

5.1 Error Codes and Solutions

Hotpoint stove manuals include detailed explanations of error codes‚ helping users identify and resolve issues quickly. Codes like E01 or E02 indicate specific malfunctions‚ such as sensor or heating element problems. By referencing the manual‚ users can diagnose faults accurately and apply the correct fixes‚ ensuring optimal performance and preventing further damage. This section is crucial for troubleshooting common errors and restoring your stove’s functionality efficiently. Always refer to the manual for precise solutions tailored to your model.

5.2 Common Problems and Fixes

Hotpoint stove manuals address common issues like ignition problems or uneven heating. Faulty igniter wires or clogged burners often cause ignition failures. Cleaning the burners and checking wire connections can resolve this. For uneven heating‚ ensure the oven shelf is correctly positioned and clean. If error codes persist‚ refer to the troubleshooting section for model-specific solutions. Regular maintenance‚ such as cleaning and checking sensors‚ prevents many issues. These fixes help restore functionality and ensure safe‚ efficient cooking performance.

Energy Efficiency and Features

Hotpoint stoves are designed for energy efficiency‚ featuring advanced technologies like smart sensors and eco-friendly designs. They offer even heat distribution and specialized burners for optimal cooking performance.

6.1 Energy-Saving Tips

Hotpoint stoves are designed with energy efficiency in mind. To maximize energy savings‚ use cookware that matches burner sizes‚ cover pots during cooking‚ and utilize residual heat. Regularly clean burners and ensure proper ventilation to maintain efficiency. Using eco-friendly modes‚ if available‚ can further reduce energy consumption. Refer to your manual for model-specific tips to optimize performance and lower energy bills while cooking effectively. These practices help extend appliance lifespan and reduce environmental impact.

6.2 Advanced Cooking Features

Hotpoint stoves offer advanced cooking features designed to enhance your culinary experience. Models like the H6TMH2AF (X) IT and RGBS330DRWW feature multi-ring burners for versatile cooking‚ allowing precise heat control. Some stoves include touch-sensitive controls for easy operation and programmable timers for convenience. Certain models also offer smart cooking features‚ enabling you to monitor and adjust settings via smartphone apps. These innovations ensure efficient and enjoyable cooking while maintaining energy efficiency‚ making Hotpoint stoves a modern choice for home kitchens.

Accessories and Cookware Compatibility

Hotpoint stoves are compatible with various cookware types‚ including stainless steel and non-stick pans. Optional accessories like griddle plates and wok rings enhance cooking versatility and convenience.

7.1 Recommended Cookware

Hotpoint stoves are compatible with various cookware types‚ ensuring optimal performance. For gas stoves‚ stainless steel‚ cast iron‚ and non-stick pans are recommended due to their heat distribution properties. Avoid cookware with rough bases to prevent scratching the stove surface. Always refer to your specific model’s manual for compatibility details‚ as some stoves may require specific cookware materials. Proper cookware selection enhances cooking efficiency and longevity of your Hotpoint stove. Additional guidelines can be found in the manuals available on ManualsLib.com or Manuals.co.uk.

7.2 Optional Accessories

Enhance your cooking experience with optional accessories designed for Hotpoint stoves. Griddle trays‚ wok stands‚ and additional oven racks are popular choices to maximize functionality. These accessories are tailored to specific models‚ ensuring compatibility and performance. For details on available options‚ refer to your stove’s manual or visit platforms like ManualsLib.com or Manuals.co.uk. Accessories can be purchased separately to customize your stove setup and improve cooking efficiency‚ making meal preparation more convenient and enjoyable.

Warranty and Customer Support

Hotpoint provides comprehensive warranty coverage and dedicated customer support for stoves. Visit ManualsLib.com or Hotpoint’s official website for detailed warranty information and contact options.

8.1 Warranty Information

Hotpoint stoves typically come with a comprehensive warranty covering parts and labor for specific periods. The warranty duration varies by model and region‚ ensuring protection against manufacturing defects. Users can find detailed warranty terms in their appliance’s manual or on Hotpoint’s official website. Proper registration and adherence to maintenance guidelines are often required to maintain warranty validity. This ensures customers receive timely support and replacements when needed‚ enhancing their overall ownership experience with Hotpoint appliances.

8.2 Contacting Hotpoint Support

For assistance with your Hotpoint stove‚ contact their customer support team through the official website‚ phone‚ or email. Hotpoint’s support is available to address queries‚ provide troubleshooting‚ and arrange repairs. Visit their website for regional contact details and a contact form. Additionally‚ Hotpoint offers a FAQ section and downloadable resources to help resolve common issues independently. Their support team is committed to ensuring a prompt and effective service experience for all users.

Hotpoint stove manuals are indispensable resources for optimizing your appliance’s performance and ensuring safety. By following the guidelines‚ users can enhance cooking efficiency‚ maintain their stoves‚ and troubleshoot common issues. With comprehensive manuals available online and reliable customer support‚ Hotpoint empowers users to make the most of their stoves. Always refer to your manual for specific instructions tailored to your model‚ and explore additional resources like energy-saving tips and advanced features for a superior cooking experience.

Bybeatrice

girard tankless water heater manual

Welcome to the Girard Tankless Water Heater Manual, your comprehensive guide for installation, operation, troubleshooting, and maintenance. Designed for safe and efficient use in RVs, this manual ensures compliance with ANSI and CSA standards, providing detailed instructions for both OEM and aftermarket installations.

1.1 Overview of the Girard Tankless Water Heater

The Girard Tankless Water Heater is a cutting-edge, demand-style water heating system designed specifically for Recreation Vehicles (RVs). Available in models such as the GSWH-1 and GSWH-2, it offers a compact, energy-efficient solution for providing hot water. Utilizing LP gas and an induced-draft design, it ensures reliable performance while meeting ANSI Z21.10.3 and CSA 4.3 safety standards. Its microprocessor-based control board manages operations, including temperature settings and flow sensors, ensuring consistent water temperature. The heater operates in two modes: high and low, catering to varying hot water demands. With its user-friendly control panel and advanced safety features, the Girard Tankless Water Heater is ideal for RV owners seeking a space-saving, efficient hot water solution.

1.2 Importance of the Manual for Installation and Operation

This manual is essential for the safe and proper installation and operation of the Girard Tankless Water Heater. It provides detailed instructions to ensure compliance with safety standards and optimal performance. By following the guidelines, users can avoid potential hazards, such as improper gas connections or electrical issues, which could lead to system malfunctions or safety risks. The manual also serves as a troubleshooting guide, helping users diagnose and resolve common issues, like error codes or ignition problems, thereby extending the heater’s lifespan and maintaining efficiency. Regular maintenance procedures outlined in the manual further ensure the system operates reliably, providing consistent hot water supply for RV owners. Adherence to the manual’s instructions is crucial for warranty validity and overall user satisfaction.

Installation Requirements

The Girard Tankless Water Heater requires a 13×13-inch cut-out opening, 12VDC electrical connection, LP gas supply, and water access. Ensure proper ventilation and meet ANSI standards for safe installation.

2.1 Key Installation Considerations

Proper installation is crucial for safe and efficient operation of the Girard Tankless Water Heater. Ensure the unit is mounted on a level surface with access to water, LP gas, and a 12VDC electrical connection. The 13×13-inch cut-out opening must be correctly sized to avoid modification. Position the heater to allow proper ventilation, avoiding obstructions. Follow ANSI Z21.10.3 standards for gas and electrical connections. Secure the unit firmly to prevent movement during RV travel. Do not lift or carry the heater by the blower assembly or exhaust tube. Ensure all connections are leak-free and compliant with the manual’s specifications for optimal performance and safety.

2.2 Step-by-Step Installation Instructions

Begin by preparing the 13×13-inch cut-out opening in the RV wall, ensuring proper alignment with the water heater housing. Position the unit into the frame, aligning the front edge evenly with the exterior wall. Secure the heater firmly to prevent movement during travel; Connect the LP gas line, water inlet/outlet, and 12VDC electrical connections according to the manual’s specifications. Ensure all connections are leak-free and properly sealed. Install the venting system as outlined to maintain airflow and prevent gas buildup. Test the system by turning on the power and checking for proper operation. Ensure compliance with ANSI Z21.10.3 standards for safe installation and operation;

Operating the Girard Tankless Water Heater

Turn on the power and set the desired temperature via the user control panel. Open the hot water faucet to activate the system. The microprocessor-controlled unit ensures efficient operation, monitoring flow and temperature for consistent performance.

3.1 Understanding the Operation Process

The Girard Tankless Water Heater operates by using a microprocessor-based controller that relies on electronic sensors to monitor and regulate the heating process. When the user sets the desired temperature on the User Control Panel (UCP), the system activates, drawing in cold water and igniting the burner. The microprocessor ensures consistent water temperature by adjusting the gas flow and monitoring flame presence. The UCP displays real-time operation phases, such as ignition, heating, and standby modes. This advanced system optimizes energy efficiency while providing continuous hot water. Proper operation requires regular maintenance and adherence to safety guidelines outlined in the manual.

3.2 User Control Panel and Its Functions

The User Control Panel (UCP) is the central interface for operating the Girard Tankless Water Heater. It features a digital display showing temperature settings, operation status, and error codes. Users can adjust the desired water temperature, select operation modes (e.g., high or low), and monitor the system’s performance. The UCP also includes indicators for active heating, fault detection, and system standby. Navigation buttons allow easy adjustment of settings, while the display provides real-time feedback. This intuitive design ensures seamless control over water temperature and system operation, making it easy for users to customize their experience and troubleshoot issues efficiently.

Troubleshooting Common Issues

Identify issues like error codes, ignition failures, or water flow problems. Check connections, sensors, and gas supply. Refer to the manual for detailed diagnostic steps and solutions.

4.1 Identifying and Diagnosing Problems

Identifying issues with your Girard Tankless Water Heater starts with observing symptoms like error codes, inconsistent water temperature, or ignition failures. Common problems include faulty sensors, blocked water flow, or gas supply issues. Check the control panel for specific error codes, such as E-5, which indicates motor failure. Verify wire connections and ensure proper gas pressure. Consult the manual for detailed troubleshooting charts to diagnose issues accurately. Regularly inspect components like the flame sensor and water flow sensor for damage or blockages. If problems persist, contact Girard Products technical support for assistance. Always refer to the manual for guidance on safe diagnostic procedures.

4.2 Solutions for Common Error Codes

Common error codes on your Girard Tankless Water Heater, such as E-5, indicate specific issues like motor failure. To resolve these, first ensure the blower motor is not jammed and check wire connections at the control board. For ignition failures, verify proper gas supply and ensure the flame sensor is clean. If the water heater does not power on, check the 12VDC electrical connection. Always refer to the manual for detailed solutions and safety precautions. If issues persist, contact Girard Products technical support or an authorized service center for professional assistance. Regular maintenance can help prevent many of these common issues.

Technical Specifications and Features

The Girard GSWH-2 features a microprocessor-based control board, induced draft technology, and LP gas operation, designed for RVs and compliant with ANSI Z21.10.3-2017 standards.

5.1 Key Features of the Girard Tankless Water Heater

The Girard Tankless Water Heater is designed for RV use, offering continuous hot water with an induced-draft system and LP gas operation. It features a microprocessor-based control board for precise temperature control and operation monitoring; The unit is compact, fitting standard RV water heater openings, and includes a user-friendly control panel. Certified to ANSI Z21.10.3-2017 standards, it ensures safety and efficiency. The heater operates in two modes, mimicking traditional tank heaters or providing on-demand hot water. Regular maintenance is essential for optimal performance, as outlined in the manual.

5.2 Detailed Technical Specifications

The Girard Tankless Water Heater (model GSWH-2) operates on LP gas with an induced-draft system, meeting ANSI Z21.10.3-2017 and CSA 4.3-2004 standards. It requires a 12V DC electrical connection and is designed for RV installations, with dimensions fitting standard 13×13-inch cutouts. The unit features a microprocessor-based control board for precise operation and error detection. Maximum wire run from the User Control Panel (UCP) to the heater is 16 feet (5 meters). The propane supply must be at least 10 PSI, and the system is not suitable for marine or space heating applications. Weight and installation requirements are detailed in the manual for proper setup and maintenance.

Safety Precautions and Maintenance

Always follow safety guidelines to prevent accidents. Regularly inspect gas lines, electrical connections, and venting for damage. Winterize the system when not in use. Ensure proper installation and maintenance as outlined in the manual to maintain efficiency and safety. Avoid improper handling of electrical components and gas lines to prevent hazards. Regular maintenance ensures optimal performance and longevity of the water heater.

6.1 Essential Safety Guidelines

Ensure the Girard Tankless Water Heater is installed, operated, and maintained strictly following the manual. Always turn off the power and gas supply before performing any maintenance. Avoid exposing the unit to freezing temperatures without proper winterization. Keep the area around the heater clear of flammable materials. Never lift or carry the heater by the blower assembly or exhaust tube. Ensure proper ventilation to avoid carbon monoxide buildup. Follow all safety precautions to prevent scalding from hot water. Regularly inspect gas lines and electrical connections for leaks or damage. Adhere to all local and national safety codes to ensure safe operation.

6.2 Regular Maintenance for Optimal Performance

Regular maintenance is crucial to ensure the Girard Tankless Water Heater operates efficiently and safely. Inspect gas lines and electrical connections regularly for leaks or damage. Clean the air intake and combustion chamber to prevent blockages. Check the water flow sensor for mineral buildup and ensure proper water pressure. Winterize the unit if storing in freezing temperatures to prevent damage. Replace worn-out seals or gaskets as needed. Descale the heat exchanger periodically to maintain performance. Follow the recommended maintenance schedule in the manual to avoid unexpected issues and extend the lifespan of your water heater.

Bybeatrice

brother mfc-l2690dw manual

The Brother MFC-L2690DW manual serves as a comprehensive guide for setup, troubleshooting, and maintenance. It provides detailed instructions to optimize printer performance and resolve common issues. Available for download from Brother’s official support center, this manual ensures users can fully utilize their printer’s features effectively.

1.1 Overview of the Brother MFC-L2690DW Printer

The Brother MFC-L2690DW is a versatile all-in-one mono laser printer designed for efficiency and convenience. It offers fax, copy, and scan functionalities, making it ideal for home and small office use. With a robust design, it features a 250-sheet paper tray, automatic document feeder, and manual feed slot for various paper types. Wireless connectivity and high-quality printing ensure seamless integration into modern workflows, catering to diverse printing needs effectively.

1.2 Importance of Using the Manual for Optimal Printer Performance

Using the Brother MFC-L2690DW manual is essential for maximizing printer functionality and troubleshooting common issues. It provides detailed setup instructions, maintenance tips, and guidance for resolving connectivity or print quality problems. The manual ensures users understand advanced features, such as Wi-Fi configuration and fax settings, while also covering network security and data protection measures. Regularly referencing the manual helps maintain optimal performance and extends the printer’s lifespan, ensuring reliable operation for years to come.

Key Features of the Brother MFC-L2690DW

The Brother MFC-L2690DW is an all-in-one mono laser printer with fax, copy, and scan functions. It features a 250-sheet paper tray, manual feed slot, and automatic document feeder for efficient printing on various paper types, ensuring versatility and productivity.

2.1 All-in-One Mono Laser Printer Capabilities

The Brother MFC-L2690DW offers versatile all-in-one functionality, combining printing, copying, scanning, and faxing in a compact design. Its monochrome laser technology delivers crisp, high-quality text prints at up to 2400 x 600 dpi resolution. With print speeds of up to 30 ppm, it efficiently handles demanding workloads. Additionally, the manual feed slot supports various paper types, making it ideal for professional and diverse printing needs.

2.2 Automatic Document Feeder and Manual Feed Slot

The Brother MFC-L2690DW features a 50-sheet automatic document feeder, enabling efficient scanning, copying, and faxing of multi-page documents. Additionally, the manual feed slot allows for printing on various media types, such as envelopes, cardstock, and custom-sized papers, ensuring versatility for diverse printing needs. These features enhance productivity and convenience, catering to both standard and specialized printing requirements.

2.3 High-Capacity Paper Tray for Improved Efficiency

The Brother MFC-L2690DW is equipped with a 250-sheet capacity paper tray, reducing the need for frequent refills. Its adjustable design accommodates letter and legal-sized paper, ensuring efficient handling of various print jobs. This high-capacity feature is ideal for both home and office environments, supporting higher print volumes with minimal interruptions. It enhances productivity by streamlining paper management and ensuring seamless printing operations.

Network and Wi-Fi Setup Guide

This section provides a detailed guide for setting up and troubleshooting the Brother MFC-L2690DW’s network and Wi-Fi connectivity, ensuring a stable and efficient printing experience.

3.1 Step-by-Step Wi-Fi Configuration

Press the Menu button on the control panel, navigate to Network, and select Wi-Fi. Choose your network’s SSID and enter the password. Select Apply to save settings. The printer will connect to the network. Ensure your router is nearby and the Wi-Fi signal is strong. Once connected, the printer is ready for wireless printing. Consult the manual for troubleshooting if connection issues arise.

3.2 Troubleshooting Network Connectivity Issues

If the printer fails to connect to the network, restart both the printer and router. Ensure the printer is within the router’s range. Check physical connections and verify Wi-Fi settings. Reset network settings via the control panel if issues persist. Update the printer firmware for compatibility. For persistent problems, reset to factory defaults or consult the manual for advanced troubleshooting steps.

Paper Handling and Print Quality

This section covers efficient paper management and print quality optimization. Adjust the 250-sheet tray for different sizes and use the manual feed slot for specialty papers. Ensure settings are configured for optimal output and minimal jams.

4.1 Adjusting the 250-Sheet Capacity Paper Tray

The Brother MFC-L2690DW features a 250-sheet paper tray designed for efficient paper handling. To adjust the tray, pull it out and slide the side and rear guides to fit your paper size. Ensure the guides align with the paper edges for proper feeding. This high-capacity tray supports letter and legal sizes, reducing the need for frequent refills and enhancing printing efficiency. Proper alignment ensures optimal print quality and minimizes jams.

4.2 Using the Manual Feed Slot for Various Paper Types

The manual feed slot on the Brother MFC-L2690DW allows printing on diverse paper types, including envelopes, card stock, and labels. To use it, ensure the paper aligns with the guides and is compatible with the printer’s specifications. This feature is ideal for professional-quality prints on unique media, offering flexibility for various projects. Proper alignment and size selection are crucial to avoid jams and ensure consistent output quality.

Control Panel and Navigation

The control panel features an intuitive LCD display and buttons for easy navigation. Users can access various settings and functions through the menu options seamlessly.

5.1 Understanding the Control Panel Layout

The control panel of the Brother MFC-L2690DW features a 2-line LCD display and a keypad for easy navigation. It includes buttons for fax, scan, and copy functions, along with navigation keys to scroll through menus. The panel also has a numeric keypad for dialing fax numbers and a directional pad for selecting options. Understanding the layout helps users quickly access settings and perform tasks efficiently. The design is intuitive, ensuring seamless operation for both basic and advanced functions.

5.2 Navigating Through Menu Options

Navigating the Brother MFC-L2690DW menu is straightforward using the control panel. Use the directional pad to scroll through options, and press OK to select. The menu includes settings for print, scan, fax, and network. Access advanced features like paper tray settings or Wi-Fi configuration by scrolling to the appropriate section. Use the back button to return to the previous menu, ensuring easy navigation without losing your place. This intuitive system simplifies customization and troubleshooting.

Fax Functionality and Setup

The Brother MFC-L2690DW offers robust fax capabilities, including memory storage and caller ID. Configure fax settings through the control panel or the manual for seamless operation and troubleshooting.

6.1 Configuring Fax Settings

Configuring fax settings on the Brother MFC-L2690DW involves accessing the fax menu through the control panel. Users can set fax resolution, contrast, and redialing options. Key features include storing fax numbers, setting caller ID, and adjusting memory settings. The manual provides step-by-step guidance for customizing fax preferences, ensuring reliable transmission and reception. Proper configuration enhances fax functionality and integrates seamlessly with other printer features.

6.2 Troubleshooting Fax Connection Problems

Troubleshooting fax connection issues involves checking the phone line, ensuring proper connections, and verifying fax settings. Common problems include no dial tone, incorrect fax number entries, or network interference. The manual recommends resetting the fax settings to default, checking for physical obstructions, and ensuring the fax machine is properly configured. If issues persist, users can refer to the manual’s detailed diagnostic guide for advanced solutions and error code interpretations.

Maintenance and Troubleshooting Tips

Regular maintenance, such as cleaning the printer and updating firmware, ensures optimal performance. The manual provides tips for addressing common issues like paper jams and network problems.

7.1 Regular Maintenance for Optimal Performance

Regular maintenance is crucial for ensuring the Brother MFC-L2690DW operates efficiently. Clean the printer and scanner regularly to prevent dust buildup. Check and update firmware to access the latest features and security patches. Perform print quality checks and align the printer if necessary. Replace toner cartridges as needed and ensure proper ventilation around the device to prevent overheating. These tasks help maintain performance and extend the printer’s lifespan.

7.2 Common Issues and Their Solutions

Common issues with the Brother MFC-L2690DW include network connectivity problems, paper jams, and print quality degradation. For connectivity, restart the router and ensure the printer is connected to the correct network. Clear paper jams by turning off the printer and gently removing stuck paper. For print quality, clean the corona wire and check toner levels. Refer to the manual for detailed troubleshooting steps to resolve these issues efficiently.

Accessing the Brother MFC-L2690DW Manual

8.1 Downloading the Manual from Brother Solutions Center

8.2 Navigating the Online User Guide

Security Features and Considerations

The Brother MFC-L2690DW manual emphasizes network security and data protection. It outlines precautions for secure printing, encryption, and regular firmware updates to safeguard your printer and documents.

9.1 Network Security Notice and Precautions

Ensure network security by changing default passwords and enabling firewall settings. Use encryption for data transmission and regularly update firmware to prevent unauthorized access. Secure your Wi-Fi network and limit device connections to trusted users. Avoid using public networks for sensitive printing tasks and disable unnecessary network features to minimize vulnerabilities. Refer to the manual for detailed guidance on protecting your printer and data from potential breaches.

9.2 Ensuring Secure Printing and Data Protection

Protect sensitive data by using encryption for wireless communication and securing print jobs with passwords. Enable secure print features to ensure documents are only released after user authentication. Regularly update printer firmware to patch vulnerabilities and maintain data integrity. Use strong passwords for network access and limit printer usage to authorized users only. The manual provides detailed steps to configure these security settings effectively.

Open-Source Software Information

The manual provides information on included open-source software components and directs users to the Brother Solutions Center for accessing licenses and detailed documentation online.

10.1 Understanding Included Open-Source Components

The Brother MFC-L2690DW manual includes details about open-source software used in the printer. It highlights the components and their importance, ensuring compliance with licenses. Users can access the full list of open-source licenses and documentation through the Brother Solutions Center website. This information is crucial for developers and advanced users who wish to understand or modify the printer’s software. The manual also guides users on how to download and review these resources, promoting transparency and customization. Additionally, it notes that some features may require Adobe Acrobat Reader for PDF documentation.

10.2 Accessing Open-Source Licenses and Documentation

To access the open-source licenses and documentation for the Brother MFC-L2690DW, visit the Brother Solutions Center website. Navigate to the printer’s support page and select the “Manuals & Documentation” section. Here, you can download PDF files containing detailed open-source information. Some documents may require Adobe Acrobat Reader for viewing. This resource ensures compliance with open-source regulations and provides transparency for advanced users and developers. Regular updates are available to reflect any changes in the software components.

The Brother MFC-L2690DW manual provides a comprehensive guide for optimal performance. By following its instructions, users can troubleshoot, maintain, and maximize their printer’s functionality effectively.

11.1 Summary of Key Manual Highlights

The Brother MFC-L2690DW manual is a detailed resource covering setup, troubleshooting, and maintenance. It includes guides for Wi-Fi configuration, paper handling, and fax functionality. The manual emphasizes network security and provides tips for optimal performance. Available online, it supports both new and experienced users in maximizing the printer’s utility. Key highlights also include troubleshooting common issues and ensuring secure printing environments.

11.2 Final Tips for Maximizing Printer Utility

Regularly update firmware and drivers for enhanced performance. Use the manual feed slot for specialty papers and ensure proper network settings for reliable connectivity. Schedule periodic maintenance to prevent dust buildup and ensure optimal print quality. Refer to the manual for troubleshooting guides to resolve common issues quickly. Explore open-source resources for additional customization and support, ensuring your Brother MFC-L2690DW operates at its full potential.

Bybeatrice

lillebaby carrier manual

Welcome to the Lillebaby Carrier Manual, your comprehensive guide to understanding and using your baby carrier safely and effectively. This manual covers key features, safety tips, and care instructions to ensure a comfortable and secure experience for both you and your baby.

What is the Lillebaby Carrier?

The Lillebaby Carrier is a versatile, ergonomic baby carrier designed for comfort and convenience. It offers six carrying positions, including front-facing, back, and hip carries, catering to babies from 7 lbs to 45 lbs. Available in models like Complete, All Seasons, and Airflow, it adapts to various climates and preferences. The carrier features adjustable straps, a lumbar support, and a removable hood for customization. Its breathable fabrics and sturdy construction ensure durability and comfort for both baby and wearer. This carrier is ideal for parents seeking a practical, stylish solution for daily use, promoting bonding while keeping hands free.

Why Reading the Manual is Important

Reading the Lillebaby Carrier manual ensures safe and proper use, preventing potential misuse that could harm your baby. It outlines weight and age limits, proper strap adjustments, and safety checks to guarantee a secure fit. The manual also provides care instructions to maintain the carrier’s quality and longevity. Understanding the features, like the six carrying positions and model differences, helps you maximize the carrier’s versatility. Additionally, it addresses common concerns and offers troubleshooting tips to resolve issues quickly. By following the manual, you can ensure a comfortable, enjoyable experience for both you and your baby while adhering to safety guidelines.

Where to Find the Lillebaby Carrier Manual

The Lillebaby Carrier manual can be easily accessed online or through the product packaging. Visit the official Lillebaby website and navigate to the support section, where you can download the PDF manual for your specific carrier model, such as the COMPLETE, COMPLETE All Seasons, or COMPLETE Airflow. Additionally, the manual is included with your purchase, either as a printed booklet or a digital copy via a QR code. For further assistance, contact Lillebaby’s customer service at CustomerService@lillebaby.com. Ensure you refer to the correct manual for your carrier model to access accurate instructions and warranty details.

Key Features of the Lillebaby Carrier

The Lillebaby Carrier offers a versatile 6-position design, adjustable seat width, and durable fabric options, ensuring comfort and support for both baby and wearer across all models.

6 Position Baby Carrier: Versatility Explained

The Lillebaby Carrier offers six versatile carrying positions, catering to different stages of your baby’s growth and your personal comfort. These include front-facing inward, front-facing outward, hip, and back carries. The narrow seat setting supports newborns, while the wide seat accommodates toddlers. Adjust the carrier to suit your baby’s age and your activity, ensuring optimal support and comfort. This adaptability makes the Lillebaby Carrier a long-lasting, practical choice for parents seeking flexibility in babywearing. Each position is designed to promote healthy hip development and provide ergonomic support for both baby and wearer.

Complete, All Seasons, and Airflow Models: What’s the Difference?

The Lillebaby Carrier is available in three models: Complete, All Seasons, and Airflow. The Complete model offers the standard features with a versatile design. The All Seasons version includes adjustable panels for temperature regulation, while the Airflow model features breathable mesh for enhanced ventilation. Each model shares the same core functionality but caters to different preferences and climates. The Complete is ideal for everyday use, All Seasons for varying weather conditions, and Airflow for warmer environments. These options ensure you can choose the best fit for your lifestyle and baby’s comfort, while maintaining the carrier’s signature ergonomic support and safety.

Safety Guidelines for Using the Lillebaby Carrier

Always check weight and age limits, ensure proper buckle and strap adjustments, and verify all adjustments are secure before each use for a safe, comfortable fit.

Weight and Age Limits for Safe Use

The Lillebaby Carrier is designed for babies weighing between 7lbs (3.2 kgs) and 45 lbs, ensuring safe and comfortable use across various developmental stages. It is suitable for infants from 3 months to 3 years old. Always verify the weight and age limits before use to ensure proper support and safety. For precise guidelines, refer to the manual or the manufacturer’s website. Adjust the carrier as your baby grows to maintain optimal fit and comfort. Regularly inspect the carrier for wear and tear to ensure all components function correctly. Adhering to these limits ensures a secure and enjoyable experience for both parent and baby.

Ensuring Proper Buckles and Straps Adjustment

Proper adjustment of buckles and straps is essential for safe and comfortable use of the Lillebaby Carrier. Before each use, inspect all buckles, snaps, and straps for damage or wear. Adjust the shoulder straps to ensure a snug fit, with the chest clip positioned at mid-chest height. The waistband should be tightened to support your baby’s weight evenly, while leg straps should be secured to prevent gaps. Regularly check the straps for proper tension and ensure all buckles are securely fastened. Proper adjustment ensures optimal support for both you and your baby, promoting comfort and safety during use. Always refer to the manual for specific adjustment guidelines.

How to Use the Lillebaby Carrier

Mastering the Lillebaby Carrier involves understanding front-facing and back carry techniques. Always check weight limits and adjust straps for a secure, comfortable fit before each use.

Front-Facing Carry: Step-by-Step Instructions

To perform a front-facing carry with your Lillebaby Carrier, start by setting the carrier to the narrow seat setting. Gently fold down the head support to ensure your baby’s view is unobstructed. Securely place your baby in the carrier, making sure their legs are in the “M” position for comfort and support. Adjust the shoulder straps to distribute the weight evenly and fasten the chest clip at a comfortable height. Finally, ensure all buckles and straps are tightly secured before moving. This setup allows your baby to explore their surroundings while maintaining safety and comfort.

Back Carry: Tips for Comfort and Safety

For a comfortable and safe back carry using your Lillebaby Carrier, start by setting the seat to the wide position to accommodate your baby’s growing size. Adjust the shoulder straps to ensure even weight distribution and secure the chest clip at a comfortable height. Place your baby on your back, ensuring their head is above the top of the carrier for proper visibility and airflow. Tighten the waist belt firmly around your natural waistline to support your lower back. Always double-check that all buckles and straps are securely fastened before moving. Practice the carry in front of a mirror to ensure a snug and correct fit.

Care and Maintenance Instructions

Regularly clean your Lillebaby Carrier by machine washing in cold water with mild detergent. Avoid bleach or harsh chemicals. Air dry to prevent damage and color fading.

Washing and Drying the Carrier

Machine wash your Lillebaby Carrier in cold water using a mild detergent. Avoid bleach or fabric softeners to preserve the material’s quality. Gently cycle to prevent damage. Air dry the carrier, as heat from dryers can harm the fabric. For spot cleaning, dampen a cloth and gently blot stains. Do not soak or iron the carrier. Regular cleaning ensures hygiene and maintains the carrier’s durability. Always check the care label for specific instructions. Proper washing and drying will extend the life of your Lillebaby Carrier, keeping it safe and comfortable for your baby.

Preventing Color Fading and Damage

To prevent color fading and damage on your Lillebaby Carrier, wash it in cold water with a mild detergent, avoiding bleach or harsh chemicals. Air dry the carrier away from direct sunlight to minimize fading. Avoid soaking or ironing, as this can damage the fabric or discolor it. For spot cleaning, use a damp cloth to gently blot stains without rubbing. Regular care ensures the colors stay vibrant and the material remains durable. Following these steps will help maintain your carrier’s appearance and extend its lifespan while keeping it safe and comfortable for your baby.

Troubleshooting Common Issues

Resolve buckle and strap malfunctions by checking adjustments and ensuring secure tightening. Refer to the manual or contact customer support for further assistance and guidance.

Resolving Buckle and Strap Malfunctions

If you encounter issues with buckles or straps, start by inspecting for dirt or debris, which can hinder proper function. Ensure all straps are securely adjusted and buckles are clicked into place correctly. If a buckle is stuck, gently clean it with a soft cloth and lubricate if necessary. Avoid forcing the buckle, as this may cause damage. For persistent problems, refer to the Lillebaby Carrier Manual or contact their customer support team for assistance. Regular maintenance can help prevent malfunctions and extend the carrier’s lifespan.

Addressing Fit and Comfort Concerns

Ensure a proper fit by adjusting the shoulder straps and waistband to distribute weight evenly. For comfort, make sure the baby’s hips are in a healthy position and knees are slightly bent. Check that the carrier isn’t too tight or restrictive. If the baby seems uncomfortable, try loosening the straps slightly. For wearers, adjust the lumbar support to alleviate back strain. Regularly inspect the straps for wear and tear, and clean the carrier as needed to maintain its shape and comfort. If discomfort persists, refer to the manual or contact Lillebaby support for personalized guidance.

The Lillebaby Carrier Manual provides essential guidance for safe and comfortable babywearing. By following these instructions, you can enjoy bonding with your baby while ensuring their well-being and your convenience.

Final Tips for Getting the Most Out of Your Lillebaby Carrier

To maximize your experience with the Lillebaby Carrier, ensure proper adjustment of straps and buckles for comfort and safety. Regularly inspect the carrier for wear and tear, and follow the care instructions to maintain its quality. Explore all six carrying positions to find what suits you and your baby best. Practice makes perfect, so don’t hesitate to watch tutorials or seek tips from the Lillebaby community. By adhering to these guidelines, you can enjoy a secure, comfortable, and enjoyable babywearing journey with your little one.

Bybeatrice

zline dishwasher manual

ZLINE dishwashers are renowned for their sleek designs‚ advanced features‚ and energy-efficient performance. This guide provides essential insights and instructions for optimal use and maintenance.

1.1 Overview of ZLINE Dishwasher Models

ZLINE offers a range of dishwasher models‚ including classic‚ compact‚ and monument series‚ designed to fit various kitchen styles and sizes. Each model boasts unique features like quiet operation‚ advanced cycles‚ and energy efficiency. The classic series is ideal for traditional kitchens‚ while the compact models are perfect for smaller spaces. The monument series combines sleek designs with cutting-edge technology. Refer to the user manual for specific details on each model’s capabilities and installation requirements.

1.2 Importance of Reading the Manual

Reading the ZLINE dishwasher manual is crucial for safe and effective operation. It provides essential safety precautions‚ installation guidelines‚ and troubleshooting tips. Understanding the manual ensures proper use of features‚ optimal loading‚ and detergent recommendations. It also outlines warranty details and maintenance requirements‚ helping users avoid costly errors. Referencing the manual prevents improper installation and helps resolve common issues‚ ensuring longevity and performance of your ZLINE dishwasher.

Safety Precautions

Ensure safety by disconnecting power before installation and avoiding improper connections. Always follow manual guidelines to prevent accidents and ensure proper dishwasher function. ZLINE is not liable for damages from misuse.

2.1 Before Installation

Before installing your ZLINE dishwasher‚ ensure the power supply is turned off at the circuit breaker. Clear the installation area and inspect the appliance for any damage. Read the installation manual thoroughly to understand safety guidelines and requirements. Proper preparation ensures a smooth and safe installation process. ZLINE is not liable for damages resulting from improper installation or failure to follow instructions.

2.2 During Operation

Always follow the user manual for safe operation. Ensure the dishwasher is properly installed and leveled before use. Keep the area around the appliance clear to avoid hazards. Do not overload racks‚ as this may affect performance. Supervise children near the dishwasher. Avoid using abrasive cleaners or scouring pads on surfaces. Only use dishwasher-safe utensils and detergents. ZLINE is not liable for damages caused by misuse or failure to follow guidelines.

2.3 ZLINE Liability and Safety Measures

ZLINE is not liable for damages resulting from improper use or installation. Proper usage must adhere to the manual’s instructions. The warranty covers parts for one year from purchase. Third-party damage or misuse voids coverage. Always follow safety guidelines to prevent accidents. ZLINE emphasizes user responsibility in maintaining safety and operational standards. Failure to comply may result in hazards or equipment malfunction.

Installation Guidelines

Proper installation ensures optimal performance and safety. Follow the installation manual carefully‚ and consider hiring a professional for accurate setup. Leveling and electrical connections are critical for functionality.

3.1 Preparation for Installation

Before installing your ZLINE dishwasher‚ ensure the installation site is prepared. Shut off the water supply and electrical power at the circuit breaker. Inspect the area for any obstructions. Unpack the dishwasher carefully‚ checking for damage. Review the installation manual thoroughly to understand the requirements and tools needed. Proper preparation ensures a smooth and safe installation process‚ avoiding potential issues during operation.

3.2 Leveling the Dishwasher

Proper leveling is crucial for optimal performance and to prevent vibration. Place the dishwasher on a firm‚ even surface. Use the adjustable legs to level the unit‚ ensuring it is stable and balanced. Refer to the installation manual for precise instructions. Uneven installation can lead to noise‚ poor washing results‚ or damage to the appliance. Ensure the dishwasher is level before proceeding to secure it in place.

3.3 Electrical Connections and Requirements

Ensure the dishwasher is connected to a dedicated 120V‚ 60Hz electrical circuit. Switch off the circuit breaker before installation to avoid electrical hazards. The dishwasher must be properly grounded to meet safety standards. Use a UL-listed power cord if not hardwired. Refer to the installation manual for specific electrical requirements. Improper connections can void the warranty or cause operational issues. Always follow local electrical codes and consult a licensed professional if unsure.

Understanding the Controls and Features

ZLINE dishwashers feature intuitive controls and advanced settings for customized cleaning. Explore the control panel and special features to optimize performance and energy efficiency for your needs.

4.1 Control Panel Overview

The ZLINE dishwasher control panel offers a user-friendly interface with clear buttons and digital displays. It includes cycle selection‚ temperature control‚ and special feature options like delay start and sanitize. The panel is designed for easy navigation‚ allowing users to customize their wash settings efficiently. Proper operation ensures optimal cleaning and energy efficiency‚ as outlined in the manual.

4.2 Special Features and Settings

ZLINE dishwashers offer advanced features like sanitize cycles‚ delay start‚ and quiet operation. The sanitize option ensures dishes are cleaned at high temperatures‚ while delay start allows scheduling wash cycles. Quiet operation reduces noise‚ making it ideal for home use. These settings can be easily accessed via the control panel‚ enhancing convenience and efficiency. Refer to the manual for detailed instructions on activating and customizing these features for optimal performance.

Loading the Dishwasher

Proper loading ensures efficient cleaning. Place dishes facing the center‚ utensils in designated holders‚ and larger items at the bottom. Avoid overcrowding for optimal performance.

5.1 Rack Configuration and Capacity

ZLINE dishwashers feature adjustable racks to accommodate various dish sizes. The upper rack is ideal for glasses and smaller items‚ while the lower rack holds plates and larger cookware. Capacity varies by model‚ but most can fit 12-14 place settings. Proper arrangement ensures optimal water flow. Avoid overcrowding to prevent poor cleaning results. Adjust racks as needed for bulky items like pots or serving trays. Always refer to your manual for specific model details.

5.2 Detergent Usage and Recommendations

Use high-quality dishwasher detergent for optimal cleaning. Recommended detergent types include pods‚ liquid‚ or powder. Place one detergent pod or the recommended dose in the dispenser before starting a cycle. Avoid over-dosing‚ as it may cause residue buildup. For hard water areas‚ adjust settings or use a water softener. Always refer to your ZLINE manual for specific detergent recommendations to ensure efficient cleaning and prevent damage to your dishwasher.

Operating Cycles and Options

ZLINE dishwashers offer preset cycles like Heavy Duty‚ Normal‚ and Light for varying soil levels. Customizable options include delay start and sanitize settings. Choose the right cycle for optimal cleaning efficiency.

6.1 Cycle Selection Guide

ZLINE dishwashers feature a range of cycles tailored to different needs. The Heavy Duty cycle is ideal for heavily soiled items‚ while the Normal cycle handles everyday dishes. The Light cycle is perfect for delicate items. Additionally‚ a Delay Start option allows you to schedule wash cycles‚ and the Sanitize setting ensures dishes are cleaned at high temperatures. Always refer to the manual for specific cycle recommendations. Energy-saving options are also available to optimize performance and efficiency‚ ensuring your dishes are clean while minimizing water and energy usage. Proper cycle selection ensures optimal cleaning results and extends the appliance’s lifespan. Regular updates to cycle options may be available through ZLINE’s support resources. By selecting the right cycle‚ you can achieve spotless dishes every time. Energy efficiency is a key focus in ZLINE’s design‚ making their dishwashers both practical and eco-friendly. Customizable settings allow for a personalized cleaning experience‚ catering to various household needs. This guide helps you navigate the cycles and options seamlessly. Always follow the manual’s guidelines for best results.

6.2 Customizing Wash Options

ZLINE dishwashers offer customizable wash options to enhance cleaning performance. Users can adjust temperature settings‚ water pressure‚ and drying options based on load requirements. Additional features like delay start and sanitize modes provide flexibility. The control panel allows easy customization‚ ensuring optimal results for various dish types. Customizing wash options helps conserve energy and water while maintaining cleaning efficiency. Always refer to the manual for detailed instructions on adjusting settings. Proper customization ensures dishes are cleaned thoroughly and gently‚ extending the lifespan of both dishes and the appliance. ZLINE’s user-friendly interface makes it easy to tailor wash cycles to specific needs‚ ensuring satisfaction with every use. Regularly updating settings can improve performance and adapt to changing household demands. This feature-rich approach ensures ZLINE dishwashers meet diverse user preferences effectively. By leveraging these customization options‚ users can achieve superior cleaning outcomes tailored to their lifestyle. Explore the manual for full details on personalizing your dishwasher experience. Customization is key to maximizing functionality and efficiency in ZLINE dishwashers.

Maintenance and Care

Regular maintenance ensures optimal performance and longevity of your ZLINE dishwasher. Clean filters‚ check for blockages‚ and perform routine checks as outlined in the manual for efficiency.

7.1 Regular Cleaning and Filter Maintenance

Regular cleaning and filter maintenance are essential for optimal dishwasher performance. Clean the filter after each use to prevent food particles from clogging the system. Wipe down the interior and exterior monthly to remove grease and stains. Refer to your ZLINE manual for specific instructions on filter removal and cleaning procedures. Proper maintenance ensures efficient operation and prevents malfunctions.

7.2 Troubleshooting Common Issues

Identify and resolve common issues promptly to ensure your ZLINE dishwasher operates efficiently. Poor cleaning performance may result from blocked filters or incorrect detergent use. Excessive noise could indicate improper installation or loose parts. Leaks often stem from faulty connections or worn seals. Regularly check and clean filters‚ ensure proper detergent dosage‚ and verify the dishwasher is leveled. For detailed solutions‚ consult your user manual or contact ZLINE customer support.

Warranty Information

ZLINE dishwashers are covered by a one-year warranty on parts from the original purchase date for the original purchaser. This warranty excludes damages due to improper installation or misuse.

8.1 Coverage and Duration

ZLINE dishwashers are covered under a one-year limited warranty for parts and labor from the original purchase date. This warranty applies to defects in materials and workmanship for the original purchaser. Coverage excludes damage caused by misuse‚ improper installation‚ or failure to maintain the appliance as outlined in the user manual. The warranty is non-transferable and begins on the date of purchase. Proper registration may be required for warranty validation.

8.2 Exclusions and Service Procedures

The warranty excludes damage from misuse‚ improper installation‚ or failure to follow manual instructions. Normal wear and tear‚ cosmetic damage‚ or third-party repairs are not covered. For service‚ contact ZLINE Customer Service for authorized technicians. Proof of purchase is required. ZLINE reserves the right to inspect defective parts and may require their return. Claims must adhere strictly to warranty terms to avoid denial or termination of coverage.

Additional Resources

Visit the official ZLINE website for downloadable manuals‚ installation guides‚ and troubleshooting tips. Contact ZLINE Customer Service for further assistance and support.

9.1 Downloading Manuals and Guides

ZLINE offers comprehensive downloadable resources‚ including user manuals and installation guides‚ to help you navigate your dishwasher’s features and troubleshooting. Visit their official website or authorized retailers to access these documents. Ensure you select the correct model-specific manual for accurate information.

9.2 Contacting ZLINE Customer Service

ZLINE’s customer service team is available to assist with troubleshooting‚ maintenance‚ and warranty inquiries. Visit their official website for contact information‚ including phone numbers and email support. For immediate help‚ refer to the contact details provided in your dishwasher’s user manual or installation guide. ZLINE is committed to resolving your concerns promptly and efficiently.

Proper installation‚ maintenance‚ and adherence to ZLINE dishwasher manuals ensure longevity and efficiency. Follow safety guidelines and utilize customer support for optimal performance and troubleshooting assistance.

10.1 Summary of Key Points

ZLINE dishwashers offer a blend of style‚ efficiency‚ and functionality. Proper installation‚ leveling‚ and adherence to manual guidelines ensure optimal performance. Regular maintenance‚ such as cleaning filters and checking detergent usage‚ prolongs appliance longevity. Understanding control panels and customizing cycles enhances user experience. Troubleshooting common issues and utilizing warranty coverage provides peace of mind. Refer to online resources and customer support for additional assistance and updates.

Bybeatrice

small manual transmission

A small manual transmission is a compact, lightweight gearbox that allows drivers to switch gears manually using a clutch pedal and gearshift. Designed for fuel efficiency and driver engagement, these transmissions are popular in smaller vehicles and performance cars, offering precise control over speed and power delivery.

1.1 Definition and Purpose

A small manual transmission is a compact mechanical system enabling drivers to manually switch gears using a clutch pedal and gearshift. Its primary purpose is to provide precise control over speed and torque, optimizing fuel efficiency and driver engagement. Commonly used in lightweight, rear-wheel-drive vehicles, these transmissions are favored for their simplicity, lower weight, and cost-effectiveness in smaller cars.

1.2 Brief History and Evolution

The small manual transmission has evolved significantly since its inception in the early 20th century. Early models were simple, non-synchronized systems, but advancements like synchromesh in the 1920s improved ease of use. Post-war, 4-speed manuals became standard, with 5-speeds emerging in the 1980s for better fuel efficiency. Modern compact transmissions now feature 6-speeds, optimized for performance and efficiency.

Types of Small Manual Transmissions

Small manual transmissions include 4-speed, 5-speed, and 6-speed variants, each designed for specific power and efficiency needs, commonly found in compact and lightweight vehicles worldwide.

2.1 4-Speed Manual Transmissions

A 4-speed manual transmission is a classic choice for small vehicles, offering simplicity and durability. Common in older models, it features a straightforward gear ratio setup, providing easy shifting and reliable performance. Ideal for low-power engines, its lightweight design enhances fuel efficiency, making it suitable for city driving and compact cars.

2.2 5-Speed Manual Transmissions

A 5-speed manual transmission offers versatility and improved performance compared to 4-speeds, with an additional gear for better acceleration and control. Widely used in compact and sports cars, it balances fuel efficiency with driving excitement. Popular in models like the Honda Civic Type R and Hyundai Veloster N, its compact design and smooth shifting make it a driver favorite.

2.3 6-Speed Manual Transmissions

A 6-speed manual transmission enhances driving dynamics with closer gear ratios, offering seamless acceleration and improved fuel efficiency. Common in high-performance vehicles, it provides precise control and a sporty feel. Cars like the Ford Shelby GT500 feature this setup, delivering enhanced power delivery and driver engagement.

Benefits of Small Manual Transmissions

Small manual transmissions offer enhanced fuel efficiency, lower costs, and greater driver control. They provide a more engaging driving experience compared to automatics, making them a popular choice.

3.1 Fuel Efficiency

Manual transmissions typically consume less fuel than automatics due to their mechanical efficiency. With fewer power losses, drivers can achieve better mileage, especially in city driving. This makes small manual transmissions a cost-effective choice for eco-conscious drivers seeking to reduce fuel expenses while enjoying a more connected driving experience.

3.2 Cost-Effectiveness

Manual transmissions are generally more affordable to purchase and maintain than automatics. They require fewer components, reducing production and repair costs. Additionally, their simplicity means less can go wrong over time, leading to lower long-term expenses. This makes small manual transmissions a practical choice for budget-conscious drivers seeking reliable, economical vehicles.

3.4 Driver Control and Engagement

Small manual transmissions provide drivers with enhanced control and engagement. By manually shifting gears and using the clutch, drivers can precisely modulate power delivery and acceleration, fostering a more connected driving experience. This hands-on interaction makes driving more engaging and skillful, appealing to enthusiasts who value precision and responsiveness behind the wheel.

How to Choose the Right Small Manual Transmission

Selecting the right small manual transmission involves considering vehicle weight, power output, and configuration (north-south or east-west). Ensure compatibility with your car’s drivetrain setup for optimal performance.

4.1 Vehicle Weight and Power

Vehicle weight and power are critical factors when selecting a small manual transmission. Lighter vehicles with lower power output often pair well with compact transmissions, while heavier or high-performance vehicles may require stronger, more durable gearboxes. Ensure the transmission’s torque capacity matches your vehicle’s specifications for optimal performance and reliability over time.

4.2 Transmission Configuration (North-South vs. East-West)

Understanding transmission configuration is essential. North-South layouts are longitudinal, ideal for rear-wheel-drive vehicles, offering better weight distribution. East-West layouts are transverse, commonly used in front-wheel-drive cars. Choose based on your vehicle’s drivetrain and space constraints for optimal performance and compatibility, especially in smaller or performance-oriented vehicles.

4.3 Clutch Compatibility

Clutch compatibility is crucial when selecting a small manual transmission. Ensure the clutch size, spline count, and pressure plate align with your transmission. Mismatched components can lead to poor performance or mechanical failure. Always verify specifications to maintain smooth operation and avoid costly repairs. Proper compatibility ensures optimal power transfer and driving experience.

Learning to Drive a Small Manual Transmission

Mastering a small manual transmission requires practice and coordination. Start in a safe, open space to learn clutch control and smooth gear shifts. Listen to the engine’s rhythm to refine your driving skills effectively.

5.1 Basic Gear-Shifting Techniques

Mastering basic gear-shifting techniques involves coordinating the clutch pedal and gearshift smoothly. Start by pressing the clutch fully, shifting into first gear, and releasing slowly while accelerating gently. As speed increases, press the clutch again, shift into higher gears, and ensure each transition is smooth to maintain control and avoid stalling the vehicle.

5.2 Mastering Clutch Control

Mastery of clutch control is essential for smooth driving with a small manual transmission. Learn to feel the “biting point” where the clutch engages, ensuring gradual and seamless transitions. Practice in a flat, open area to develop muscle memory. Avoid sudden movements and “riding the clutch,” as this can cause wear and unnecessary strain on the system.

5.3 Common Mistakes to Avoid

Common mistakes include riding the clutch, which wears it out faster, and not using the clutch when downshifting, leading to gear grinding. Drivers should also avoid ignoring the car’s rhythm and forcing gears without listening. Practice in a safe, open space to build confidence and refine your technique effectively.

Maintenance and Care for Small Manual Transmissions

Regular fluid checks, clutch inspection, and gearbox lubrication are essential for maintaining small manual transmissions. Proper care ensures smooth operation and prevents damage over time.

6.1 Regular Fluid Checks

Regular fluid checks are crucial for maintaining a small manual transmission. Ensure the gearbox is filled with the recommended type and level of transmission fluid. Low or degraded fluid can cause wear, noise, and eventual failure. Always refer to the vehicle’s manual for the correct specifications and inspection intervals to avoid damage.

6.2 Clutch Wear Inspection

Inspecting the clutch for wear is essential for maintaining a small manual transmission. Check the clutch pedal’s free play and feel for slippage or uneven engagement. Visually examine the clutch disc and pressure plate for wear or damage. Replace worn components promptly to prevent costly repairs and ensure smooth gear transitions and optimal performance.

6.3 Gearbox Lubrication

Regular lubrication of the gearbox is essential for smooth operation and longevity. Check the fluid level periodically and top it up as needed. Use the recommended type of transmission fluid to prevent overheating and wear. Replace the fluid every 30,000 to 60,000 miles to maintain optimal performance and extend the gearbox’s lifespan.

Popular Cars with Small Manual Transmissions

The Honda Civic Type R, Ford Shelby GT500, and Hyundai Veloster N are renowned for their compact manual transmissions, offering precise control and thrilling driving experiences for enthusiasts worldwide.

7.1 Honda Civic Type R

The Honda Civic Type R is a performance icon, equipped with a precise 6-speed manual transmission. Its compact gearbox enhances driver engagement, offering smooth shifts and excellent control. Designed for both track and street driving, the Type R delivers a thrilling experience, making it a favorite among enthusiasts who value precise handling and power delivery.

7.2 Ford Shelby GT500

The Ford Shelby GT500 offers a limited manual transmission option, featuring a 6-speed Tremec gearbox. Known for its raw power, it accelerates from 0-60mph in just 3.3 seconds and reaches a top speed of 180mph. The manual transmission enhances the driving experience, appealing to purists who seek precise control and a direct connection to the engine’s performance.

7.3 Hyundai Veloster N

The Hyundai Veloster N is a sporty hatchback equipped with a 6-speed manual transmission. It delivers 275 horsepower and 260 lb-ft of torque, providing a responsive and engaging drive. The manual gearbox complements its performance capabilities, making the Veloster N a favorite among enthusiasts seeking a blend of power and driver interaction in a compact package.

Common Issues in Small Manual Transmissions

Small manual transmissions often face issues like worn-out clutch components, fluid leaks, and synchronization problems. Regular maintenance is key to preventing premature wear and ensuring smooth operation.

8.1 Clutch Slippage

Clutch slippage occurs when the clutch fails to fully engage, causing the engine to rev without transferring power to the wheels. Common causes include worn clutch facings, misalignment, or excessive heat buildup. Symptoms include a spongy pedal feel and a noticeable loss of acceleration. Addressing this issue early is crucial to prevent further damage to the transmission system.

8.2 Gear Grinding

Gear grinding is a common issue in manual transmissions, often caused by improper shifting techniques or worn synchronizers. This results in a grinding noise when attempting to shift gears. If left unaddressed, it can lead to costly damage, including chipped or broken gears. Regular maintenance and smooth shifting practices can help prevent this problem.

8.3 Synchronization Problems

Synchronization problems occur when gears fail to engage smoothly, often due to worn synchronizers or improper clutch engagement. This can cause difficulty shifting gears, loud noises, and resistance. If not addressed, synchronization issues can lead to further damage, such as gear wear or failure. Regular maintenance and proper shifting techniques are essential to prevent this issue.

Upgrading or Replacing a Small Manual Transmission

Upgrading or replacing a small manual transmission can enhance performance and compatibility. Consider factors like vehicle weight, power, and configuration to choose the right replacement for improved driving experience.

9.1 Why Upgrade?

Upgrading a small manual transmission can improve performance, durability, and driver experience. Enhanced gear ratios can boost acceleration and fuel efficiency, while modern materials reduce wear. Upgrading may also unlock compatibility with higher horsepower engines, making it ideal for performance enthusiasts seeking better control and reliability in their vehicles.

9.2 Choosing the Right Replacement

Selecting the right small manual transmission replacement involves considering factors like vehicle weight, power output, and configuration needs. Popular options include the Mazda Miata or Ford S-10 transmissions, known for their compact size and durability. Ensure compatibility with your clutch system and drivetrain setup to maintain optimal performance and avoid installation issues.

9.3 Installation Tips

When installing a small manual transmission, ensure proper alignment with the engine and drivetrain. Secure the transmission firmly to prevent movement. Connect the clutch system carefully for smooth operation. Route the gearshift and controls for easy access. Bleed the hydraulic system to remove air bubbles. Always test-drive post-installation to verify functionality and address any issues promptly.

10.1 Final Thoughts on Small Manual Transmissions

Small manual transmissions remain a beloved choice for drivers seeking control and efficiency. Despite declining popularity, they offer a unique driving experience. With proper maintenance, they can last for years, providing both practicality and enjoyment. Their simplicity and performance make them a timeless option in the automotive world.

10.2 Future of Manual Transmissions

The future of manual transmissions is uncertain but promising. While automation dominates, niche markets and driving enthusiasts keep manuals relevant; Innovations like hybrid systems and improved synchromesh designs may extend their lifespan. Manuals are likely to remain in performance and specialty vehicles, appealing to those who value driving engagement and mechanical simplicity.

Bybeatrice

blue iris user manual

Blue Iris is a powerful video surveillance software designed to manage IP cameras, webcams, and other video devices. Its comprehensive user manual provides detailed guidance for setup, configuration, and advanced features like motion detection and remote access, ensuring efficient monitoring and enhanced security for both home and professional environments.

1.1 Overview of Blue Iris and Its Purpose

Blue Iris is a robust video surveillance software designed to manage and monitor multiple cameras, including IP cameras, webcams, and analog devices. It provides a user-friendly interface for capturing video, snapshots, and enabling motion detection. The software is ideal for both home and professional use, offering features like remote access, scheduling, and alerts. Its primary purpose is to enhance security by providing real-time monitoring and reliable recording capabilities, ensuring users can safeguard their properties efficiently. It supports up to 64 cameras, making it a versatile solution for diverse surveillance needs.

1.2 System Requirements for Running Blue Iris

Blue Iris requires a compatible computer with Microsoft Windows 7 or newer OS, or a Windows Server OS. It supports USB, IP, and analog cameras. A minimum of 4GB RAM is recommended, though 8GB or more is ideal for smoother performance. The software is compatible with both 32-bit and 64-bit systems. For optimal functionality, ensure your system meets these specifications to handle video streaming, recording, and advanced features efficiently. Regular updates are necessary for maintaining compatibility and performance.

Installing Blue Iris

Install Blue Iris by running the setup wizard, selecting installation options, and following on-screen instructions. Once installed, launch the application to begin configuration.

2.1 Step-by-Step Installation Guide

To install Blue Iris, download the latest version from the official website. Run the installer, select your preferred language, and agree to the terms. Choose installation location, select components, and proceed. The wizard will guide you through the process. Ensure your system meets the minimum requirements, including a 64-bit version of Windows 7 or newer. Once installed, launch Blue Iris to start configuring your surveillance setup.

2;2 Compatibility with Windows Versions

Blue Iris is compatible with Windows 7, 8, 8.1, 10, and 11, both 32-bit and 64-bit versions. For optimal performance, ensure your system runs a 64-bit version of Windows. While older versions like Windows 7 are supported, the software is optimized for newer releases like Windows 11. Always check the official documentation for the latest compatibility updates to ensure smooth operation.

Configuring Cameras in Blue Iris

Configuring cameras in Blue Iris involves setting up IP cameras, webcams, and other devices. Ensure proper network settings, resolution, and frame rates for optimal performance. Secure camera access by setting passwords and enabling encryption. Follow the manual’s step-by-step guide to configure cameras effectively and achieve reliable monitoring.

3.1 Adding IP Cameras to the System

Adding IP cameras to Blue Iris involves configuring network settings and ensuring proper connectivity. Use the camera’s IP address, username, and password for access. Enable features like motion detection and alerts. For optimal performance, set the resolution and frame rate according to your network bandwidth. Organize cameras into groups for easier monitoring. Refer to the user manual for detailed instructions on adding and managing IP cameras securely and efficiently.

3.2 Setting Up Local Cameras and Webcams

Setting up local cameras and webcams in Blue Iris is straightforward. Connect the device via USB or other compatible interfaces. Open the software, select the camera from the dropdown menu, and configure settings like resolution and frame rate. Test the feed to ensure proper functionality. Position the camera for optimal viewing angles and adjust focus if needed. Use the software tools to organize and manage multiple local cameras for seamless monitoring and recording capabilities.

Advanced Features of Blue Iris

Blue Iris offers advanced features like motion detection, scheduling, and remote access. These tools enhance security monitoring and provide users with flexible, automated surveillance solutions.

4.1 Motion Detection and Alert Settings

Blue Iris provides robust motion detection capabilities, allowing users to customize sensitivity and trigger zones. Alerts can be configured to notify via email, mobile app, or sound. Users can set specific detection areas and adjust thresholds to minimize false alerts. This feature enhances security by enabling real-time notifications and automated responses, ensuring quick action during potential threats. The user manual offers detailed steps to optimize these settings for reliable monitoring and peace of mind.

4.2 Scheduling and Automation Options

Blue Iris offers advanced scheduling and automation tools, enabling users to define custom rules for camera operations. Tasks like recording, motion detection, and alerts can be programmed to run at specific times or events. Users can automate repetitive actions, enhancing efficiency and reducing manual oversight. The software supports flexible scheduling, allowing seamless integration into daily routines while ensuring continuous monitoring and reliable performance. This feature is ideal for both home and professional surveillance needs, offering unparalleled control and customization.

Remote Access and Monitoring

Blue Iris enables seamless remote access and monitoring via mobile apps, ensuring secure connections for real-time surveillance from anywhere, enhancing convenience and security for users.

5.1 Configuring Remote Access via Mobile App

Configuring remote access via the Blue Iris mobile app allows users to monitor cameras on-the-go. Enable remote access in the software settings, ensuring your router is configured for port forwarding. A stable internet connection is essential for smooth functionality. Use the app to view live feeds, receive alerts, and control camera settings securely. Ensure encryption is enabled for secure connections, protecting your surveillance system from unauthorized access. This feature enhances convenience and security, making remote monitoring effortless and reliable.

5.2 Ensuring Secure Remote Connections

To ensure secure remote connections in Blue Iris, enable encryption for all remote access sessions. Use strong, unique passwords and regularly update them to prevent unauthorized entry. Configure your router to use secure ports and disable unnecessary services. Restrict remote access to trusted IP addresses and implement multi-factor authentication if possible. Keep the software updated with the latest security patches. Monitor connection logs for suspicious activity and disconnect any unrecognized devices immediately to maintain system integrity and protect your surveillance network.

Troubleshooting Common Issues

Troubleshooting common issues in Blue Iris involves checking camera connections, restarting devices, updating software, and consulting the user manual for detailed solutions and guidance.

6.1 Resolving Camera Connectivity Problems

Resolving camera connectivity issues in Blue Iris often involves checking network cables, ensuring correct IP addresses, and verifying camera settings. Restarting both the camera and software can also resolve issues. If problems persist, refer to the user manual or support resources for detailed troubleshooting steps and advanced solutions to restore functionality and maintain reliable monitoring.

6.2 Fixing Software-Related Errors

Software-related errors in Blue Iris can often be resolved by reinstalling the program or updating to the latest version. Ensure your system meets the minimum requirements and temporarily disable antivirus software during installation. Check for driver updates for cameras and network adapters. Refer to the user manual for detailed troubleshooting steps, including resetting configurations or clearing cache. Regular software updates and proper system maintenance can help prevent errors and ensure smooth operation.

Best Practices for Using Blue Iris

Regularly update the software and maintain optimal camera settings for best performance. Follow the user manual’s guidance to ensure reliable operation and enhanced security features.

7.1 Optimizing Video Quality and Performance

To enhance video quality in Blue Iris, adjust camera settings like resolution, frame rate, and bitrate. Ensure stable internet connectivity for IP cameras and use high-quality equipment. Regularly update camera firmware and software to maintain optimal performance. Refer to the user manual for detailed guidance on configuring these settings effectively to achieve clear and reliable video streams.

7.2 Regular Maintenance and Updates

Regular maintenance ensures Blue Iris operates smoothly. Update the software to access new features and security patches. Check camera firmware regularly and update as needed. Clear cached data periodically to improve performance. Additionally, ensure your Windows OS is up-to-date for compatibility. Back up configurations to prevent data loss. These steps, as outlined in the user manual, help maintain system reliability and security for your surveillance setup, ensuring uninterrupted monitoring and optimal functionality over time.

Blue Iris offers robust surveillance solutions with detailed guides for optimal use. Visit the official website for the latest manual, updates, and dedicated customer support resources.

8.1 Summary of Key Features and Benefits

Blue Iris supports up to 64 cameras, including IP cams, webcams, and analog devices, offering versatile monitoring solutions. It records video in formats like MP4 and AVI, ensuring compatibility. The software features motion detection, scheduling, and remote access, enhancing security and convenience. With a user-friendly interface, Blue Iris is ideal for both home and professional use, providing reliable surveillance and peace of mind through advanced automation and secure remote monitoring capabilities.

8.2 Accessing the Official Blue Iris User Manual

The official Blue Iris user manual is available for download on the software’s website. It provides a detailed guide covering installation, configuration, and advanced features. The manual is offered in PDF format, making it easy to access and reference. Users can find step-by-step instructions, troubleshooting tips, and explanations of all functionalities. This comprehensive resource is indispensable for both new and experienced users, ensuring they maximize the software’s potential for their surveillance needs.

Bybeatrice

brinkmann smoke n grill user manual

The Brinkmann Smoke N Grill is a versatile charcoal smoker and grill designed for smoking, grilling, and slow cooking. Perfect for outdoor cooking enthusiasts, this durable, portable smoker offers excellent heat control and flavor distribution. This manual provides essential guidance for safe assembly, operation, and maintenance.

Overview of the Brinkmann Smoke N Grill and its features

The Brinkmann Smoke N Grill is a charcoal smoker and grill combo designed for versatile outdoor cooking. Its key features include a durable steel construction, adjustable ventilation for precise temperature control, and a spacious cooking area. The smoker includes a water pan for maintaining moisture and adding flavor, while the grill section allows for direct heat cooking. It is portable and easy to assemble, making it ideal for both beginners and experienced cooks. The unit also comes with a dome lid for even heat distribution and a charcoal pan for efficient fuel management. This smoker-grill combo is perfect for slow cooking, smoking, and traditional grilling.

Safety Precautions

Read the manual thoroughly. Use protective gloves and eyewear. Keep children away. Avoid direct heat exposure. Ensure the grill is placed on a heat-resistant surface.

Key safety guidelines for assembling and using the Brinkmann Smoke N Grill

Always follow the manufacturer’s instructions to ensure safe assembly and operation. Wear protective gloves and eyewear to prevent injury. Place the grill on a stable, heat-resistant surface, away from flammable materials. Keep children and pets at a safe distance. Never move the smoker while it is in use or when the water pan contains hot liquid. Ensure proper ventilation to avoid carbon monoxide buildup. Avoid using charcoal lighting fluid after 20 minutes of lighting, as it may leave harmful residues. Regularly inspect the grill for damage or wear and tear. Follow all warning labels and guidelines provided in the user manual.

Assembly Instructions

Begin by unpacking and inventorying all parts. Follow the manual’s step-by-step guide to attach legs, chimney, and cooking grates securely. Use a wrench and screwdriver for assembly.

Step-by-step guide to assembling the Brinkmann Smoke N Grill

Begin by carefully unpacking and inventorying all components. Ensure no parts are missing or damaged. Place the smoker on a level, stable surface.

Attach the legs to the base using the provided bolts and wrench. Tighten firmly to ensure stability.

Install the chimney by aligning it with the base and securing it with the included hardware. Ensure proper ventilation.

Attach the cooking grates to the grill section, making sure they are evenly spaced and securely fastened.

Connect the water pan and charcoal pan to the base, following the manual’s alignment instructions.

Finally, place the dome lid on top, ensuring it fits snugly and the handle is securely attached. Double-check all connections for safety.

Operating the Smoker

To operate the smoker, light charcoal in the pan and allow it to ash over. Add wood for flavor and set up the water pan. Monitor temperature and adjust vents for consistent heat during cooking.

How to properly light the charcoal and manage the smoking process

Start by preparing the charcoal pan with the recommended amount of charcoal. Light the charcoal using lighting fluid, following the product instructions. Allow the fluid to burn off completely before closing the lid, ensuring the charcoal is fully lit and covered in a gray ash layer. Once ready, add wood chips or chunks for smoke flavor. Maintain the desired temperature by adjusting the vent openings. Monitor the water pan, ensuring it’s filled with liquid to keep meat moist and prevent flare-ups. Avoid moving the smoker during operation. Regularly check and replenish charcoal and wood as needed to sustain consistent heat and smoke levels throughout the cooking process.

Grilling Instructions

Preheat the grill to the desired temperature, ensuring grates are clean and lightly oiled to prevent sticking. Place food evenly, close the lid, and cook to the recommended internal temperature for your meat type.

Tips for achieving the best grilling results with the Brinkmann Smoke N Grill

For optimal grilling, preheat the grill to the desired temperature and ensure grates are clean and lightly oiled to prevent sticking. Place food evenly, close the lid, and cook to the recommended internal temperature. Use a meat thermometer for accuracy. For smoky flavor, add wood chips during grilling. Avoid overcrowding the grill to ensure even cooking. Keep the grill lid closed to maintain heat and moisture. Let meats rest for a few minutes before serving to retain juices. Regularly clean and maintain the grill for consistent performance. Experiment with marinades and seasonings for enhanced flavor; Always follow safety guidelines for the best experience.

Maintenance and Cleaning

Regularly clean the grill and smoker, removing ash and food residue. Apply a light coat of vegetable oil to prevent rust. Empty the ash pan after use and clean the water pan to maintain hygiene. Follow the manual’s recommendations for deep cleaning and part replacement to ensure optimal performance and longevity.

How to clean and maintain the Brinkmann Smoke N Grill for optimal performance

Regular cleaning and maintenance are essential for the longevity and performance of the Brinkmann Smoke N Grill. After each use, clean the grill grates with a wire brush and wipe down surfaces with a damp cloth. Remove ash from the charcoal pan and dispose of it properly. Apply a light coat of vegetable oil to the interior surfaces to prevent rust. Deep clean the water pan and drip trays periodically to avoid grease buildup. Inspect and replace worn-out parts as needed; Follow the manual’s guidelines for disassembling and cleaning components to ensure your smoker and grill remain in top condition for years of reliable use.

Troubleshooting Common Issues

Common issues include uneven heating, charcoal not lighting, and electrical malfunctions. Ensure proper airflow, use dry charcoal, and check connections. Refer to the manual for detailed solutions.

Solutions to common problems users may encounter

For uneven heating, ensure proper airflow by adjusting vents and checking for blockages. If charcoal won’t light, use dry charcoal and follow lighting instructions carefully. Electrical issues? Verify connections and plug integrity. Water pan problems? Ensure it’s filled correctly and clean. For temperature control, monitor vents and adjust as needed. If smoke leaks, check seals and tighten any loose parts. Refer to the manual for specific troubleshooting steps and solutions to maintain optimal performance and safety. Regular maintenance can prevent many common issues, ensuring a smooth cooking experience every time.

Accessories and Upgrades

Enhance your Brinkmann Smoke N Grill experience with accessories like grill covers, smoking wood chips, and replacement grates. Upgrade with temperature controllers or charcoal starters for improved performance.

Recommended accessories to enhance the Brinkmann Smoke N Grill experience

To elevate your smoking and grilling experience, consider these essential accessories. A heavy-duty grill cover protects your unit from weather damage. Wood chips or chunks like hickory or mesquite add rich, smoky flavors. A temperature controller ensures consistent heat levels for perfect cooking. Upgrade with a charcoal starter for quick and efficient ignition. Additionally, grill brushes and cleaning tools help maintain your smoker. For convenience, invest in meat thermometers and smoking utensils like tongs and gloves. These accessories optimize performance and make your Brinkmann Smoke N Grill experience even more enjoyable and hassle-free.

Cooking Recipes

Explore delicious recipes designed for the Brinkmann Smoke N Grill, including tender brisket, fall-off-the-bone ribs, and smoky chicken. Use wood chips for enhanced flavor in every dish.

Popular recipes specifically designed for the Brinkmann Smoke N Grill

Discover mouthwatering dishes tailored for the Brinkmann Smoke N Grill, such as tender slow-cooked brisket, fall-off-the-bone ribs, and smoky BBQ chicken. Try wood-smoked salmon or grilled vegetables for a lighter option. Enhance flavors with hickory or mesquite wood chips. For a classic touch, smoke pulled pork with a tangy BBQ sauce. Experiment with marinades and rub recipes to elevate your meals. Perfect for outdoor gatherings, these recipes ensure a flavorful and memorable cooking experience with the Brinkmann Smoke N Grill.

Warranty and Support

The Brinkmann Smoke N Grill is backed by a limited warranty covering defects in materials and workmanship. Refer to the manual for details. Contact Brinkmann support for repairs or assistance.

Understanding the warranty and customer support options

The Brinkmann Smoke N Grill is supported by a limited warranty that covers manufacturing defects for a specified period. The warranty details are outlined in the user manual, ensuring repairs are handled by authorized personnel. Customers can access support through Brinkmann’s official website or contact their customer service team for assistance. The manual also provides guidance on maintaining warranty validity and troubleshooting common issues. For any inquiries or concerns, users are encouraged to refer to the warranty section in the manual or reach out to Brinkmann directly for prompt resolution.

The Brinkmann Smoke N Grill offers a fantastic blend of smoking and grilling capabilities. By following the manual’s guidance, users can master techniques, ensure safety, and maintain their grill for lasting performance and delicious results.

Final tips and recommendations for getting the most out of the Brinkmann Smoke N Grill

To maximize your experience with the Brinkmann Smoke N Grill, always preheat the unit before cooking and use high-quality charcoal for consistent heat. Regularly clean the grill grates and interior to prevent rust and food residue buildup. Experiment with different wood types for unique smoke flavors. Keep the water pan filled with liquid to maintain moisture and enhance flavor. Store the grill in a dry, protected area when not in use to prolong its lifespan. Follow the manual’s maintenance tips to ensure optimal performance and enjoy years of delicious smoking and grilling results.